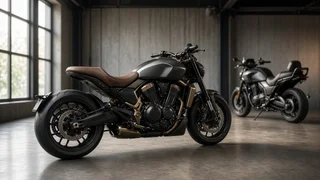
Saddlemen Motorcycle Seats: How to Choose, Fit and Install the Right One
Saddlemen motorcycle seats are aftermarket replacement saddles from an American seat maker. They are designed to replace a motorcycle's stock seat with one that changes comfort, riding position, passenger accommodation or appearance. The brand is best known among cruiser and touring riders, but the same rule applies to any replacement seat. A Saddlemen seat is only the right choice if it is built for your exact motorcycle, meaning the same make, model, model year range and relevant equipment. It also has to match how you ride. Fitment is the condition that matters most. A seat made for a closely related model can still fail to mount, block a fuel tank or side cover, or put you in the wrong position relative to the controls.
What a Replacement Seat Actually Changes
Riders usually think of a seat as a comfort part, but it does more than that. Seat height and shape decide how far your feet reach the ground at a stop. They also set the angle of your knees and hips and the reach to the handlebars, foot controls and hand controls. A seat's width at the front affects how easily you can put your feet down. The shape of the seating pocket decides where your weight sits and whether you slide forward under braking. For two-up riding, the passenger section affects pillion comfort, grip and how the passenger reaches the footpegs or floorboards.
Aftermarket seats from makers such as Saddlemen use different foams, shapes, and in some designs gel inserts. The aim is to spread pressure more evenly than a stock seat does. Comfort is personal, though. A seat that suits one rider's build and riding distance may feel worse to another, so it helps to treat any comfort claim as a starting point, not a guarantee.
Common Seat Styles and Who They Suit
Seat style | Typical purpose | Points to consider; Solo seat | Rider-only use, cleaner look, often lower or more sculpted | A passenger pillion may need to be bought separately, or may not be available for that design; Two-up seat | Rider and passenger on one piece | Check that the passenger section suits your passenger's size and the bike's passenger footpeg position; Touring seat | Long-distance comfort, wider support and often more padding | It may raise the rider and change reach to the ground and the controls; Step-up seat | Raised passenger section so the pillion can see over the rider | Changes the passenger's position and how they interact with a backrest or sissy bar; Low-profile seat | Lowers the rider for an easier reach to the ground | Less padding can reduce long-ride comfort, and legroom to the foot controls may shrink; Option-equipped seats (backrest, heating) | Extra lumbar support or heated surfaces | Check mounting provisions, electrical connections and the bike's charging capacity
Exact styles, materials and options change over time and differ by motorcycle, so check what is currently offered for your specific bike instead of assuming every style exists for every model.
Step 1: Identify Your Motorcycle Precisely
Model identification is the foundation of seat fitment. Manufacturers often change frames, fuel tanks, fenders, side covers or seat mounting points between model years. Sometimes they do this within what looks like the same model family. Write down the following before you shop:
Make and full model name, including any trim or sub-model designation; Model year, and the build date if the bike was made near a model-year changeover; Market or region the bike was originally sold in, because specifications can differ between markets; The Vehicle Identification Number (VIN), which can settle uncertain model or year questions; Any changes to the frame, rear fender, fuel tank or seat mounting hardware
Step 2: Check Equipment Compatibility
Even with the correct model and year, accessories you already have can affect whether a seat fits and works. Make a list of the equipment that sits near or attaches to the seat area and compare it with the seat's stated fitment notes. Pay particular attention to:
Backrests and sissy bars, including whether they mount to the frame, fender or seat; Luggage racks, tour packs and trunk mounts that may need clearance from the passenger section; Aftermarket or stretched fuel tanks, which change the seat's front contour; Custom or aftermarket rear fenders; Factory or aftermarket heated seat wiring and connectors; Seat-mounted or fender-mounted grab rails and passenger straps
If the fitment information does not clearly mention your accessories, assume it is uncertain and ask the seller before buying. That is easier than discovering a clash during installation.
Step 3: Match the Seat to Rider Fit and Passenger Needs
Once you have a short list of seats that fit your motorcycle, choose based on the riders who will use it. Work through these questions:
Ground reach: do you need to sit lower or narrower at the front to plant your feet confidently? Riding controls: will a taller or more forward seating pocket change your reach to the bars, shifter or rear brake? Riding distance: are you mostly commuting and riding short distances, or doing long days in the saddle? Lower back support: would a rider backrest or a more defined seating pocket help? Passenger use: how often do you ride two-up, and what size is your usual passenger? Passenger position: does the passenger section work with your footpegs or floorboards and any backrest? Climate: would heating, or a cover material that handles heat and sun well, be worthwhile where you ride?
Small changes in seat position add up. A seat that moves you rearward and upward may relieve pressure on your tailbone but stretch your reach to the handlebars. A seat that moves you lower and forward may make stops easier but cramp your knees on longer rides. If you have already changed your handlebars or foot controls, think about the seat and controls together.
Step 4: Install the Seat
Most replacement seats use the same mounting points as the stock seat, but methods vary by motorcycle. Follow the instructions supplied with the seat. Where fasteners are involved, use the torque values in your motorcycle's service specification. A typical installation follows this sequence:
Park the motorcycle on level ground, secure it on its stand and switch off the ignition; Remove any side covers, straps or accessories that cover the seat fasteners; Remove the seat bolts or release the seat latch, and keep the hardware together; Lift the stock seat off carefully and check for wiring, such as a heated seat connector, before pulling it fully away; Compare the new seat's base with the stock seat to confirm the mounting tabs, hooks and bolt holes match; Route any wiring so it is not pinched between the seat pan and the frame or fender; Seat the front tab or hook into its receiver, usually at the rear of the fuel tank, then lower the rear into place; Install and tighten the fasteners to the correct specification, using any supplied spacers or hardware; Refit side covers, straps and accessories that were removed
Step 5: Verify the Result
Check the installation before riding normally, and check it again after the first few rides, because foam and fasteners can settle.
Pull firmly on the seat at the front, middle and rear. It should not lift, shift or rock; Make sure the front of the seat sits securely and does not press on or scratch the fuel tank; Confirm that side covers, fuel cap access and any storage or battery access still work as designed; Check that wiring is not pinched and that any heated seat function works; Sit on the bike with your feet down and confirm you can reach the ground and hold the bike upright comfortably; With the bike secured, check that you can operate the handlebars, clutch, brake, shifter and rear brake without strain; If you ride two-up, have your passenger sit on the bike and confirm their footing and grip; Take a short, low-speed test ride in a safe area before riding in traffic or at speed; Recheck fastener tightness after the first rides
When a Saddlemen Seat May Not Be the Right Fit
A replacement seat cannot fix every comfort or fit problem. If discomfort comes from a stretched reach to the handlebars, forward foot controls in the wrong position, or suspension that is too stiff or too soft, a new seat may help only a little. In those cases, look at handlebar risers or pullback, control relocation, or suspension setup alongside the seat. Also, if no seat is listed for your exact model year or you have heavily modified the bike, a custom-built seat or a seat reworked by an upholsterer may be a better option than forcing a near-fit.
Before You Buy: A Quick Checklist
Exact make, model, trim and model year confirmed, with the VIN on hand; Fitment listing matches your bike, including any notes on model-year ranges; Accessories such as backrests, racks, tanks and fenders checked for compatibility; Seat style chosen for your ground reach, riding distance and passenger use; Options such as a backrest or heating confirmed as compatible with your motorcycle; Return policy understood in case the fit or feel is not right