Procedure for Vehicle Inspection: How to Prepare, Pass and Confirm Your Result
The Short Answer
In the United States, vehicle inspection rules are set by each state, and sometimes by county or metro area, not by the federal government for ordinary passenger cars. The general procedure has five stages. First, find out which inspection your vehicle needs: a safety inspection, an emissions inspection, a VIN verification, or a combination. Second, gather your registration, proof of insurance and identification. Third, check the vehicle yourself for obvious defects. Fourth, take it to a licensed inspection station or state-run facility. Fifth, confirm that the result was recorded, then repair and retest if the vehicle failed.
Some states require no periodic inspection for private passenger vehicles. Others require emissions testing only in certain areas, and some require both safety and emissions checks. Your state's motor vehicle or environmental agency is the authority on what applies to you. That includes required intervals, fees, exemptions and approved stations.
Key Terms
Safety inspection: A check of equipment that affects safe operation, such as brakes, lights, steering, tires, wipers, horn, mirrors and seat belts. Emissions inspection (smog check): A test confirming that the vehicle's exhaust and emissions control systems meet the standards for its type and model year. OBD-II: On-Board Diagnostics, second generation. It has been standard on light-duty vehicles sold in the US since the 1996 model year. Many emissions programs test these vehicles by plugging into the diagnostic port instead of measuring tailpipe exhaust. Readiness monitors: Self-tests the vehicle's computer runs on emissions systems. If too many are reported as incomplete, the vehicle may be rejected for testing even when nothing is broken. VIN verification: A physical check that the Vehicle Identification Number on the car matches the title and registration documents. It is often required when registering a vehicle brought in from another state.
Which Inspection Does Your Vehicle Need?
Inspection type | Typical trigger | What is generally examined; Safety inspection | Periodic renewal, registration, or change of ownership in states that require it | Brakes, lighting, steering and suspension, tires and wheels, glass and wipers, horn, mirrors, seat belts, exhaust system integrity; Emissions inspection | Periodic renewal in designated areas, or registration in those areas | OBD-II scan for newer vehicles; tailpipe or other testing for some older vehicles; visual check of emissions components; fuel cap test in some programs; VIN verification | Registering a vehicle titled out of state, rebuilt or salvage titles, some title corrections | VIN plates and labels compared against documents; may include checks for tampering; Commercial vehicle inspection | Vehicles operated commercially above certain weight or use thresholds | Governed by separate federal and state rules for commercial vehicles; not covered in detail here
Several conditions commonly change what is required. Newer vehicles are often exempt for a set number of model years. Fully electric vehicles have no tailpipe and are typically exempt from emissions testing, though they may still need a safety inspection where one applies. Classic, antique or historic registrations frequently have separate rules. Diesel vehicles, motorcycles and trailers may follow different procedures. Check your state's rules for your exact vehicle type and model year.
Step 1: Confirm the Requirement and Deadline
Look at your registration renewal notice, which often states whether an inspection is due and which type. If you have no notice, check your state motor vehicle agency's guidance for your county and vehicle type. New residents should check how many days they have to register and inspect after moving. Missing that window can lead to penalties.
Step 2: Gather Documents
Current vehicle registration, or the title and other ownership documents for a new purchase or out-of-state vehicle; Proof of valid auto insurance for the vehicle; Driver's license or other accepted identification; Your renewal or inspection notice, if you received one; A payment method accepted by the station; fees and accepted forms of payment vary by state and station; Previous inspection report, if you are returning for a retest
Step 3: Pre-Check the Vehicle Yourself
A few minutes of checking at home can catch simple failures such as a burned-out bulb. Do these checks on level ground, with the parking brake set and the engine off unless a step requires it to run. You need no special equipment beyond a tire pressure gauge and possibly a helper to watch the lights. Do not get under a vehicle supported only by a jack.
Lights: Test headlights (low and high beam), tail lights, brake lights, turn signals, hazard flashers, reverse lights and license plate lights. A helper standing behind the car makes brake lights easy to check. Horn: Confirm it sounds clearly. Wipers and washers: Blades should clear the windshield without streaking, and washer fluid should spray. Windshield and windows: Note cracks or chips, especially in the driver's line of sight. States differ on what damage is acceptable, and many also regulate window tint. Mirrors: Required mirrors should be present, secure and uncracked. Tires: Look for adequate tread, bulges, cuts or exposed cords, and set pressures to the value on the door-jamb placard. Seat belts: Each belt should latch, release and retract properly. Brakes: The pedal should feel firm, and the car should stop straight without grinding. The parking brake should hold the vehicle. Exhaust: Listen for unusual loudness or hissing that may indicate a leak, and look for loose or hanging components. Dashboard warnings: Note any lit check engine, ABS, airbag or brake warning lights after the engine starts. Fuel cap: Make sure it is present and clicks closed; a missing or faulty cap can cause emissions failures in some programs.
Stop and use qualified service if you find problems with brakes, steering, suspension, airbags or fuel leaks. These are safety-critical systems. Repairs should follow the manufacturer's procedures and specifications for your specific vehicle. Simple items such as bulbs, wiper blades and washer fluid are generally reasonable to handle yourself, using the owner's manual for the correct parts.
Step 4: Prepare for an Emissions Test
If your vehicle needs an emissions test, a lit check engine light usually means an automatic failure in OBD-II programs. Have the fault diagnosed and repaired before the test.
Do not clear trouble codes or disconnect the battery shortly before testing. Either action resets the readiness monitors, and the vehicle may then be rejected as not ready. After a repair, a code clearing or a battery replacement, drive the vehicle normally for some time, including a mix of city and highway driving, so the monitors can complete. The required driving varies by vehicle. A repair shop can scan the car to confirm the monitors are ready before you go.
Step 5: Choose a Station and Go
Depending on the state, inspections are performed at licensed private garages, dedicated test-only centers or state-operated facilities. Use only a station authorized for the inspection type you need. Some stations take appointments, while others serve walk-ins. Arrive with the engine warmed up from normal driving, which can help emissions testing, and with the documents you gathered.
Step 6: What Happens During the Inspection
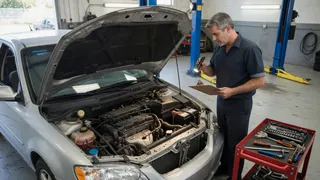
The inspector verifies your documents and confirms that the VIN on the vehicle matches them. For a safety inspection, the inspector works through the state checklist: lights, horn, wipers, glass, mirrors, tires, brakes, steering, suspension, seat belts and exhaust. This may include a road or brake test, or lifting the vehicle. For an emissions inspection, the inspector connects to the OBD-II port, or performs a tailpipe or other test for vehicles not covered by OBD-II testing. A visual check of emissions equipment may follow. Results are entered into the state system, and you receive a report listing pass or fail and any defects found.
Stay available during the inspection and follow the station's instructions. In many states, the inspection station is not obligated to perform the repairs, and you may choose where to have any needed work done.
Step 7: If the Vehicle Fails
Read the inspection report carefully. It identifies which items failed and is what the repair shop and retest will be based on. Have the listed defects repaired by a qualified technician, or by yourself where the item is simple and permitted. Keep receipts. Return for a retest within any period your state allows. Some states offer a reduced-fee or free retest within a set window, often at the original station. If an emissions repair proves very costly, ask about waivers, repair assistance or extensions. Many emissions programs have them, with conditions that vary by state. Avoid driving a vehicle with failed brakes, steering or other critical defects until it is repaired.
Completion Check: How to Confirm You Are Done
You received a passing inspection report or certificate, and you have kept it with your vehicle records. A sticker is displayed on the windshield or plate, if your state uses them, and it is placed where the inspector indicated. The result appears in the state system. Many states transmit results electronically, which allows registration renewal to proceed. Your registration has been renewed or issued, if the inspection was a prerequisite. You have noted the next due date so the following inspection is not missed.
Special Situations
Buying a used car: In some states, a vehicle must pass inspection before or shortly after a sale. Who is responsible, the buyer or the seller, depends on state law. Ask for any recent inspection report, but remember that a passing state inspection is not the same as a full pre-purchase mechanical evaluation.
Moving to a new state: Expect a VIN verification, and possibly safety or emissions testing, as part of first-time registration. Your previous state's inspection generally does not transfer.
Rebuilt or salvage vehicles: These often require a more detailed inspection before they can be retitled and registered. That inspection may include documentation of replacement parts. Check your state's specific process before starting repairs.
Modified vehicles: Aftermarket lighting, lowered or lifted suspension, exhaust changes, window tint and removed emissions equipment can all cause failures. Tampering with emissions controls is prohibited under federal and state law, regardless of local inspection requirements.