Mini Cooper PCV Valve: Symptoms and Replacement
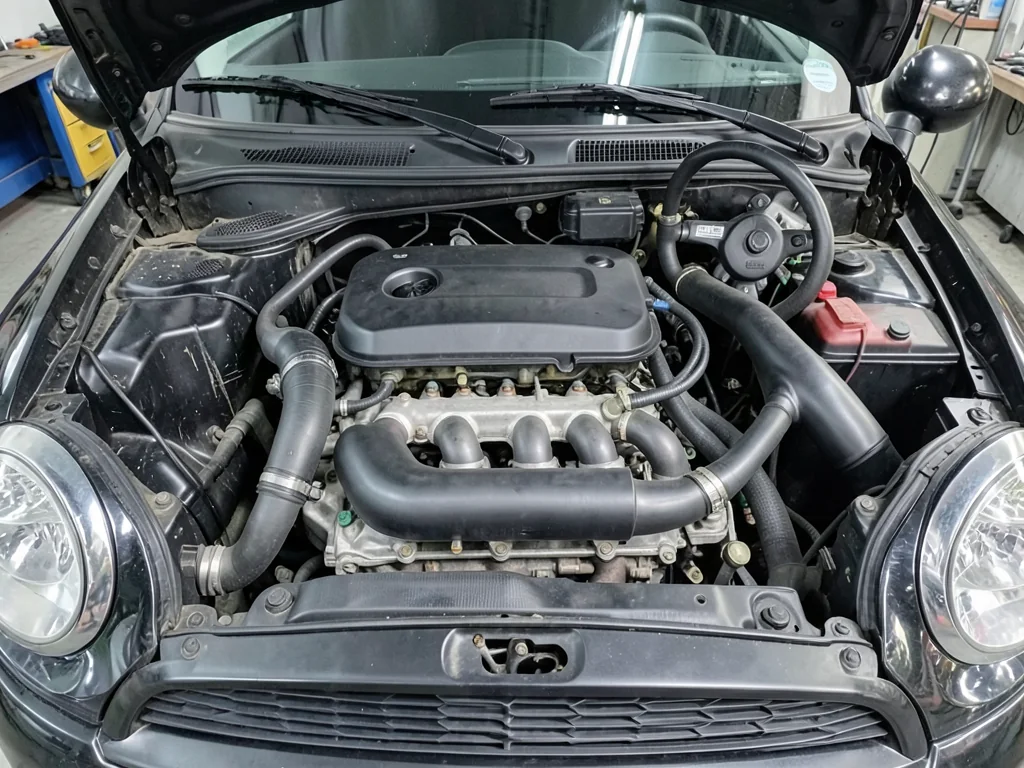
A Mini Cooper PCV valve is part of positive crankcase ventilation, which routes blow-by gases and helps control crankcase pressure. Some Cooper and Cooper S engines use a hose-mounted regulator; others integrate a PCV diaphragm in the valve cover. Mini Cooper PCV valve replacement therefore starts with engine identification, whether the car is a Cooper S or a 2009 or 2010 Mini Cooper.
How the PCV System Works on a Mini Cooper
During combustion, some mixture slips past the piston rings as blow-by. Positive crankcase ventilation on a Mini Cooper moves those gases out of the crankcase so pressure does not build against seals and gaskets. Fresh air typically enters through a breather path, while a regulated return path feeds the gases into the intake to be burned. An oil separator, when fitted, knocks liquid oil from the vapor. Whether a discrete Mini Cooper PCV valve is used depends on the engine family rather than the Cooper badge.
Ventilation hoses and a breather hose carry vapor between the crankcase, valve cover, and intake. A PCV valve, diaphragm, or similar regulator meters flow so crankcase pressure stays in a useful range instead of swinging toward a vacuum leak or overpressure. Some Mini engines place that regulator in the valve cover, so the service part may be a cover assembly rather than a standalone valve. Engine identification therefore belongs at the start of any Mini Cooper S PCV valve discussion, because one layout does not apply to every Mini.
Identify the PCV Arrangement on Your Cooper or Cooper S
Finding the right Mini Cooper PCV valve starts with the VIN, engine designation, and build information, then the matching parts diagram. The Cooper S badge does not prove a particular PCV design; turbocharged and naturally aspirated engines can ventilate the crankcase differently even when the cars look similar. Confirm the engine code and the ventilation parts shown for that engine before ordering a valve, diaphragm, or cover. A parts catalog that lists several Mini Cooper PCV valve options is a reminder that the badge and a visual search are not enough.
A 2009 Mini Cooper S PCV valve and a 2010 Mini Cooper PCV valve both need the same extra details: which engine is fitted, which ventilation layout that engine uses, and which service part the manufacturer supports. Model year alone does not establish whether a discrete valve, a PCV diaphragm, or a complete valve cover is the correct replacement. Production changes can occur within a year, and similar body styles can hide different engines. Use the VIN and the applicable diagram to lock the arrangement before discussing replacement scope.
Symptoms That Can Point to a PCV Problem
A failing PCV path can present as a whistle from the valve cover area, rough idle, oil seepage at gaskets, rising oil consumption, or exhaust smoke. Those signs are possible, not conclusive. A torn PCV diaphragm or split breather hose can admit extra air like a vacuum leak, while a blocked oil separator can raise crankcase pressure and push oil past seals. Smoke and consumption can also come from worn rings or other oil-control faults. Treat the pattern as a reason to inspect ventilation, not as proof the Mini Cooper PCV valve has failed.
The same symptoms overlap with intake leaks, ignition misfires, fueling faults, and sensor problems, so a Mini Cooper that idles poorly still needs a broader check. A warning light or stored fault code is evidence to interpret; it does not by itself establish PCV failure, and manufacturer-dependent codes require vehicle-specific confirmation of the definition and freeze-frame data. Heavy exhaust smoke, severe running problems, or an oil-pressure warning are different: those are reasons to stop driving and seek prompt assistance rather than continue a roadside diagnosis.
Safe Observations and Professional Diagnostic Checks
Useful owner notes include when the whistle, rough idle, or smoke appears at cold start, idle, boost, or after a long run, and whether the oil level is changing. Check the oil using the procedure in the owner information for that Mini, because dipstick and electronic-level methods differ. With the engine off and cool, look at accessible ventilation hoses, connections, and visible oil residue around the valve cover and oil separator area. Do not remove hoses on a running engine, improvise pressure tests, or put hands near hot or moving parts.
Oil-cap suction, a whistle, or residue can support a ventilation suspicion, but none of those observations confirms that a PCV component has failed. Other leaks and oil-control problems can produce the same clues. A shop can measure crankcase pressure and perform leak testing with engine-specific procedures and specifications, comparing results to the values published for that engine rather than a generic rule of thumb. That measurement, together with hose and diaphragm inspection, is what separates a true PCV fault from an intake vacuum leak or an unrelated idle problem.
Planning PCV Valve or Valve Cover Replacement
Mini Cooper PCV valve replacement should follow a confirmed diagnosis and a verified service configuration, not a parts-counter guess. Once the engine and diagram are known, the supported repair may be a discrete valve, a diaphragm, selected hoses, or the entire valve cover if the regulator is integrated. An available diaphragm kit is not automatically suitable or an approved repair; its fitment and the manufacturer's procedure still need verification for that engine. Choosing the wrong scope leaves the original leak or pressure problem in place and can create new sealing issues at the cover.
An estimate should identify the failed component, any necessary seals or breather hose pieces, labor, and the diagnostic work already performed. Cover gaskets, fasteners, and adjacent ventilation lines often travel with a valve-cover job even when the complaint started as a PCV valve Mini Cooper issue. Keep the work at the planning level: disassembly, installation, and tightening belong to qualified service using vehicle-specific information. That is especially true for a 2009 Mini Cooper S or a 2010 Mini Cooper, where the correct torque, seal set, and cover design are engine-dependent rather than year-dependent.
Confirm the Repair and Follow Up on Remaining Symptoms
After Mini Cooper PCV valve replacement, verification should confirm that ventilation is operating, that new and disturbed joints are dry, and that the original whistle, rough idle, smoke, or consumption has improved. Idle quality and oil-cap behavior can be rechecked under the same conditions that first showed the problem. Clearing stored fault codes is not proof of a successful repair; codes can return if the vacuum leak, pressure fault, or related misfire remains, and some codes need a complete drive cycle before they can be judged.
Continue watching the oil level for a stretch of normal driving and note any return of smoke, noise, or idle roughness. Persistent symptoms mean further diagnosis is needed, not another round of PCV parts. Remaining causes can include intake leaks away from the ventilation circuit, ignition or fueling faults, and oil-control problems that never involved the Mini Cooper S PCV valve. Repeating cover or diaphragm replacement without new evidence wastes seals and labor and can mask the condition that still needs attention.