Kubota Glow Plug Relay Location: Where to Find It and How to Check It
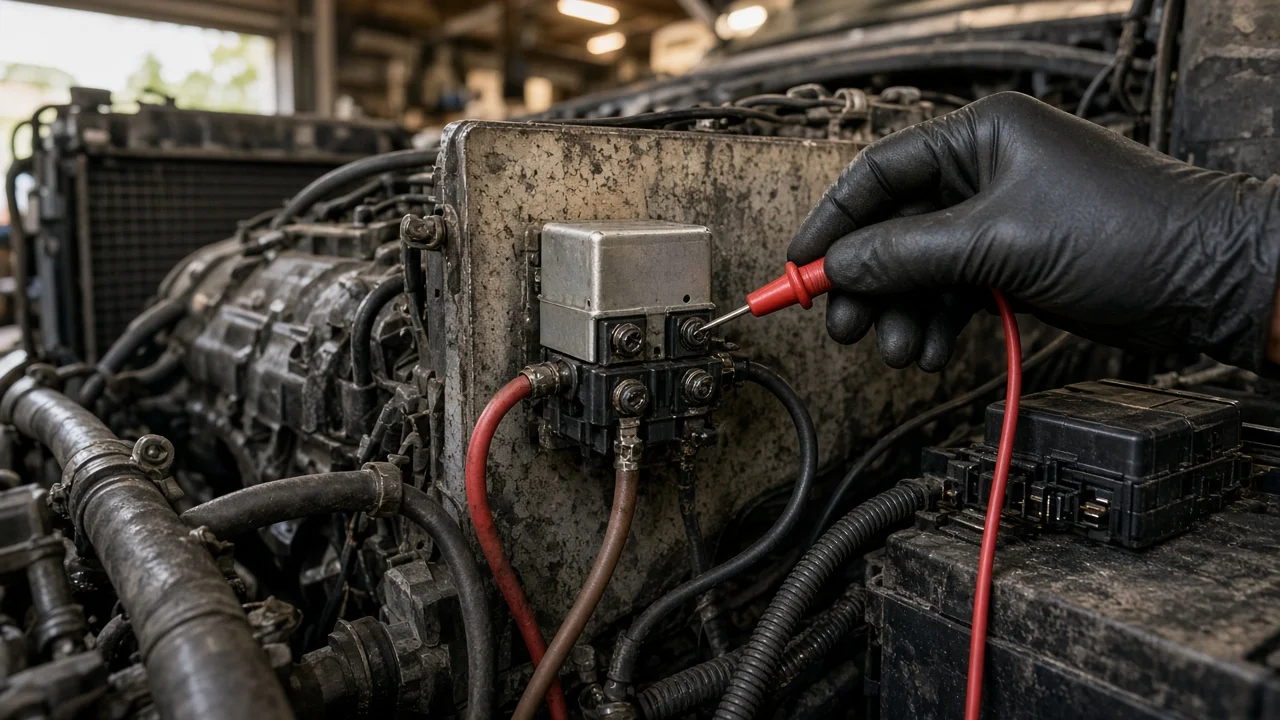
On most diesel Kubota tractors, mowers and utility vehicles, the glow plug relay sits with the other electrical components, either under the hood near the battery and fuse block or behind the dash panel. The exact position depends on the series, model year and platform. The most reliable way to find it on any machine is to trace the heavy wire from the glow plug bus bar back to its source. This guide covers where to look, how the preheat circuit works and how to check it safely.
Where the Kubota glow relay is usually located
Kubota does not use one universal mounting point. On many compact and utility tractors, the relay is bolted to a bracket under the hood close to the battery, fuse box or firewall, where battery cables are short. On many sub-compact tractors and some cab models, it is behind the dash or lower steering column panel with other relays and the fuse block. Zero-turn mowers and utility vehicles often group it near the main fuse panel, which can be under the seat, under a side cover or beneath the cargo bed area.
The relay itself is a small sealed cube or cylinder. Its distinguishing feature is wiring: one heavy-gauge terminal receives battery power, another heavy-gauge terminal feeds the glow plugs, and one or two lighter wires carry the control signal. Locate the flat metal bus bar or wire that links the glow plug tops on the cylinder head, follow its feed wire back through the harness, and it will end at the relay. Some older or smaller models route preheat current through the key switch circuit and have no separate relay at all.
How the preheat circuit works
Glow plugs draw far more current than a key switch can handle, so the relay acts as a heavy-duty switch. When you turn the key to the preheat position, a small current energizes the relay coil. The relay closes its high-current contacts and sends battery voltage to the bus bar, which feeds all the glow plugs in parallel. Each plug tip heats up inside the combustion chamber. On many smaller Kubota diesels with indirect injection, that tip sits in a swirl chamber where fuel from the injector is first sprayed.
The heat helps compression ignite the atomized diesel when the engine and air are cold. On simpler machines, the operator controls preheat time by holding the key. On newer machines, a timer or engine controller may switch the relay automatically and can keep the plugs energized briefly after startup. Either way, the relay only supplies heat; it does not affect fuel delivery. If the fuel pump, fuel filter or injectors cannot deliver a proper spray, a perfectly working glow system will not make the engine start.
What changes the answer for your machine
Several factors move the relay or change how the circuit is built. Model series and production year matter most, because harness layouts are revised between generations. Open-station and cab versions of the same tractor can place electrical parts differently. Engine configuration also matters: a mechanically injected three-cylinder engine typically uses a straightforward key-controlled relay, while an electronically controlled common rail engine may manage preheat through a control unit and a dedicated relay box, sometimes with a diagnostic code if the circuit fails.
Fuel type settles the question entirely for some units. Glow plugs exist only on diesel engines, so a machine with a gasoline engine has no glow plug relay to find. Previous repairs are the other wildcard. A replaced harness, aftermarket relay or relocated battery can put the part somewhere the factory diagram does not show, which is another reason tracing the bus bar feed beats searching by panel.
How to find and test the relay safely
Park on level ground, set the parking brake, remove the key and let the engine cool, since glow plugs, exhaust parts and the cylinder head stay hot. Find the bus bar on top of the glow plugs and trace its feed wire to the relay. Before loosening any heavy terminal, disconnect the battery negative cable; the glow circuit carries enough current to arc and burn wiring if a tool touches ground. Inspect the relay terminals and connectors for corrosion, loose nuts, melted insulation or heat discoloration.
For a basic function check, reconnect the battery and have a helper turn the key to preheat while you listen for a click at the relay. Use a multimeter or test light at the bus bar: during preheat it should show close to battery voltage. If the control wire receives voltage but the output stays dead, the relay is the likely fault. If there is no control voltage, check the related fuse, key switch and any timer or controller. To check the plugs, remove the bus bar and measure each plug for continuity to ground; an open circuit means a failed plug. Compare readings with the specification in the workshop manual.
Avoid bypassing the relay with a jumper cable as a long-term fix. Continuous current can overheat the plugs and damage the harness, and jumping the wrong terminal can short the battery.
When hard starting is not the relay
If the preheat circuit tests good, look at fuel delivery. A clogged fuel filter, water in the separator bowl, air in the lines after running the tank dry or a weak lift pump all cause hard starting that resembles a glow fault. Use the bleeding procedure in the operator's manual to purge air through the designated screws, not by loosening random fittings. Winter-grade or properly blended diesel matters in cold weather; fuel additives are not a proven repair for a failed component.
For a leak check, look for wet spots, stains or fuel smell along the low-pressure lines, filter housing and pump. Never feel for leaks along injection lines with your hand or crack high-pressure fittings with the engine running: injection pressure can drive fuel through skin. On common rail engines, fuel pressure readings require a compatible diagnostic tool. Fuel trim data, familiar from cars, generally does not apply to mechanically injected Kubota engines.
Limitations and next step
The locations described here are typical patterns, not a guarantee for a specific machine. Confirm the position with the wiring diagram in the operator's or workshop manual for your exact model and serial number, or ask a Kubota dealer, who can identify the part from those details. Seek professional help if you find melted wiring, repeated relay failures, diagnostic codes on an electronically controlled engine or a suspected injection system problem, since those point to causes beyond a simple relay replacement.