How to Clean an EGR Valve: What to Use, Removal, and Reinstallation
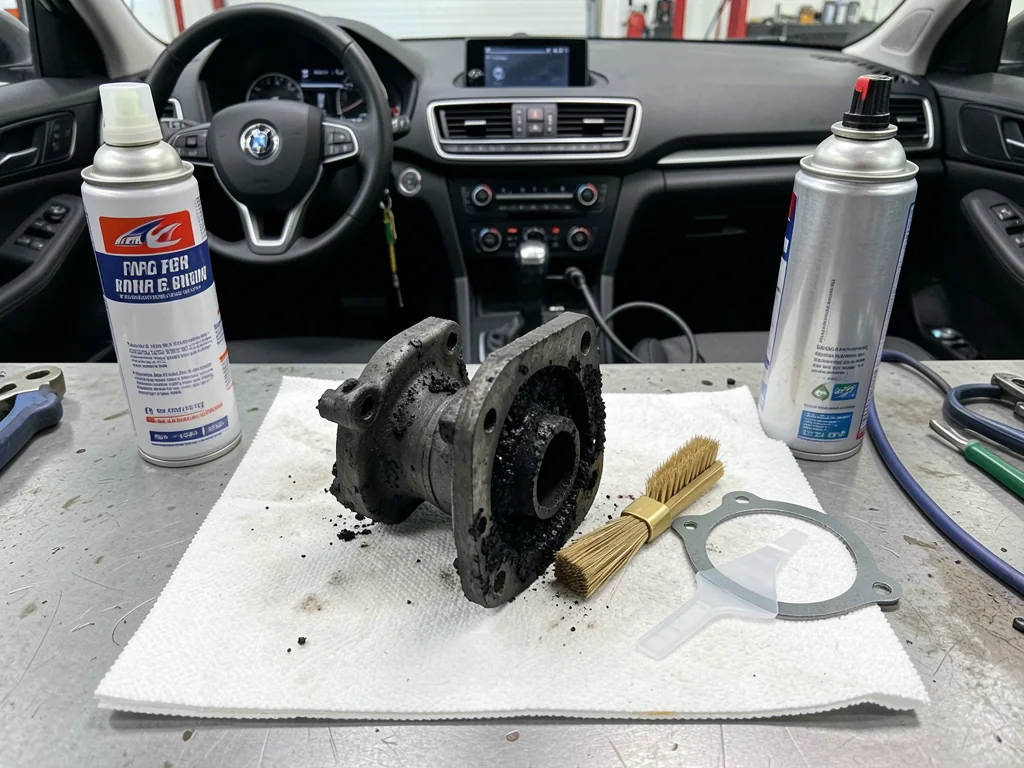
A sticking or carbon-choked exhaust gas recirculation valve can make an otherwise healthy engine idle roughly, stumble, or turn on the check engine light. Often the valve can be cleaned instead of replaced, but only if carbon is the real problem. This guide covers how to tell whether cleaning makes sense, which cleaners and tools work, and how to remove, clean, and reinstall the valve.
Can an EGR Valve Be Cleaned, and When Is It Worth Trying?
The EGR valve sends a metered amount of exhaust back into the intake. This lowers combustion temperatures and reduces nitrogen oxide emissions. That exhaust carries soot and oil vapor, so carbon bakes onto the pintle, the valve seat, and the passages leading to the intake manifold ports. A valve that sticks open can cause a rough idle or stalling. One that stays closed or restricted can allow knock under load and hesitation. EGR flow codes are also common, but vacuum leaks, misfires, and sensor faults can cause the same symptoms.
Whether cleaning is worth trying depends on the valve design. Vacuum-operated valves and valves with a mechanical stem usually handle a thorough cleaning well, because the diaphragm or actuator can be kept away from solvent. On fully electronic valves with an integrated motor and EGR position sensor, you can only carefully clean the exposed metal side. Cleaning removes carbon restriction. It cannot fix a failed EGR solenoid, a torn diaphragm, a bad sensor, or damaged wiring. Read any stored codes with a scan tool and interpret them for your specific vehicle first.
What to Use to Clean an EGR Valve: Carb Cleaner, Dedicated Sprays, and Tools
Carburetor and throttle body cleaners are popular because they cut baked carbon quickly and evaporate cleanly. Dedicated EGR or intake cleaner is made for the same deposits and is often labeled as safe for sensors and coatings. Brake cleaner removes oily film well but softens carbon less effectively, and some formulas are harsh on plastics and rubber seals. Before you use carb cleaner on an EGR valve, check the label for warnings about plastic parts, sensors, or painted surfaces. Whichever cleaner you choose, keep it off connectors, motors, and position sensors.
You don't need many tools: a socket or wrench set, a plastic or gasket scraper, a soft brass or nylon brush, pipe cleaners or picks, shop towels, a small soaking container, and new gaskets if the originals can't be reused. Work on a fully cooled engine in good ventilation. Wear gloves and eye protection, and keep solvent away from sparks and flames. The best method is patient soaking and gentle brushing. Wire wheels and harsh abrasives can scratch the seat and sealing faces and cause new leaks.
How to Get to the EGR Valve and Remove It Safely
Start with the service information for your engine. Depending on the engine, the valve may sit on the intake manifold, near the throttle body, or low on the exhaust side, and connectors and fasteners vary by model and year. Let the engine cool completely, because the valve and its tube get very hot. If the valve has an electrical connector, disconnecting the negative battery terminal is a sensible precaution. Photograph the vacuum lines, connectors, and hose routing before unplugging anything so reassembly isn't guesswork.
Release connector locks gently, because aged plastic tabs break easily. Twist vacuum hoses free rather than yanking them. Loosen the mounting bolts a little at a time in an even pattern. On cooled EGR designs, check for coolant lines, which may need partial draining first. If the valve is stuck to its gasket, tap it lightly with a rubber mallet instead of prying against the mating surface. Then cover the open ports so debris can't fall in. If the valve is buried under the intake manifold or needs special tools, a shop is often the better choice.
Step-by-Step EGR Valve Cleaning Procedure
Inspect the valve before you invest time in it. The pintle should move when pushed or when vacuum is applied, and the deposits around the seat show how badly flow was restricted. If the housing is cracked or the vacuum diaphragm is split, cleaning is pointless. If the valve is worth saving, spray cleaner onto the carboned areas and let it soak long enough to soften the deposits. Loosen them with a soft brush and plastic scraper, wipe the residue away, and repeat until the seat and pintle show clean metal.
Clean the passages in the valve body and the matching engine ports with pipe cleaners or picks. Pull the debris out and wipe it away rather than pushing it deeper. A shop vacuum helps collect loose flakes near the intake side. Electronic valves need extra care. Clean only the exposed mechanical side, never soak the unit, and hold it so solvent drains away from the motor, sensor, and connector pins. The job is done when the pintle moves freely, seats fully, and the passages are visibly open. Give stubborn deposits another soak rather than scraping harder.
Reinstalling the EGR Valve and Checking Your Work
Before reinstalling the valve, clean the engine-side mating surface with a plastic scraper and wipe it down so the gasket seats evenly. A new gasket is the safest choice. Reuse the old one only if it is undamaged and the service information allows it. Start the bolts by hand, then tighten them evenly to the torque listed for your vehicle. Reconnect the vacuum lines and electrical connector using your photos, then reconnect the battery. On cooled designs, refill any coolant you drained and check carefully for leaks.
Expect a little smoke or solvent odor on the first start as leftover cleaner burns off. It should fade quickly. Listen for hissing, which points to a loose or cracked vacuum line, and make sure the idle settles smoothly. If the check engine light stays on, clear it with a scan tool. The EGR monitor may not report ready until the vehicle completes one or more drive cycles. Some vehicles also need a relearn procedure for an electronic valve, so check the service information if the idle stays unstable.
When Cleaning Does Not Fix the Problem
Sometimes cleaning shows that the valve itself has failed. Signs include a pintle that still binds after thorough cleaning, a diaphragm that won't hold vacuum, a motor that doesn't respond to commands, or codes that return right after clearing. These point toward replacement, not more solvent. Other parts can cause identical symptoms. A clogged EGR cooler, carbon-packed intake passages, a faulty EGR solenoid, or chafed wiring can each restrict or disrupt flow, and each needs its own testing.
Treat any EGR code as a clue rather than a verdict. Code definitions, enabling conditions, and test thresholds vary by manufacturer, so confirm what the code means for your vehicle before you buy parts. Professional testing makes sense when the problem persists. A technician can watch live data, run actuator tests with a capable scan tool, and perform vacuum or flow tests. These tests separate a valve fault from a passage or control problem. Professional service is especially sensible when the valve is part of a sealed electronic module.