How a Timing Chain Is Replaced: Step-by-Step Overview
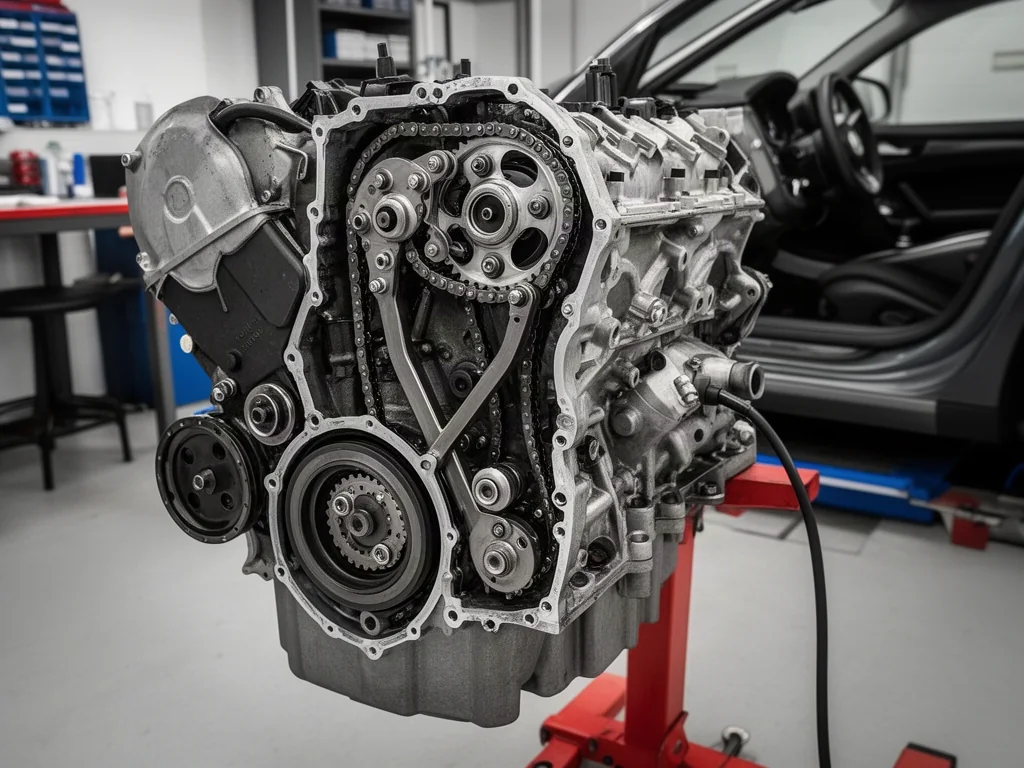
Replacing a timing chain is rarely a matter of swapping one part. The chain works with guides, a tensioner, sprockets, and the engine's oil supply, and how the job goes depends on how that engine is built. This overview covers how the work is usually approached, what decides how much gets replaced, and where exact manufacturer information is required.
Confirm the Engine’s Timing Drive and the Reason for Replacement
People often mix up the terms timing belt and timing chain, but they are different systems. A belt usually runs behind an external cover and typically has a manufacturer-specified replacement interval. A chain runs inside the engine, is lubricated by engine oil, and is generally designed to last much longer, although it still wears. One vehicle line may offer engines with different timing drives, so the first step is confirming the exact engine. A chain should be replaced because diagnosis shows it's needed and the manufacturer's requirements call for it, not because an assumed mileage has passed.
Owners usually ask for an inspection after hearing a rattle at cold start, noticing rough running, or finding a stored code about camshaft and crankshaft correlation. These signs point toward the timing system, but they don't prove the chain has stretched. Low oil level, a faulty sensor, or a variable valve timing problem can produce similar evidence, and code meanings vary by manufacturer. Some signs are more urgent: a loud, persistent rattle, stalling, or an oil-pressure warning. If any of these appear, pull over safely, shut the engine off, and have the car inspected professionally instead of driving further.
Identify the Service Information, Parts, and Tools Needed
The scope of the job starts with the exact engine identification, because manufacturers sometimes revise chains, guides, or tensioners within the same engine family. The manufacturer's procedure lists the timing fixtures needed for that engine, such as camshaft holding tools or crankshaft locking devices. It also gives tightening specifications that require a calibrated torque wrench and, in some cases, an angle gauge. Depending on the layout, the job may also need engine support equipment or lift access. These tools only protect the engine when they are used exactly as the procedure directs.
Parts should be chosen based on inspection findings and service information, not guesswork. Guides, tensioners, sprockets, and seals may need replacing along with the chain. Some manufacturers also designate certain fasteners as single-use, so they must be replaced during reassembly. Access varies a lot between vehicles. A sideways-mounted engine tucked against the firewall, a V-engine with several chains, or a design with the timing drive at the back can turn a moderate job into one that requires removing the engine or separating the transmission. The engine layout, more than the chain itself, largely decides labor time and complexity.
Understand Access and Timing Position Control
Reaching the timing assembly generally means removing whatever sits in front of or around the timing cover. Depending on the engine, that can include accessory drive belts, pulleys, brackets, the crankshaft damper, the valve cover, engine mounts, and sometimes the oil pan, since the timing cover often seals against it. The positions of the crankshaft and camshafts must stay controlled the whole time. Once the chain is released, valve spring pressure can turn the camshafts. The correct alignment between the camshafts and crankshaft is then lost unless the right locking tools hold everything in place.
This overview can't provide timing marks, locking positions, or an installation sequence, because those details differ between engines and even between versions of the same design. Using marks from a similar engine is a common way to get into trouble. On many engines, incorrect timing or a camshaft that moves unexpectedly can let the valves and pistons hit each other. That can bend valves or damage pistons before the engine ever runs properly. Because of that risk and the specialized tools involved, this work belongs with a qualified technician using the correct procedure.
Assess the Chain, Guides, and Tensioner as an Assembly
Once the timing assembly is exposed, a technician typically inspects everything before ordering or fitting parts. Guides are checked for grooves, cracks, or missing pieces. The tensioner is checked for plunger travel, for leaks, and for whether it had used up its adjustment range. Sprocket teeth are examined for wear patterns. The findings are documented, often with photos, so the repair decision is based on evidence. Components confirmed as worn or damaged are then replaced. If a heavily worn chain ran on the original sprockets, replacing the sprockets as well may be justified.
Tensioners vary widely. Some are hydraulic and rely on oil pressure, some are mechanical, and some use both a spring and oil pressure. How a tensioner is prepared or released is specific to each engine, so it should only be handled as the service procedure describes. It's just as important to find out why the parts wore out. Pieces of broken guide can end up in the oil pan and block the oil pickup screen. Long oil-change intervals, the wrong oil viscosity, or a restricted oil supply can speed up chain wear. A new chain installed without dealing with debris and lubrication may fail the same way.
Handle Timing Chain Guide Bolts Using Exact Specifications
Guide bolts look ordinary, but many are purpose-made. Some have a machined shoulder that sets the guide's pivot point or clearance. Some differ in length depending on where they go. Others work with spacers or bushings that are easy to lose. During disassembly, the position of each bolt should be recorded and later checked against the engine's service information. A bolt that is too long can bottom out in its hole or hit internal parts. A bolt without the correct shoulder can clamp a pivoting guide so tightly that it can't move as designed.
The service information should confirm whether guide bolts can be reused, what their tightening specification is, and whether a threadlocker or other thread treatment is required. Damaged threads in the block or cylinder head, a snapped bolt, or doubt about which bolt goes where are all reasons to stop and have a professional evaluate the problem before reassembly continues. An improvised thread repair or the wrong fastener can let a guide shift or loosen. That throws the chain out of line and speeds up wear, and in serious cases it can let the chain jump teeth or break.
Verify Timing and Check the Completed Repair
Before the engine is started, the technician should complete the manufacturer's timing and tension checks. These confirm that the crankshaft and camshaft positions line up as specified and that the tensioner is working correctly. Some procedures call for turning the engine over by hand and checking again, but the method differs by engine, so the specified process is what counts. The timing cover is sealed with either a gasket or liquid sealant, and surface preparation and assembly time follow the engine's procedure. Oil and coolant are refilled to specification, and connectors, hoses, and mounts are checked before the first start.
After startup, the technician checks for oil or coolant leaks, unusual rattles or whines, and warning lights. A diagnostic scan then confirms that earlier timing-related codes haven't returned and, where the scan tool shows it, that camshaft correlation readings look normal. Owners should ask for paperwork that lists the replaced parts, any contributing problems found, such as lubrication issues or debris, and the results of these checks. That record is useful if symptoms come back. Report any returning rattle, warning light, or oil pressure problem right away instead of waiting for the next scheduled service.