How to check an alternator without a multimeter

The short answer
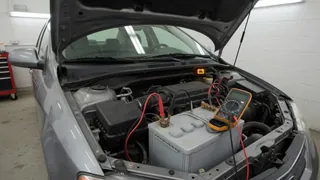
You can get a reasonable indication of alternator health without a multimeter. Watch the battery or charging warning light, read any voltage gauge on the dashboard, see how the lights and electrical accessories behave with the engine running, and listen and look for signs of a failing alternator or drive belt. These checks can point strongly toward a charging problem, but they cannot measure charging output precisely or separate an alternator fault from a battery, wiring or belt fault with certainty. For a definitive answer, you need an electrical test, either with a meter, an OBD-II scan tool that reports system voltage, or a charging-system test at a workshop or parts retailer.
The alternator is the engine-driven generator that recharges the 12-volt battery and powers the vehicle's electrical systems while the engine runs. This guide applies to conventional petrol and diesel vehicles with a belt-driven alternator. Many hybrids and electric vehicles do not have a conventional alternator and instead charge the 12-volt battery through a DC-DC converter, so these methods do not apply to them in the same way.
One condition materially changes the results: many modern vehicles use smart or variable charging, where the engine computer deliberately raises and lowers alternator output depending on battery state, load and driving conditions. On these vehicles, lights or gauges that seem to vary are not necessarily a fault, and simple observation tests are less reliable. Your owner's manual or the manufacturer's service information will indicate whether your vehicle uses this type of system.
Before you start
Park on level ground with the parking brake set and the transmission in Park or neutral. Work in a well-ventilated space, never in a closed garage with the engine running, because of exhaust fumes. Keep hands, hair, loose clothing and jewellery away from the drive belt, pulleys and cooling fan. Electric cooling fans can start even when the engine is off. Avoid touching the exhaust manifold, radiator and other hot components. Keep sparks and flames away from the battery, which can release flammable gas. Have an assistant available if you need to watch the dashboard and engine bay at the same time. Check your owner's manual for any vehicle-specific warnings about the charging system or battery.
Equipment you may need
A torch for inspecting the belt and wiring. Safety glasses and gloves. Optionally, an OBD-II scan tool or plug-in voltage monitor, if your vehicle has an OBD-II port and the tool can display system or battery voltage. This is not a multimeter, but it gives an actual voltage reading.
Step 1: Check the warning light
Turn the ignition on without starting the engine. The battery or charging warning light, usually a battery-shaped symbol, should illuminate as part of the bulb check. Start the engine. On most vehicles, the light should go out shortly after the engine starts. If it stays on, comes on while driving, or flickers, the vehicle's own monitoring has detected a possible charging problem. The light does not tell you whether the cause is the alternator, the belt, the wiring or the battery, and the exact meaning of the light varies between manufacturers, so check the owner's manual.
Stop condition: if the charging light comes on while driving, the vehicle may be running on battery power alone and could stall once the battery is depleted. Reduce electrical load where safe to do so and get the vehicle checked promptly. If a temperature warning appears at the same time, stop safely and switch off the engine, because a broken belt on many engines also stops the water pump.
Step 2: Read the dashboard voltage gauge, if fitted
Some vehicles have a voltmeter gauge or can display battery voltage through the instrument cluster or infotainment menu. With the engine running, the reading should be higher than with the engine off, which shows the alternator is supplying charge. Normal charging voltages for 12-volt systems are commonly cited as roughly 13.5 to 14.5 volts, but the correct range for your vehicle should be confirmed in the manufacturer's information, particularly if it uses smart charging, which can legitimately run lower at times. A reading that stays at or below the engine-off level, or one that climbs well above the specified range, suggests a charging fault. Gauges without numbers only show a general trend.
Step 3: Use an OBD-II scan tool, if available
If you have a compatible scan tool, plug it into the diagnostic port and view battery or control-module voltage with the engine off and then running. Compare the readings in the same way as with a dashboard gauge. The tool may also show stored fault codes relating to the charging system, which can narrow down the cause. Code meanings vary by manufacturer, so interpret them using the tool's documentation or service information for your vehicle.
Step 4: Observe lights and accessories under load
With the engine running at idle, switch on the headlights and watch their brightness, or watch them against a wall. Then turn on additional loads such as the heater blower on high, the rear demister and the wipers, and have an assistant raise the engine speed gently. With a healthy charging system on a conventional vehicle, the lights should stay steady or brighten slightly as engine speed rises. Lights that dim noticeably under load, flicker, or brighten and dim with engine speed can indicate an alternator struggling to keep up.
Limitations: this test is less meaningful on vehicles with smart charging, and on vehicles with LED or regulated headlights, which may hold steady brightness even when voltage changes. Other signs of low charging include slow power windows, a weak horn, or electrical accessories behaving erratically, but these can also come from a weak battery or poor connections.
Step 5: Listen and smell
With the engine running, listen near the front of the engine from a safe distance. A whining or grinding sound that changes with engine speed can come from worn alternator bearings, though tensioner and idler pulleys and other belt-driven components can produce similar noises. A squeal, especially at start-up or when electrical load is added, often points to a slipping belt. A smell of hot rubber or electrical burning can indicate a slipping belt or an overheating alternator.
Stop condition: if you smell burning electrical insulation or see smoke, switch off the engine and do not continue testing. Have the vehicle inspected before driving it further.
Step 6: Inspect the belt and visible connections
Switch off the engine, remove the key, and allow the engine to cool before reaching into the engine bay. Using a torch, check the drive belt that turns the alternator for cracks, fraying, glazing, missing sections or contamination with oil or coolant, and check that it is not obviously loose. A slipping or damaged belt can stop the alternator charging properly even when the alternator itself is sound. Also look at the battery terminals and the visible alternator wiring for corrosion, looseness or damage. Do not pull on wiring or disconnect connectors you are unsure about.
A test to avoid
An old method suggests disconnecting a battery terminal with the engine running to see whether the engine stalls. Do not do this. The battery helps stabilise system voltage, and removing it while the engine runs can cause voltage spikes that may damage the alternator, control modules and other electronics. The result is also not a reliable indication of alternator health on modern vehicles.
How to interpret the results
Warning light off, steady gauge or scan-tool reading above engine-off voltage, steady lights and no unusual noises: the charging system is probably working, though this does not rule out an intermittent fault. Warning light on, voltage not rising when the engine starts, or lights dimming under load: a charging fault is likely, but the cause could be the alternator, belt, wiring, fuses or battery. Bearing noise with otherwise normal charging: the alternator or another belt-driven component may be wearing and should be inspected. Repeated flat batteries with no other signs: the cause could be the battery, a parasitic electrical drain or the alternator, and needs electrical testing to identify.
Completion check and next steps
You have finished these checks when you have observed the warning light at start-up and while running, compared any available voltage readings with the engine off and running, watched the lights under load, listened for noises and inspected the belt and connections. If everything appears normal and the original symptom persists, or if any check suggests a fault, the next step is a proper charging-system and battery test. Many workshops, and in some areas parts retailers, offer this kind of test. A failing battery can mimic alternator problems, so testing both together avoids replacing the wrong part.
Alternator replacement, belt replacement or tensioning, and any repair to charging-system wiring should follow the manufacturer's procedure for your specific engine and model, since belt routing, tension specifications and electrical precautions vary. If you are not confident with these procedures, or the vehicle uses smart charging, start-stop or battery management systems that may need registration or calibration after battery or alternator work, have the work done by a qualified technician.