Buy aluminum auto body repair tools
What to buy first
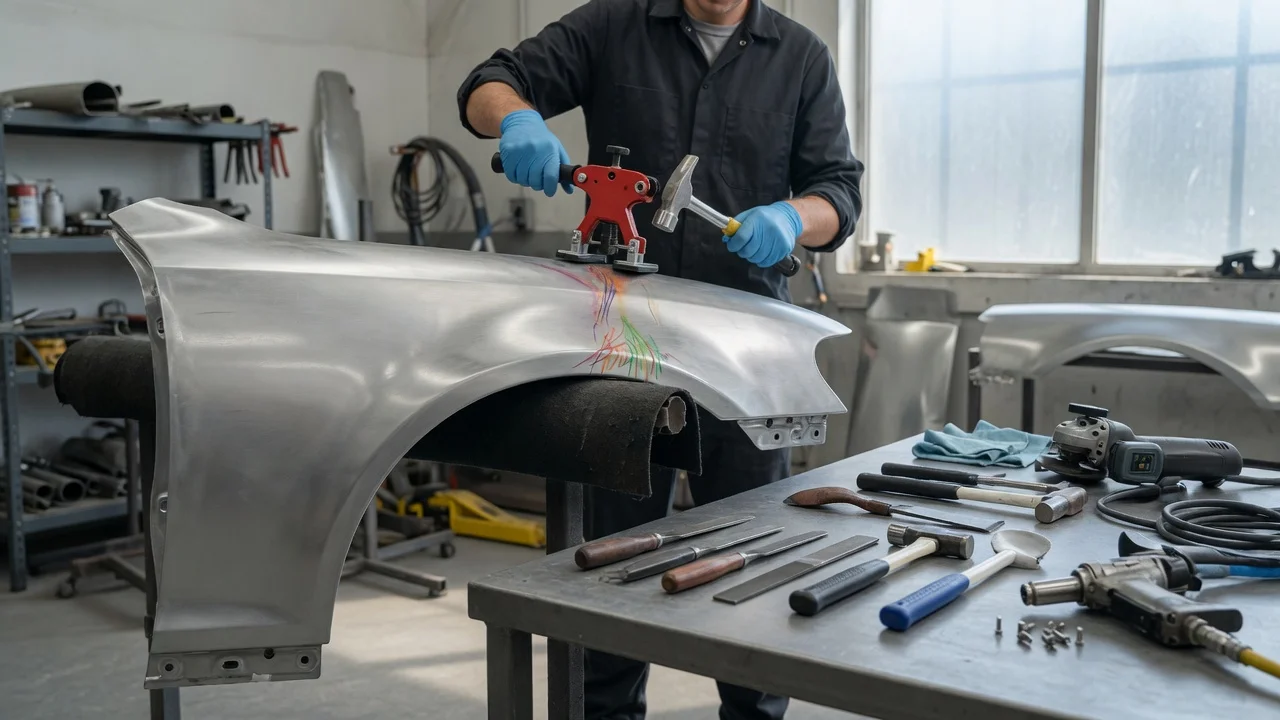
Buy a dedicated aluminum body-repair set and keep it isolated from steel tools. The kit you need depends on the repair method the vehicle requires: cosmetic panel finishing, mechanical joining with rivets or fasteners plus adhesive, or aluminum welding. If the car uses mixed materials, identify the damaged part and the approved repair method before spending on pulling, welding, or bonding equipment. Using steel hammers, dollies, grinders, or wire brushes on aluminum can embed iron particles that later corrode the panel.
Why aluminum work needs its own tools
Aluminum auto body panels are lighter and more thermally conductive than typical steel skin, and they work-harden when they are hammered. They also sit at a different electrical potential from steel. When steel dust or filings are left in aluminum, moisture can start galvanic corrosion at those particles. That is why collision shops treat aluminum as a separate process: marked tools, separate abrasives, and a work area that is not shared with steel grinding.
A second practical difference is joining. Many late-model aluminum and mixed-material structures are specified for rivets, flow-drill screws, and structural adhesive rather than conventional steel-style welding. A tool list built only around hammers and a steel MIG welder will not cover those repairs.
Match the kit to the repair, not to a generic body cart
Cosmetic dents in outer aluminum skins call for finishing tools: aluminum-safe hammers and dollies, plastic or dead-blow mallets, blending hammers, files, and a dent-pulling method that does not contaminate the metal. Glue-pull systems are often the first choice on painted skins because they avoid welding studs and grinding. If a stud puller is used, it must be an aluminum-capable stud welder with aluminum studs, not a steel dent-pull kit.
Structural or sectioning work follows the maker’s procedure for that model year, market, and body style. That usually means a rivet gun or self-piercing-rivet tool, the specified rivets or fasteners, a bonding-adhesive system with the correct nozzles and clamps, panel-separation tools that can cut or drill out factory joints without shredding flanges, and measuring equipment to confirm structure before and after the repair. Skip welding equipment unless the procedure allows aluminum welding and you have a process that can handle oxide, heat, and the correct filler.
Welding aluminum, when it is permitted, needs an aluminum-capable power source, the specified shielding gas and filler, a clean joint, and a way to control heat so the panel does not warp. A steel-only MIG setup is the wrong purchase for this. Confirm the vehicle’s repair information before treating a welder as the center of the kit.
Core categories to shop
Dedicated striking and backing tools: hammers, dollies, spoons, and mallets reserved for aluminum so steel scale never transfers. Contamination control: color-coded or labeled tools, covered storage, aluminum-only stainless brushes, and abrasives that never touch steel. Paint-safe pulling: glue-pull tabs, slide hammers or lifters made for glue systems, and adhesive that releases cleanly from the finish. Aluminum stud pulling, if glue pulling is not enough: an aluminum stud welder, aluminum studs, and bits that stay in the aluminum set. Joining hardware: rivet or fastener tools that match the joint type in the procedure, plus the rivets, screws, or blind fasteners called out for that panel. Bonding: structural adhesive specified for the materials being joined, clamps or fixtures that hold flange gap and alignment while it cures, and surface-prep materials that do not leave steel residue. Cutting and removal: tools to drill out rivets, separate bonded flanges, and trim aluminum without overheating or smearing the edge. Finishing: body files, sanding blocks, and aluminum-compatible fillers used only after the metalwork is clean and the procedure allows filler. Heat and cleanliness for weld repairs: when welding is allowed, a process and consumables made for aluminum, plus degreasing and oxide removal immediately before the weld. Personal protection: eye, hand, and respiratory protection suited to grinding dust, adhesive vapors, and welding fumes.
Conditions that change the shopping list
A homeowner fixing a shallow dent in an aluminum hood needs far less than a shop sectioning a rail. Glue-pull gear, a few aluminum-safe hand tools, and a way to refinish the spot may be enough for skin damage that has not stretched or cracked the metal. Cracked, creased, or work-hardened aluminum, damage that reaches structure, or a panel that was joined with rivets and adhesive moves the job into procedure-driven repairs. At that point the next step is the vehicle’s body-repair information, not a larger hammer set.
Material mix on the same vehicle also changes the answer. Many cars combine aluminum closures with steel structure, or aluminum structure with steel or composite panels. Tools and abrasives still have to stay dedicated by metal, and fasteners or adhesives have to match both sides of the joint. If you cannot confirm whether a part is aluminum, do not grind it with a steel wheel or treat it with a steel stud welder.
Existing steel body tools are not a substitute. They can be kept for steel work, but they should not be the aluminum kit even after a wipe-down. Particles hide in file teeth, hammer faces, grinder guards, and vacuum hoses. Buy or mark a second set and store it closed.
How to choose without guessing compatibility
Start with the damaged part, the model year, and the construction of that area. Outer skin, bolted closure, or welded-and-riveted structure each points to a different tool group. Then read the approved repair: replace versus repair, rivet-bond versus weld, and which fasteners or adhesives are called out. Buy the joining tools to that specification. Consumables such as rivets, studs, adhesive, and filler are not generic across brands or even across years of the same nameplate, so treat those as vehicle-specific until the procedure says otherwise.
For hand tools, shop for faces and files that will not chatter or gall soft aluminum, and for storage that keeps the set sealed. For power tools, prefer equipment that can be reserved for aluminum only, including sanders and grinders with their own discs. For pulling, decide glue versus stud based on paint condition, access, and whether welding on that panel is allowed. For structural work, the measuring and fixture capability of the shop matters as much as the rivet gun; a fastener tool cannot recover a misaligned body.
Quality and safety checks before you pay
Confirm the tool is intended for aluminum or non-ferrous bodywork, not merely marketed as a universal dent kit. Check that stud welders, rivet tools, and adhesive guns accept the consumables named in the repair procedure. Prefer kits that include labeled storage so the set stays isolated after the first job. Inspect hammer and dolly faces for pits or embedded grit that would print into aluminum. Plan dust control; aluminum grinding dust is a fire and health hazard and must not mix with steel grinding waste. If welding is in scope, confirm gas, filler, and machine capability against the procedure rather than assuming a steel welder can be adapted.
Sensible next step
Identify the panel material and whether the damage is cosmetic or structural. For a shallow, uncracked skin dent, a dedicated aluminum hand-tool and glue-pull set is the usual purchase. For anything involving factory rivets, adhesives, or welding, get the repair procedure for that vehicle first, then buy the joining tools and consumables it names. Keep every item in that kit off steel work from the day it arrives.
Specific prices, kit contents by brand, and fastener sizes are not listed here because they vary by tool maker and by vehicle. Match hardware and adhesive to the published repair for the exact model year, market, trim, and body style, and treat unresolved differences in construction as a reason to pause rather than to improvise with steel-body equipment.