What Is Paint Overspray on a Car? Identification, Assessment and Removal
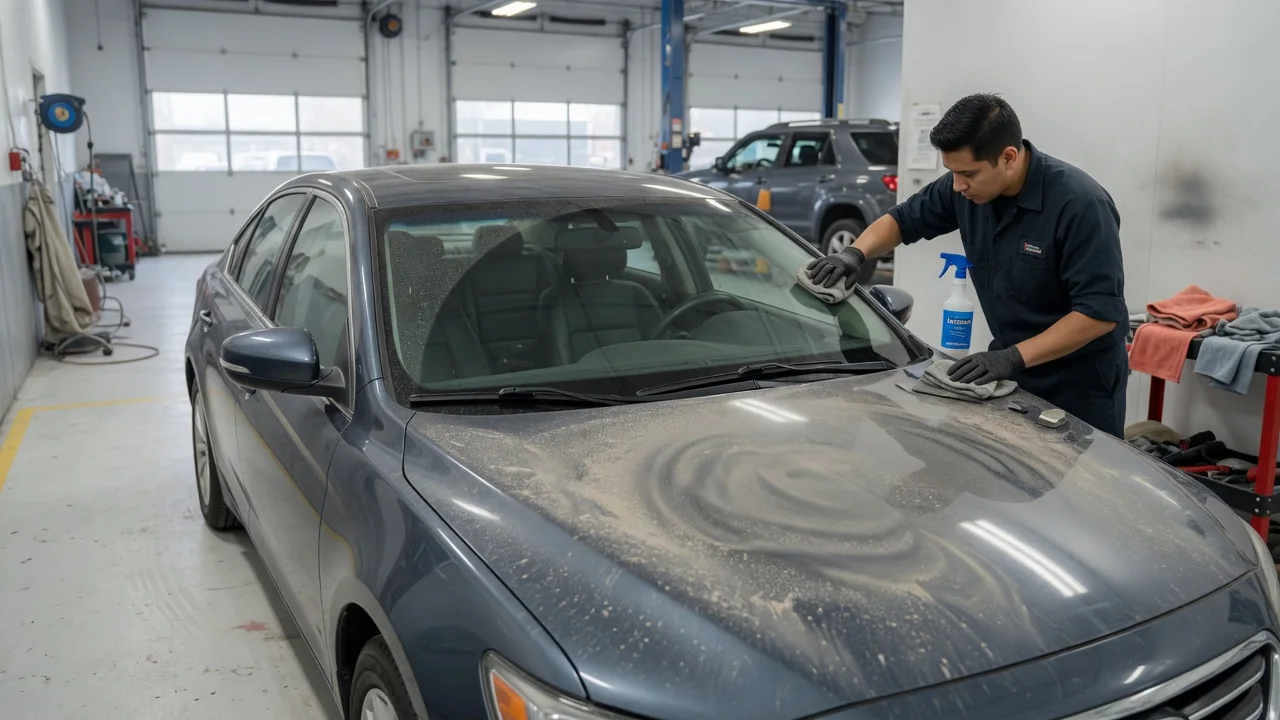
Paint overspray is airborne paint, primer, clear coat or a similar coating that drifts away from its intended target and settles on a car. It can come from a nearby body shop, a neighbor painting a fence, road-marking crews, or a repair on your own vehicle where masking was incomplete. The droplets often partly dry before or soon after landing, so overspray usually sits on top of the finish rather than bonding into it. That affects how you identify it and how you remove it.
How Paint Overspray Appears on a Car
The most common sign is texture. A panel that looks normal from a distance may feel rough or gritty when you slide your fingertips across it through a thin plastic sandwich bag, which exaggerates small bumps. Fine overspray often forms a dusting of tiny dots. These dots may be visible only at an angle under strong light, or when the overspray color contrasts with the car. Heavier exposure can leave a speckled haze, a dull band across one side of the vehicle, or distinct droplets with raised centers.
Where it shows up gives useful clues. Wind-carried overspray tends to concentrate on surfaces facing the source, such as one flank, the hood and roof, or the windshield. It is often easier to see on glass, chrome, black plastic trim and headlight lenses than on painted panels, because the specks stand out against clear or dark surfaces. Wheels, tires, rubber seals and mirrors can carry it too. Overspray from a repair is usually more localized. It tends to appear near a refinished panel, on adjacent panels, in door jambs, or on trim that was not fully masked.
Several contaminants look similar, so car paint overspray identification benefits from comparison. Tree sap tends to form sticky, irregular blobs. Industrial fallout and rail dust often appear as tiny orange or brown rust-colored spots. Tar is usually dark and concentrated low on the body behind the wheels. Water spots leave rings or mineral outlines rather than raised specks. Overspray often matches the color of a nearby painting project, though it may also be white, gray or clear. It is typically spread in a fine, even pattern consistent with drifting mist rather than splashes thrown up from the road.
Assessing Overspray Safely
Start with a thorough wash and dry. This keeps ordinary dirt from being mistaken for contamination and from being dragged across the paint during inspection. Then examine the vehicle in good light, ideally indirect daylight plus a handheld light held at a low angle to the surface. Check each surface type separately: painted panels, glass, plastic and rubber trim, lights, wheels and badges. Note which areas are affected and how heavily, because different materials tolerate different removal methods.
The key question is whether the overspray is resting on the surface or has bonded to it. Most overspray that dried in the air before landing sits on top and can be lifted mechanically. Paint that arrived wet, or a solvent-based coating that softened the surface beneath it, may be more firmly attached. Fresh overspray is generally easier to remove than material that has cured for weeks in sun and heat, so a prompt assessment matters. If the coating type is known, such as water-based house paint versus an automotive coating, share that with whoever handles the removal. It helps in choosing a method.
Avoid testing the specks with a fingernail, a blade on painted panels, abrasive pads or household solvents. These can scratch clear coat or haze plastic, causing more harm than the overspray itself. If the car may have been sprayed by a third party, photograph the affected areas before cleaning anything. Include close-ups and a wider shot showing the vehicle's location. That record can matter if an insurer or the responsible party becomes involved.
Removal Choices for Paint Overspray
For light overspray on painted surfaces, a clay bar or synthetic clay mitt with plenty of lubricant is the usual first step. Used gently, the clay glides over the clear coat and grabs contaminants sitting above it, shearing them off without meaningfully abrading the finish. Work in small sections and keep the surface wet. Fold or rinse the clay often so collected particles do not scratch the paint. Claying can leave light marring, especially on soft or dark finishes, so a light polish and a protective wax or sealant often follow.
Glass usually tolerates more aggressive approaches than paint. Clay works on glass as well. A fresh razor blade held flat with lubricant is a common method for windows, but take care around tint film, defroster or antenna lines, and coated glass. Plastic trim, rubber seals and headlight lenses are more sensitive, because solvents and strong cleaners can stain, soften or haze them. Gentle clay work or a product labeled safe for that material is the more cautious choice. Test any product on an inconspicuous spot first.
Heavier or bonded overspray may call for one of two approaches. The first is machine polishing with a compound, which removes a thin layer of clear coat along with the contamination. The second is a carefully chosen remover that the manufacturer states is compatible with cured automotive finishes. Both carry a real risk of cutting through clear coat, especially on edges and body lines. For that reason they are commonly left to an experienced detailer or body shop. Professional removal is often the most practical route when overspray covers a large area, spans several surface types, or came from a commercial source.
Practical Implications and Limits
Timing affects both effort and outcome. Overspray left in place keeps curing and can become harder to lift. Gritty contamination on the surface also makes every wash more likely to cause fine scratches. At the same time, reaching for strong chemicals or a polisher before identifying the material risks permanent damage worse than the original problem. Moving from the least aggressive method to the most aggressive protects the finish and lets you stop as soon as the surface is clean.
No single method fits every vehicle. Paint hardness, clear coat thickness, previous refinishing, applied coatings or protective films, and the type of overspray all vary. A technique that works cleanly on one car may mar another. Repeated correction also consumes clear coat, which cannot be restored without refinishing. Sometimes removal leaves etching, staining or dullness, or the overspray appears to have reacted with the finish. In those cases the panel may need refinishing rather than cleaning, a judgment best made in person by a qualified professional.