What Is Injection Molding for Car Parts?
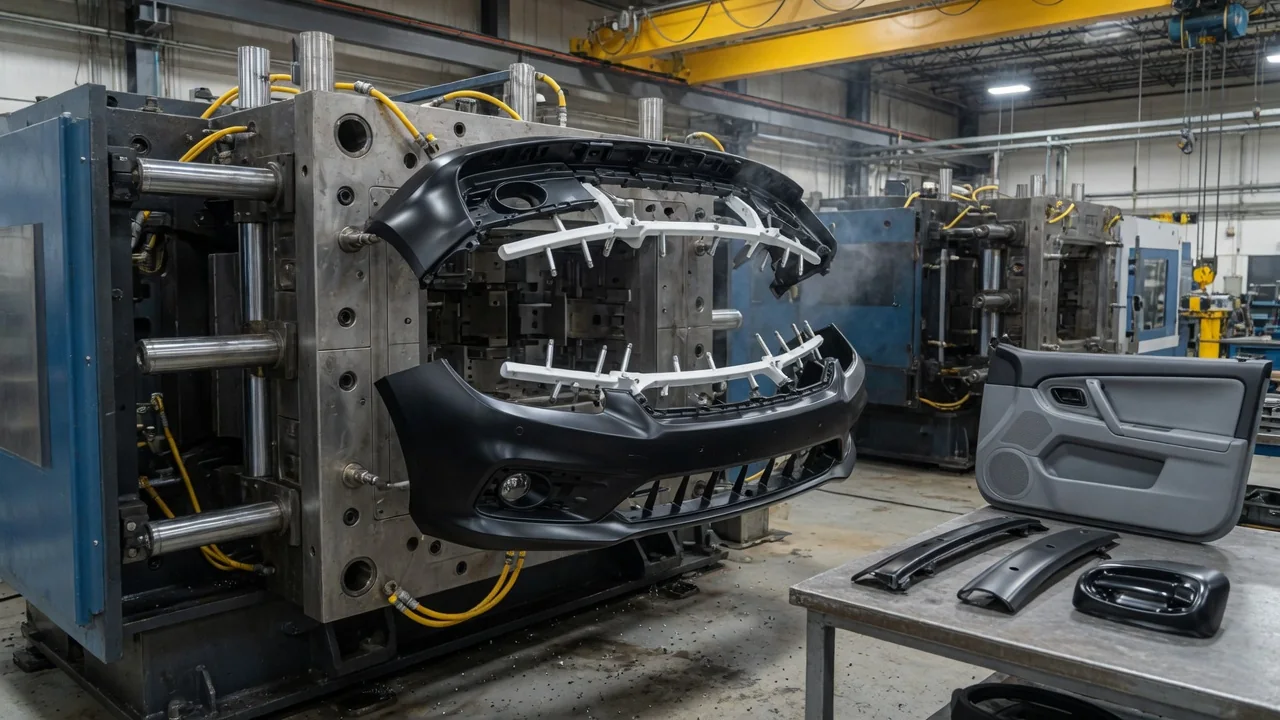
Injection molding is the manufacturing process behind many of the plastic parts in a modern car, from interior trim panels and vent louvers to clips, housings, and bumper covers. Automotive injection molding melts a plastic material, forces it into a precisely machined metal mold, lets it cool into shape, and then ejects a finished part. Knowing the basic steps helps explain why these parts look and fit the way they do, and why they behave as they do over time.
Molten polymer
Most injection-molded car parts start as small pellets of thermoplastic. A thermoplastic is a polymer that softens when heated and hardens again when cooled. Common automotive families include polypropylene, ABS, polyamide (often called nylon), polycarbonate, and blends of these. They are often compounded with additives such as mineral fillers, glass fibers, color pigments, UV stabilizers, or impact modifiers. The pellets feed from a hopper into a heated barrel that contains a rotating screw. As the screw turns, it moves the material forward. Heater bands on the barrel and friction from the screw's motion together turn the polymer into a molten, flowable state.
The condition of the melt matters as much as the material choice. Molten plastic is thick and viscous rather than watery, so the machine must push it with considerable pressure to make it flow through narrow channels. If the melt is too cool, it may not fill the mold completely. If it is held too hot or too long, the polymer can degrade, discolor, or lose strength. Some materials, polyamide among them, absorb moisture from the air and are typically dried before processing, because trapped water can cause surface streaks or weaken the finished part. Fillers and fibers also change how the melt flows and how the part shrinks as it cools. That is one reason the same shape molded in two different compounds may not behave the same way.
Mold shape
The mold, often called the tool, is what gives an injection-molded part its form. It is usually made from hardened steel or, for some lower-volume work, aluminum. It has at least two halves that close tightly together. The space between them, called the cavity, is a negative of the part: every rib, boss, clip, texture, and logo on the finished piece corresponds to a feature machined into the mold surfaces. Molten plastic enters through a sprue and a network of runners, then passes through a gate into the cavity. Some molds use heated runner systems so that less material hardens outside the part itself.
Because the part must be pulled out of a rigid mold, its geometry follows certain design rules. Walls are kept as uniform in thickness as practical, since thick sections cool more slowly and can leave sink marks or internal voids. Vertical faces get a slight taper, known as draft, so the part releases cleanly. Ribs add stiffness without making walls heavy. Some features would lock the part in place, such as side holes or snap hooks. These are called undercuts, and they require moving mold components like slides or lifters, which make the tool more complex. The mold also contains channels for coolant to control temperature, and small vents that let air escape as the plastic fills the cavity. Surface finish is built into the steel too. That is why a grained dashboard texture or a glossy trim piece comes out of the mold already looking that way.
Production
Each production cycle on an injection molding machine follows the same sequence. The mold closes and is held shut by a clamping force strong enough to resist the pressure of the incoming plastic. The screw then moves forward like a plunger, injecting a measured shot of melt into the cavity. Once the cavity is nearly full, the machine keeps up holding or packing pressure to push in extra material as the plastic begins to shrink. The part then cools inside the mold, which is often the longest stage of the cycle. Finally, the mold opens and ejector pins or plates push the part free, either onto a conveyor or into the grip of a robot.
Automakers value the process because, once the mold and settings are established, it can produce large quantities of parts with consistent dimensions and appearance. Molders monitor variables such as melt temperature, injection speed, pressure, and cooling time, because small shifts can affect fit or surface quality. Several variations extend what the basic process can do. Insert molding places a metal component, such as a threaded bushing, into the mold before plastic is injected around it. Multi-shot molding and overmolding combine two materials in one part, for example a rigid base with a soft-touch surface. Gas-assist molding uses pressurized gas to hollow out thick sections such as handles. After molding, some parts are painted, plated, welded, or assembled with other components before they reach the vehicle.
Practical implications and limits
For car owners, the main takeaway is that a molded plastic part's shape, strength, and finish are largely fixed at the factory. A cracked clip, broken tab, or warped trim piece usually cannot be restored to its original condition by reshaping it. Its properties come from the material formulation and the conditions under which it was molded. That is one reason replacement is often more practical than repair for small interior and exterior plastics. It also explains why two parts that look alike may not be interchangeable: a slightly different mold, material grade, or mounting feature can change fit. Checking the correct part number for a specific vehicle, rather than relying on appearance, is the safer approach.
Injection-molded parts also have practical limits in service. Thermoplastics can soften at high temperatures, become more brittle in cold weather, and degrade with long exposure to sunlight, heat cycles, or certain chemicals. Additives and material selection are used to reduce these effects. Small visual details such as faint gate marks, ejector pin circles, or parting lines are normal results of the process, not defects in themselves. Repair techniques such as plastic welding or adhesive bonding can work on some parts. Success depends on identifying the base material, which is often shown by a molded-in material code on the part. How a particular component ages or responds to repair depends on its specific design and compound, so the general behavior described here may not hold for every vehicle or part.