Vintage Car Audio Amplifiers: What to Know Before You Buy or Restore One
Short Answer: Condition and Era Matter More Than Brand Name
A vintage car audio amplifier can still work well, but its value and usability depend mainly on whether it has been serviced, how it was stored, and the specific circuit design from its production era. An amplifier from the 1970s or 1980s often needs capacitor replacement before regular use, while some late-1990s models may power on with no work at all. Do not assume age alone means poor sound; many older amplifiers have robust power supply sections and high-quality discrete components that outperform cheap modern units.
Compatibility with a Modern or Period-Correct Head Unit
Most vintage car amplifiers accept a low-level RCA input, but some early designs use speaker-level or DIN-style inputs. Check the input sensitivity rating, often printed near the gain controls. A modern head unit with a 2-volt or 4-volt preamp output will usually drive a vintage amplifier cleanly, but you may need to reduce the gain to avoid clipping. If the amplifier has only high-level inputs and your head unit has no speaker outputs at the correct impedance, use a line output converter, but be aware that this can add noise.
Impedance stability is the main electrical compatibility issue. Many classic amplifiers are rated for 4-ohm loads only. Connecting a 2-ohm subwoofer or paralleled drivers can overheat the output stage or trigger protection. Check for markings such as "4 ohm min" or "2 ohm stable." If the chassis does not state a minimum impedance, treat it as 4-ohm only. Bridged operation also changes the minimum safe impedance; a pair of 4-ohm subs wired in parallel to a bridged two-channel amplifier can present a 2-ohm mono load, which many vintage models cannot handle.
Power Ratings: Old Numbers, Different Measurements
Vintage amplifier power ratings are often quoted as peak or maximum watts, not continuous RMS watts. A 1980s amplifier marked "200 watts" may deliver only 25 to 40 watts RMS per channel into 4 ohms. Compare RMS output at a stated distortion level, such as 0.1% THD, when possible. If the original box or manual is missing, look for a specification sticker on the underside or the end panel of the chassis. Unresolved differences in how manufacturers measured power mean two amplifiers with the same printed number can sound very different in loudness and headroom.
Power Supply and Vehicle Electrical Demands
A high-current vintage amplifier may draw more from the alternator and battery than the original factory system expected. Check the fuse rating on the amplifier chassis. As a general guide, a single 30-amp fuse suggests roughly 350 watts or less of total power draw at 14.4 volts, while dual 40-amp fuses indicate a much higher current demand. Use an appropriately sized power cable and a dedicated ground run to bare metal. Older vehicles with low-output alternators may show dimming lights or voltage drop at high volume.
Many vintage amplifiers use unregulated or loosely regulated power supplies. Their output rises as the vehicle's charging voltage rises. A cold start at 14.8 volts can produce noticeably more power than a hot idle at 12.5 volts. This is normal for the period but means you should set gain levels with the engine running at a normal operating voltage to avoid clipping when the alternator is charging hard.
Common Failure Points and Servicing
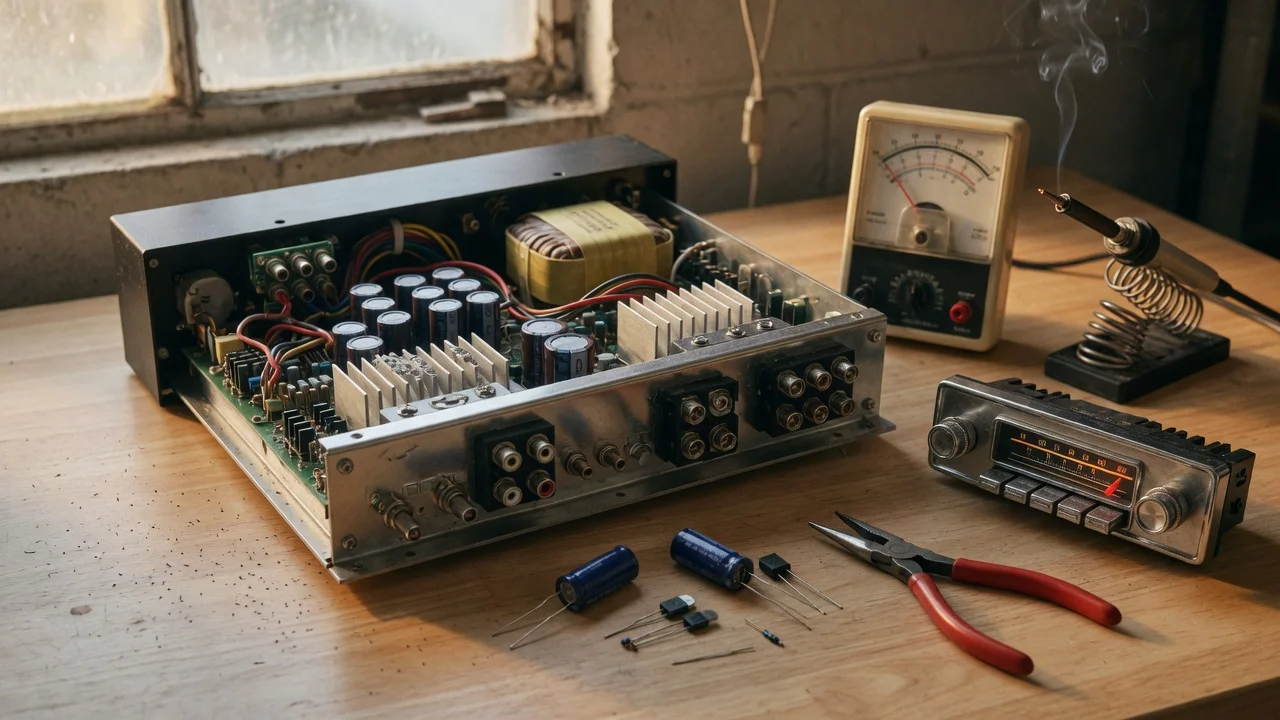
Electrolytic capacitors are the most common failure point. They dry out with age, causing hum, weak bass, intermittent turn-on or a burning smell. A full capacitor replacement is often called a recap and is the first service step for any amplifier older than about twenty years. Also inspect solder joints around large resistors, power transistors and speaker terminals. Thermal cycling can crack these joints, producing distortion that comes and goes with temperature.
If the amplifier does not power on, check the remote turn-on wire first. Vintage amplifiers need a 12-volt signal on the remote terminal; a modern head unit may provide only a low-current 12-volt signal, which is usually sufficient, but a relay may be needed if the amplifier's remote input draws more current than the head unit can supply. Do not bypass the remote terminal by jumping it to the main power terminal permanently, as this will drain the battery when the vehicle is off.
Physical Condition and What to Look For
Open the cover, if possible, before purchase. Look for bulging or leaking capacitors, brown heat discoloration around resistors, and signs of previous repairs such as mismatched solder or replaced output transistors. Rust on the chassis or corrosion around the power terminals suggests moisture exposure, which can damage the transformer or cause hidden trace corrosion on the circuit board. A clean board with original parts is not always better; an amplifier that has been professionally recapped may be more reliable than one with all-original thirty-year-old capacitors.
Installation Notes for Period and Modern Vehicles
Mount the amplifier away from direct moisture and heat. Older amplifiers run hotter than modern class-D designs, so provide air space above the heatsink fins. If the amplifier uses an external fuse holder, match the fuse value to the chassis label and place the fuse within a short distance of the battery positive terminal. Use a ground wire at least as large as the power wire and connect it to a clean, paint-free chassis point.
For a period-correct installation, you may need an adapter harness if the original vehicle used a proprietary connector. Many 1980s factory-amplified systems use a separate speaker-level input plug and a speaker output plug. If you are replacing a factory amplifier with a vintage aftermarket unit, verify the speaker wiring and impedance before connecting anything. Some older European cars route common-ground speaker wiring, which can damage bridgeable aftermarket amplifiers.
Is It a Good Next Step?
A vintage car audio amplifier is a reasonable choice if you accept the servicing risk and match it to a compatible head unit and speaker impedance. Buy a unit with a clear chassis label, intact terminals and some evidence of recent functional testing. If the seller cannot demonstrate power-on or output, assume it needs a recap and repair work. For a daily-driven vehicle where reliability matters more than period styling, a modern efficient amplifier is the lower-risk alternative. For a restoration or a classic-car audio build, a properly serviced vintage amplifier delivers a sound character and visual correctness that modern equipment cannot replicate.