UTV and ATV Differential Fluid: Type, Capacity and Change Guide
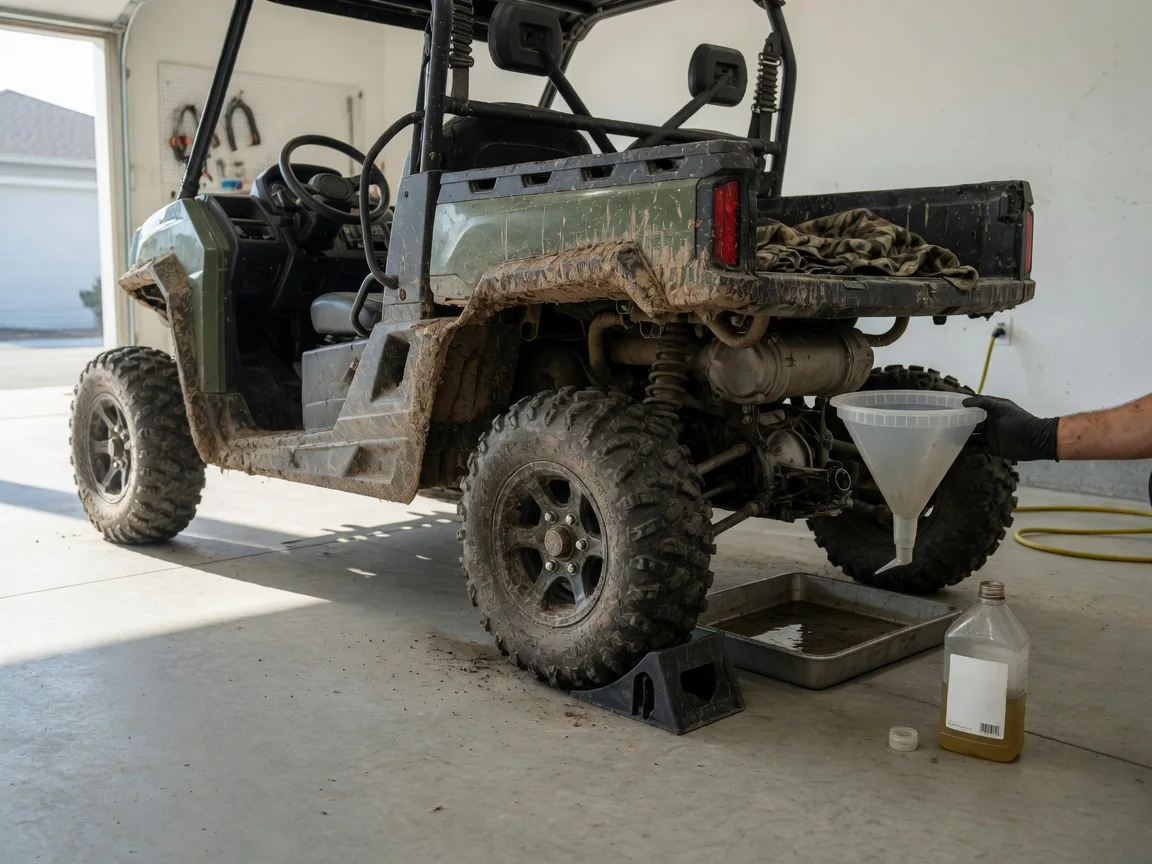
Differential fluid often gets overlooked until drivetrain issues appear, yet it is critical for any ATV or side-by-side. The fluid cools and lubricates the gears and bearings inside the front and rear gearcases while protecting engagement mechanisms used for all-wheel drive. Owner's manuals list exact types and capacities for models like the Can-Am Maverick X3, Polaris Ranger 1000, and Kawasaki Mule 4010. Knowing how to confirm those specs prevents damage and keeps 4WD working properly in mud or water.
What Differential Fluid Does in an ATV or Side-by-Side
The front and rear differentials split engine torque between the wheels and allow them to rotate at different speeds during turns. In a 4WD ATV or side-by-side, the front gearcase often contains an engagement mechanism, such as a sprague or electronic actuator, that connects the front wheels when needed. The fluid coats the gears, bearings and clutch surfaces to reduce friction and carry away heat, which is essential because these components are small and heavily loaded during aggressive riding.
Fluid type is not universal across powersports machines. Some gearcases use a standard gear oil such as 75W-90 or 80W-90, while others require a proprietary fluid with specific friction modifiers for correct all-wheel-drive engagement. The manual may call for a branded fluid or an exact specification. Capacity also varies, so the fill plug is the practical guide: with the unit level, fluid should just reach the bottom of the fill hole. Warning signs like a burnt smell, milky appearance, or metal flakes mean contamination or wear, and the fluid should be changed according to the manufacturer's schedule, especially after water crossings or heavy towing.
Can-Am Maverick X3 Front Differential Fluid: Finding the Correct Spec
To find the correct front differential fluid for a Can-Am Maverick X3, start with the model year and VIN. The owner's manual or an official service manual lists the specific fluid by name or specification, and some variations exist between model years. Generic gear oil charts can mislead because the X3 front differential may require a fluid that supports its limited-slip or electronic engagement system. Using a substitute with different friction characteristics can cause harsh engagement, noise, or accelerated wear, so it is best to purchase the exact product or an equivalent that meets the full specification.
Locating the plugs on the front differential requires access beneath the machine, often after removing a skid plate. The fill plug is typically higher than the drain plug on the differential housing. Check the fluid only when the vehicle is on level ground, the engine is off, and the unit has cooled. Remove the fill plug and insert a clean finger or tool to feel the level; it should be at or slightly below the threads. When draining, inspect the old fluid for water contamination, grit, or a metallic shimmer, and clean any metallic debris from the magnetic drain plug. Reinstall the plugs to the specified torque, record the service in a maintenance log with the date and vehicle hours, and have a dealer inspect the unit if the fluid shows excessive metal or the plug magnet is coated with chunks.
Can-Am Defender HD10 Rear Differential Fluid Change Walkthrough
Before changing the rear differential fluid on a Can-Am Defender HD10, park the machine on a flat surface, let the engine and exhaust cool, set the parking brake, and chock the wheels. Locate the rear differential housing and identify the fill and drain plugs; the fill plug may be on the upper side of the case. Loosen the fill plug first to ensure it will come out after the fluid has drained and to allow air into the housing. Remove the drain plug and catch the old fluid in a pan.
Specific fluid type and capacity for the Defender HD10 rear differential must come from the service information for the exact model year, as specifications can change. Some models use a specific gear oil and require a new sealing washer on the drain plug. After refilling, the correct level is when fluid just starts to seep from the fill hole. If the machine is used for heavy towing or frequent wet riding, check the fluid more often than the standard schedule. Test drive briefly and inspect for leaks around the plugs. Dispose of the used fluid at a recycling center, never in the trash or drain.
Polaris Ranger 1000 Front Differential Fluid Requirements
The Polaris Ranger 1000 front gearcase typically requires a specialized fluid specified by Polaris because of its all-wheel-drive engagement system. The system may use an electromagnetic coil or a mechanical sprague that relies on the fluid for both hydraulic and lubrication properties. The owner's manual lists the required fluid, often a Polaris-branded demand drive fluid or equivalent. Using ordinary gear oil may cause the front drive to engage harshly or fail to disengage, so it is important to follow the specification exactly.
Approved capacity figures come from the service manual for the specific model year and trim, not from online forum posts. After draining, refill with the specified amount and then check at the fill plug; many Ranger models have a fill plug on the front gearcase that is also the level check. If the front differential is noisy or AWD engagement is erratic, the fluid may be low, but other causes include electrical faults or mechanical wear. Checking the fluid level and condition is a good first step, but if the problem persists after service, have a technician diagnose the engagement system.
Polaris RZR Rear Differential Fluid Capacity: How to Confirm It
Polaris RZR models have different rear drivetrain layouts across the lineup, so the first step is to identify whether a particular RZR has a separate rear gearcase. Some RZR models use a transaxle that combines the transmission and rear differential in one housing, and those may use a different fluid than a standalone rear differential. The owner's manual will show the maintenance points for the specific model and engine, so match the fluid type and capacity to the exact year and trim, not just the RZR name.
The check plug on the rear differential or transaxle is used to verify the correct fill level. With the machine level, fluid should be even with the bottom of the check hole. Overfilling can force fluid past seals and cause foaming, while underfilling starves the gears and bearings. If the rear differential runs hot during aggressive trail riding or high-speed operation, inspect the fluid more often. The manual may list a severe-duty interval for dusty, muddy, or high-load use, and following that guidance helps protect the gearset from premature wear.
Kawasaki Mule 4010 and Mule Pro FXT Rear Differential Capacity
The Kawasaki Mule 4010 and Mule Pro FXT are distinct platforms with different rear final gear case designs, so their fluid capacities are not interchangeable. The 4010 is a smaller, older utility vehicle, while the Pro FXT is a larger, newer model with different drivetrain components. Each owner's manual provides the specific capacity, fluid type and viscosity, often a Kawasaki-branded gear oil or an SAE viscosity like 80W-90. Using the wrong fill amount or oil can lead to overheating or bearing wear in these work machines.
Routine rear differential level checks on Mule models are done at the fill or inspection plug, usually located on the side or rear of the gear case. Look for fluid that is clean and honey-colored; dark or milky fluid indicates contamination or overheating. Given that Mules are often used for hauling, towing and off-road work, the fluid is subjected to high loads and should be checked regularly per the manual's maintenance schedule. If the fluid is low, top it off with the specified type and investigate any visible leaks around the axle seals or plugs.
Safe Maintenance Practices and When to Call a Professional
Any fluid service should begin with the vehicle parked on level ground, engine cold, parking brake engaged, and wheels chocked. Do not rely on a jack alone; use jack stands or a service lift. Wear gloves and eye protection because gear oil is malodorous and can irritate skin. Before draining, make sure you have the correct replacement fluid and any sealing washers, and loosen the fill plug to verify it can be removed. After service, run the machine briefly and inspect for leaks around the plugs, then recheck the level.
Stripped drain plugs, cross-threaded fill holes, persistent leaks, or metal chunks in the drained fluid are signals to stop and seek professional help. Fluid condition can indicate contamination or wear, but it cannot pinpoint an internal failure without disassembly. Keep records of every fluid change with date, hours, and type of fluid used; this supports warranty claims and helps track service intervals. Following the manufacturer's schedule and using the correct fluid keep the differentials reliable for the life of the machine.