Using Car Ramps for an Oil Change: Choosing and Using Them Safely
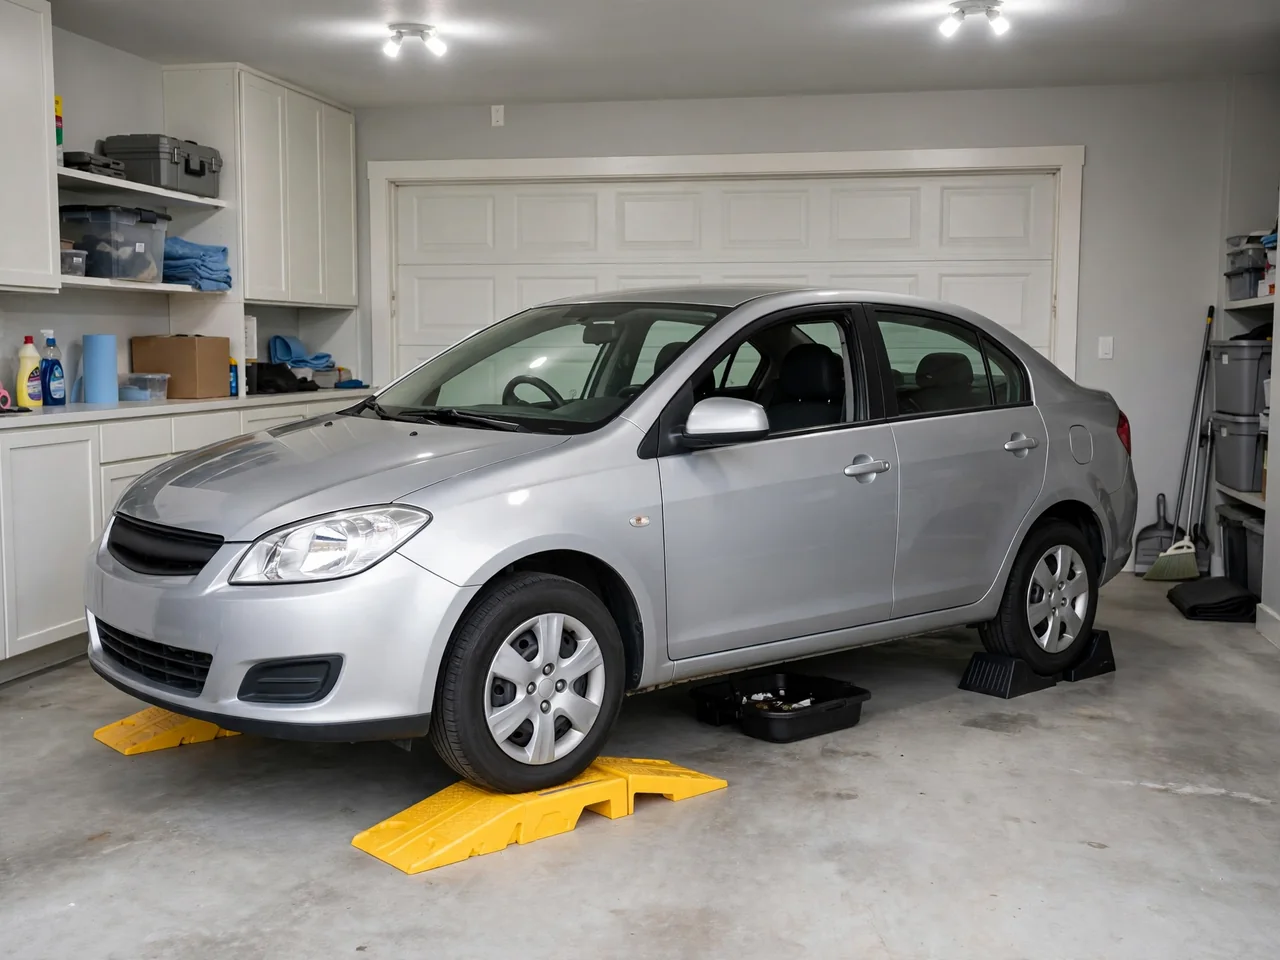
Driving onto a pair of ramps is one of the simplest ways to get enough room under a car for an oil change, but simple does not mean foolproof. The ramps need to suit the vehicle's weight, tire width and ground clearance. They also need firm, level ground. Getting those details right decides whether the job feels routine or risky, so here is how to handle each step.
Why Ramps Are a Popular Choice for Home Oil Changes
Ramps work differently from a floor jack. A jack lifts the body at one point. With ramps, you drive the front tires up an incline until they rest on a flat platform. The tires stay loaded, the suspension stays at its normal ride height, and the vehicle's weight spreads across a broad base. That makes ramps a good fit for routine oil and filter changes and quick underbody inspections. They also suit owners who want a steady platform without using a jack.
The limits matter just as much. Ramps raise only one end, and the wheels sitting on them cannot come off. Tire rotations, brake jobs and most suspension work need jack stands or a lift instead. Ramps also depend on the driver getting the car onto them correctly. A clear approach path, a good view of both tires and careful throttle control count as much as the quality of the ramps.
Ramp Types: Molded Plastic, Steel, Low-Profile and Extended-Length
Molded plastic ramps are light, easy to carry and cannot rust, which makes them handy for driveways and damp garage floors. Steel ramps are heavier and often have a narrower tire channel, but many fold or stack for compact storage. Low-profile and extended-length designs spread the climb over a longer distance. The gentler angle lets bumpers and air dams on low cars clear the ramp before the tire starts to climb.
Some ramps are one piece. Others add a separate lead-in extension that helps low cars but can shift or separate if it is not locked in place. Whatever the design, look for a raised stop at the top, a tire channel wide enough for your tread, a textured climbing surface and a base that grips concrete. Think about weight and storage space too, because heavy, awkward ramps tend to sit unused in a corner.
Reading Weight Ratings and Matching Ramps to Your Vehicle
Ramp capacity is usually listed as a gross vehicle weight for the pair, not for each ramp. Manufacturers word this differently, though, so read how they define the number. Next, find your vehicle's gross vehicle weight rating on the label inside the driver's door jamb. That figure is the fully loaded maximum. Choose ramps rated comfortably above it rather than ones that sit right at the limit.
Weight is only half the fit check. The tread should sit fully inside the ramp channel without hanging over either edge. An overhanging tire loads the side walls unevenly and can slip off. Ramps that suit a compact sedan may not be enough for an SUV, pickup or van, so check capacity and width again for each new vehicle. Trust the rating molded or stamped on the ramp itself, since packaging and listings sometimes describe a different model.
Low Clearance, Approach Angle and Bumper Contact
On cars with sport packages, deep front air dams or aftermarket splitter lips, the bumper can reach the ramp before the tire does. The result can be a scraped bumper, a cracked lip or a ramp pushed across the floor. To check ahead of time, measure from the ground to the lowest point of the front bumper. Then compare that with how high the ramp rises over the gap between the bumper edge and the tire.
If clearance looks tight, longer low-angle ramps are the cleanest fix. A short lead-in extension or a sturdy board under the start of each ramp raises the tire slightly before the incline begins. Any added piece must be solid and flat, and it must not shift or tip under load. Make the first approach at a crawl, with a helper beside the bumper watching the gap, and stop at the first sign of contact.
Positioning the Ramps and Driving Up Safely
Start on a flat, hard, level surface such as a garage slab or concrete driveway. On loose gravel, ramps can sink or tilt, and asphalt can soften on a hot day. Set each ramp squarely in front of its tire with the steering straight ahead so the tire climbs the center of the ramp. Ramps tend to slide forward when a tire first touches them. A rubber mat under the base or built-in anti-slip pads helps keep them in place.
A helper standing to the side, never in front, can watch both tires and call out alignment. Use slow, steady throttle, because a quick burst can shove the ramps or carry the tire past the top. You will feel the climb level off on the platform and then light resistance as the tire meets the stop. Going past that stop can drop the car off the front. Stop gently, get out and confirm that both tires are centered.
Wheel Chocks, Parking Brake and Pre-Work Stability Checks
Once the car is up, set the parking brake firmly. Put an automatic in park or a manual in gear. Then wedge wheel chocks snugly against both rear tires, since the rear wheels are the only ones still on the ground. Before you slide underneath, push on the body from the side and from the rear. Nothing should rock, creak or shift, and the ramps should stay exactly where you placed them.
Inspect the ramps before every use, not just when they are new. Retire a ramp rather than repair it if the plastic is cracked, the steel is bent, a weld is loose, or the stop is damaged or missing. Never work under a car that feels unstable, sits on a slope or rests on stacked blocks or other makeshift supports. If anything feels wrong, back down, fix the setup and start again.
Working Under the Car on Ramps: What to Expect and When to Stop
With only the front raised, the car sits nose-up, and the tilt changes how it drains. The drain plug may no longer be the lowest point in the pan, so oil can flow more slowly and a little may stay behind. That is normal on ramps. The stream may also land in a different spot than it does on level ground. Place the drain pan with room to spare and keep it away from the ramp base.
When you finish, pull every tool, light and the drain pan out from under the car, and make sure no one is nearby. Remove the chocks only when you are in the driver's seat and ready to go. Back down slowly with the wheels straight, then check the oil level once the car is on level ground. Use a shop or a lift if the vehicle exceeds the ramp rating, the job needs wheels removed, or the setup cannot be made stable.