Transfer Case Linkage Bushing Identification: Finding and Matching the Right Part
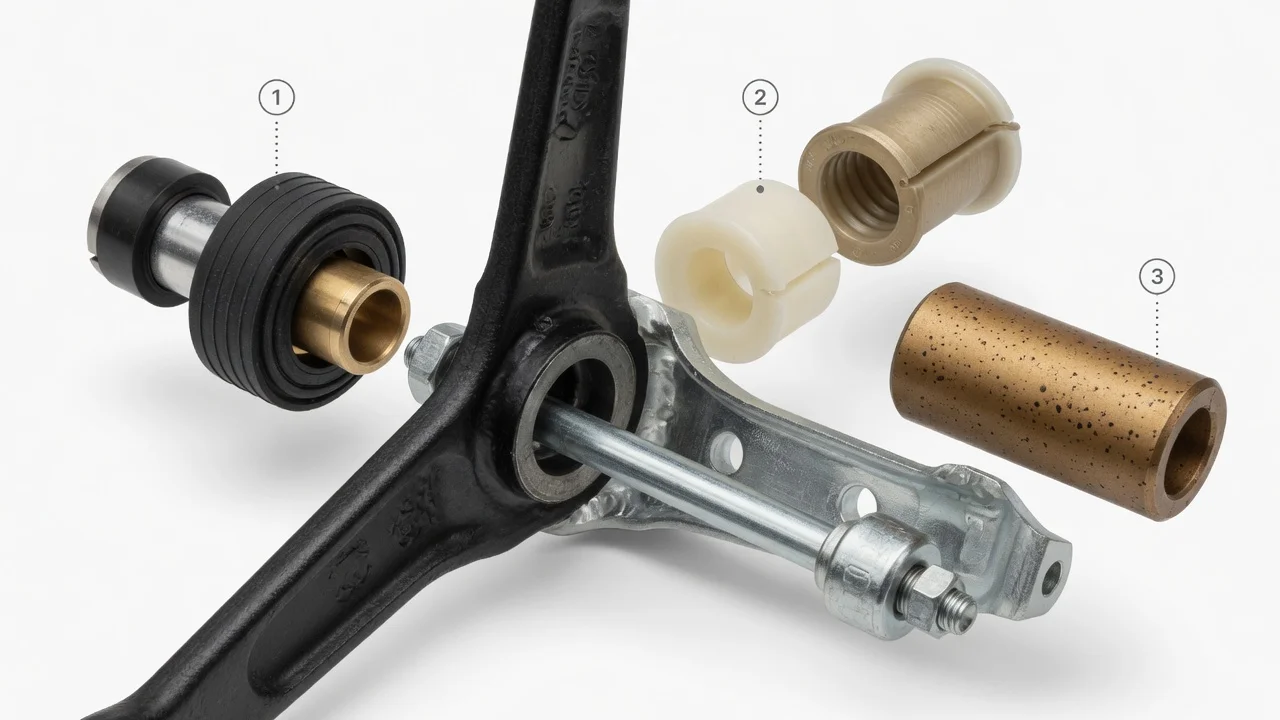
When a floor-mounted four-wheel-drive lever starts feeling sloppy or won't select 4H or 4L, a small plastic or rubber part is often to blame: the transfer case linkage bushing. To identify it correctly, you need to know where it sits, which style your vehicle uses and whether your setup has a mechanical linkage at all. This guide covers how to find the bushing, recognize wear and match a replacement without guessing.
The short answer
A transfer case linkage bushing is a small insert, usually nylon, plastic, rubber or polyurethane. It sits where the shift rod connects to the shift arm on the side of the transfer case, and sometimes where the rod attaches at the base of the shift lever. It fills the gap between the metal rod end and the hole in the arm, so lever motion reaches the case without slop or rattle. To find it, trace the linkage from the cab lever down to the transfer case and check each pivot point. These pivots are typically held by a clip or retainer. The correct replacement is the one specified for your exact model, model year, transfer case and shifter design. A part that only looks similar may not fit.
This applies only to vehicles with a mechanical lever or cable. Many trucks and SUVs select four-wheel drive with a dash switch or knob that commands an electric shift motor on the transfer case. Those systems have no shift rod and no linkage bushing, so a 4WD selection problem on them points elsewhere.
How the linkage and bushing work
In a lever-shifted system, the lever in the cabin pivots on a bracket, often mounted to the transmission or transfer case. A rod or cable runs from the bottom of that lever to an arm on the transfer case shift shaft. Moving the lever rotates the arm, which moves internal shift forks to select two-wheel drive, four-high, neutral or four-low, depending on the case. The bushing is pressed or snapped into the arm hole. The rod end passes through it, and a clip keeps the rod from backing out.
Because the rod and arm are steel, the bushing serves as both the wear surface and a small damper. Over time it can crack, harden, shrink or fall out. Heat from nearby exhaust components, road salt, mud, water crossings and frequent shifting all speed up this wear. Once it is worn, the rod has play in the hole. The lever moves before the arm does, the detents feel vague, and the case may not travel fully into a range. If the bushing is missing entirely, the rod can rattle and wear the hole oval. It can also slip out of the arm, so the lever moves but the transfer case does not.
What changes the answer
Vehicle configuration matters more than anything else. Different transfer case models, cab styles, transmissions and model years may use different rods, arms and bushing sizes, even within the same nameplate. Some designs use a simple snap-in grommet. Others use a bushing with a separate washer and clip, or a ball-and-socket end. Cable-operated shifters have a bushing or grommet at the cable end and bracket. A full-time system with a neutral position, a part-time system and an aftermarket or swapped transfer case can each have a different layout. Previous repairs also matter. The vehicle's service history might reveal a universal bushing, a substituted bolt or a modified rod that no longer matches the original part listing.
Operating conditions affect what you find during inspection. A truck used off-road or in a snowy region may show corrosion around the arm, a seized pivot or an elongated hole. A vehicle that rarely engages four-wheel drive may simply have a dried-out bushing. Some symptoms resemble a bad bushing but have other causes. A case that jumps out of four-low or grinds during engagement may have internal wear, a misadjusted rod or a front axle disconnect problem. Confirm the bushing problem visually rather than assuming it.
How to inspect and identify the bushing
Start with safety. Park on level ground, set the parking brake, chock the wheels and support the vehicle on jack stands if you need to get under it. With the transfer case in neutral, the transmission's Park position will not hold the vehicle. Do not rely on Park while you move the lever through its ranges. Let the exhaust and transfer case cool before touching anything nearby.
From underneath, follow the linkage from the base of the shift lever to the transfer case arm. At each joint, look for a missing insert, a cracked or flattened bushing, a loose or absent clip, shiny wear marks and an oval hole. Have a helper move the lever slowly while you watch. If the lever travels before the arm starts to move, or the rod shifts back and forth in the hole, the bushing is worn or gone. Also check the shifter mounting bracket and the lever pivot bushings. Play there produces a similar loose feel inside the cab.
To match a replacement, collect the VIN, model year, drivetrain, transmission and the transfer case identification tag if one is present. Remove the old bushing if possible and note its style, any flange or shoulder, and how it is retained. Measuring the rod diameter and the arm hole with calipers helps when comparing listed parts. Treat those measurements as a check, not a substitute for the manufacturer specifications or a VIN-based parts lookup. Universal bushing kits exist, but a loose fit tends to fail quickly, so a part made for your linkage is the safer choice. Replace the retaining clip at the same time. Inspect the arm hole too: if it is badly worn, you may need a new arm or rod to keep the bushing in place.
Limitations and when to get help
This guide cannot give you the exact bushing size, part number or material for your vehicle. No universal replacement interval applies either, so inspecting the linkage during routine service is more useful than following a fixed maintenance schedule. Linkage layouts and adjustment procedures are specific to each design. Some require you to adjust the rod after replacing the bushing so the case reaches every range fully. Use the service information for your vehicle for that step.
Get professional help if the arm moves correctly but the case still won't engage. The same applies if the case jumps out of gear, you hear grinding, you see fluid leaks, or the arm, rod or shaft is damaged. Those symptoms point beyond the bushing. A dealer parts department or an experienced driveline shop can confirm the correct part from your VIN. They can also check that the linkage is adjusted properly before you rely on four-wheel drive.