Trailer Brake Controller Installation: Process, Cost and Installers
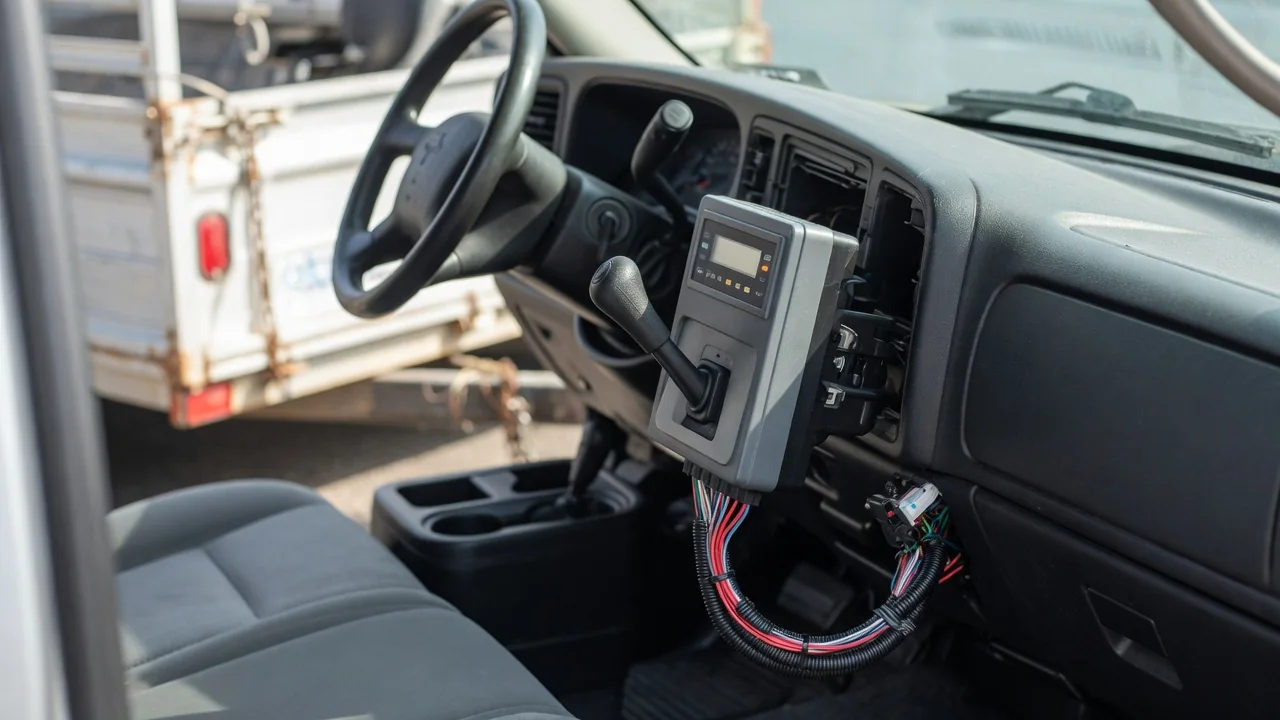
If you plan to tow a trailer equipped with electric brakes, you will need to install a trailer brake controller in the tow vehicle unless one is already built in. This guide explains what the installation involves, how the process works at a high level, what Ford F-150 owners should verify, what drives the cost, and how to choose qualified installers.
What Installing a Trailer Brake Controller Actually Involves
An electric trailer brake controller is the device that tells the trailer's brakes when and how hard to work. When the tow vehicle slows, or when the driver squeezes the manual override lever, the controller sends an electrical signal through the trailer wiring to magnets inside the electric trailer brakes, which press the shoes against the drums in step with that signal. Without a controller, those brakes receive no command at all, leaving the tow vehicle to stop the combined weight alone.
Installing a trailer brake controller comes down to three tasks: mounting the control unit within the driver's reach, connecting it to the vehicle's power, ground and brake signal circuits, and linking its output to the 7-pin trailer connector at the rear. Vehicles with a towing package often carry factory pre-wiring or a plug-in port, while others need considerably more wiring work. Some already have an integrated trailer brake controller, so check the owner's manual or ask a dealer before buying an aftermarket unit. Because the job governs trailer braking, accuracy matters more than speed.
How to Install an Electric Trailer Brake Controller: A High-Level Overview
Anyone asking how to install a trailer brake controller should start with the general sequence: confirm the vehicle is compatible, choose a controller type, pick a mounting spot that clears knees and airbag zones, connect the brake controller wiring harness, and test before towing. A proportional brake controller senses deceleration and matches trailer braking to it, so mounting position and calibration usually matter during setup. A time-delayed brake controller applies a preset output that ramps up over time, which shifts the setup work toward choosing output and delay settings.
Where the vehicle has a compatible port, a vehicle-specific plug-in adapter harness can connect the controller without splicing, but confirm fitment with the controller and harness maker rather than assuming a part will fit. Follow the controller manufacturer's instructions and the vehicle wiring documentation, and never cut into brake, airbag or unidentified circuits. DIY work should stop when pre-wiring is missing, wire functions are unclear, earlier aftermarket electrical changes are present, or circuit protection is in doubt. Those situations belong with a professional installer.
Ford F-150 Trailer Brake Controller Installation Considerations
A Ford F-150 trailer brake controller install depends heavily on how the truck was built. Equipment varies by model year, trim and towing package, so two trucks that look alike can need very different work. Before buying anything, confirm whether yours already has a factory-integrated controller in the dash or a dash-area connection intended for an aftermarket unit. The owner's manual, the original window sticker or a dealer looking up the truck's build information can answer that question reliably.
If an aftermarket controller is the right route, verify with the controller or harness maker that any vehicle-specific adapter harness matches your exact year and configuration, since connectors and wiring are not guaranteed to carry over between years. Factory towing menus or trailer settings in the instrument cluster may also need to be configured, and the steps differ by year, so rely on the owner documentation for your truck. When no pre-wiring is visible or the connection points are unclear, dealer or professional help is safer than guessing.
What Affects the Cost to Install a Trailer Brake Controller
The cost to install a trailer brake controller is the sum of three things: the controller itself, any vehicle-specific harness, and labor. Vehicle readiness drives the labor portion more than anything else. A pre-wired truck that accepts a plug-in harness usually takes far less shop time than a vehicle needing power, ground, brake signal and output wires run the full length to the rear connector. That is why no single figure answers how much to install a trailer brake controller.
Other factors shape trailer brake controller installation cost as well, including controller type and features, mounting hardware, upgrading a simpler plug to a 7-pin trailer connector, and any diagnostic work on existing wiring faults. Ask for a written quote that lists parts, labor and testing separately so estimates can be compared fairly. When weighing DIY, set the parts savings against what professional installation provides: correct circuit protection, verified output and someone accountable for a braking-related system.
Choosing Trailer Brake Controller Installers
Trailer brake controller installers come from several kinds of businesses. A hitch installation shop or towing specialist does this work routinely, RV service centers handle it alongside trailer repairs, dealers know factory systems, and general repair shops can be a good choice if they have real experience with the towing electrical system. Ask whether they have worked on your vehicle before, which controller and harness they plan to use, and whether they verify the result with an actual trailer or a brake circuit tester.
Confirm what the service includes. A complete trailer brake controller install should cover mounting the unit, setting an initial gain and walking you through operation, including the manual override. Ask about workmanship warranty terms and request documentation of the parts fitted and the circuits used, which helps with any later diagnosis. Be wary of shortcuts such as unprotected splices, wires left dangling or routed near hot or moving parts, vague answers about where connections were made, or a vehicle handed back without testing.
Testing, Setup and Warning Signs After Installation
Once installed, the controller needs its gain setting adjusted. Gain determines how much power goes to the trailer brakes, and it should reflect the trailer's weight and load, using the procedure the controller manufacturer specifies. Initial checks belong in a low-speed, open and legal area, such as an empty lot where permitted. Confirm that the controller recognizes the connected trailer and that gently applying the manual lever produces a noticeable, even slowing from the trailer. Nothing more aggressive is needed.
Certain symptoms call for professional diagnosis: a no-connection or short-circuit indicator, brakes that grab harshly or fail to respond, blown fuses, intermittent operation or a burning smell. A warning message or fault code is evidence to interpret, not proof that the controller has failed, because the trailer's own magnets, wiring and grounds must be healthy too, and no controller can compensate for trailer-side faults. Recheck the setup whenever the trailer, load or tow vehicle changes, and follow local towing rules on trailer brakes.