Trailblazer Front Axle Actuator Housing Fitment: What to Check Before You Buy
Ordering a front axle actuator housing for a Trailblazer looks simple until you notice that listings cover several model years, drivetrains and even entirely different vehicles sold under the same name. A part that bolts up but uses the wrong connector, plunger length or seal will leave the four-wheel drive inoperative or leaking. This guide explains how to match the housing to your exact vehicle configuration, what the component does, and what to check before and after installation.
Does a given actuator housing fit your Trailblazer?
The direct answer is that fitment depends on the specific Trailblazer, not on the model name alone. A front axle actuator housing is only a correct match when it is listed for your model year, body style and four-wheel-drive configuration, and when its part number matches the one specified for your vehicle. Two-wheel-drive versions have no front axle actuator at all, so any listing that does not separate 2WD from 4WD should be treated with caution.
The most reliable way to confirm fitment is to identify the part by your VIN, either through a dealer parts department or a parts catalog that decodes the VIN, and then compare that result with the number cast or printed on the part you remove. If the numbers or the physical features differ, do not assume the replacement is a superseded equivalent unless the catalog explicitly says so.
How the front axle actuator works
On Trailblazer models with selectable four-wheel drive, the front axle is not permanently locked to the front wheels. When you select a four-wheel-drive mode, the transfer case sends power forward, and the front axle actuator moves a shift mechanism inside the axle so that the axle shaft is connected to the differential. When you return to two-wheel drive, the actuator disengages that connection so the front driveline can coast instead of turning under load.
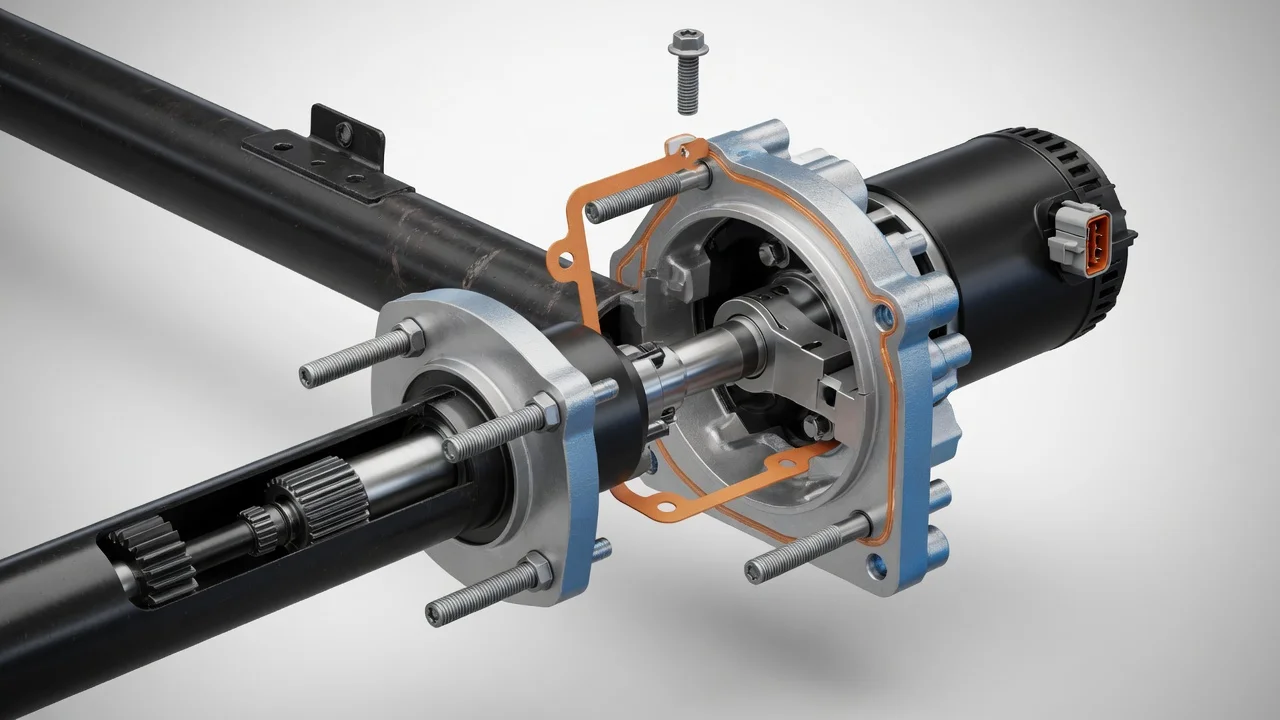
The housing is the part that holds the actuator mechanism, mounts it to the axle and keeps axle lubricant in while keeping water and dirt out. It typically relies on a gasket or O-ring at its mounting face and has an electrical connector that receives the command signal. Because the housing locates the moving parts, small differences in its mounting pattern, depth or plunger travel can prevent the shift mechanism from fully engaging even when the bolts line up.
What changes the answer
The biggest variable is the generation. The Trailblazer name has been used on a trim of the earlier Blazer, on the body-on-frame midsize SUV sold in North America in the 2000s, on a truck-based SUV sold in other markets, and on the later compact crossover. These vehicles use different front driveline designs, and the crossover's all-wheel-drive layout does not use the same front axle actuator arrangement as the older SUV. A part listed for one of these vehicles should never be assumed to fit another.
Within a single generation, drivetrain and trim still matter. Two-wheel-drive and four-wheel-drive versions differ, and performance or extended-length variants may use different driveline components. Production changes during a model run can also alter connector style, actuator design or seal type, which is why catalogs sometimes split one model year by build date or by option codes. GM vehicles of this era carry a service parts identification label, usually inside the glove box, that lists option codes describing the drivetrain; a parts counter can use those codes alongside the VIN.
Related platform vehicles sometimes share driveline parts, but sharing is not guaranteed and must be confirmed by part number rather than by appearance. Finally, operating conditions and service history can affect what you actually need: a vehicle that has had axle work, a previous aftermarket replacement or corrosion damage may require additional seals, hardware or connector repair beyond the housing itself.
What the owner can do before ordering and installing
Start with an inspection to make sure the housing is really the problem. Common observations that lead owners to this part include four-wheel drive that will not engage or disengage, a flashing or unresponsive 4WD indicator, grinding or clunking from the front when shifting modes, and lubricant seeping around the actuator mounting face. Several of these symptoms can also come from a blown fuse, a damaged wiring harness, a corroded connector or a transfer case control fault, so check those and read stored trouble codes with a capable scan tool before buying parts.
When you shop, compare the replacement against the original on the details that determine fit: mounting bolt pattern, overall shape and depth, plunger or shift fork arrangement, connector shape and pin count, and whether a new gasket or O-ring is included. Check whether the listing is for the housing alone or a complete actuator assembly, since buying the wrong scope means either reusing worn internal parts or paying for parts you do not need. Confirm the seller's return terms before installation, as many sellers will not accept parts that show signs of being fitted.
During installation, clean the mounting surface thoroughly, use the seal specified for the part, and tighten fasteners to the manufacturer specifications in the service information for your vehicle. Check and top up the front axle lubricant with the type the manufacturer specifies if any was lost. Afterward, test engagement and disengagement in a safe location, confirm the indicator behaves normally, and recheck for leaks after a short drive.
Limitations and next step
This guide cannot confirm fitment for an individual vehicle, and it does not replace the VIN-specific parts lookup or the factory service procedure. Torque values, lubricant type and capacity, and any inspection items belong to your vehicle's manufacturer specifications and maintenance schedule, which vary by year and configuration. Where catalog listings conflict with the part on your vehicle, the part number from the original component and a dealer VIN lookup should take priority over marketplace descriptions.
Consider professional help if the diagnosis points to wiring or control module faults rather than the housing, if fasteners are seized or the mounting area is badly corroded, or if the four-wheel drive still fails to engage after a correct part is installed. A shop with the right scan equipment can command the actuator, check its circuit and verify that the shift mechanism inside the axle is moving fully, which is difficult to confirm at home.