Toyota Tacoma 4WD Actuator Replacement
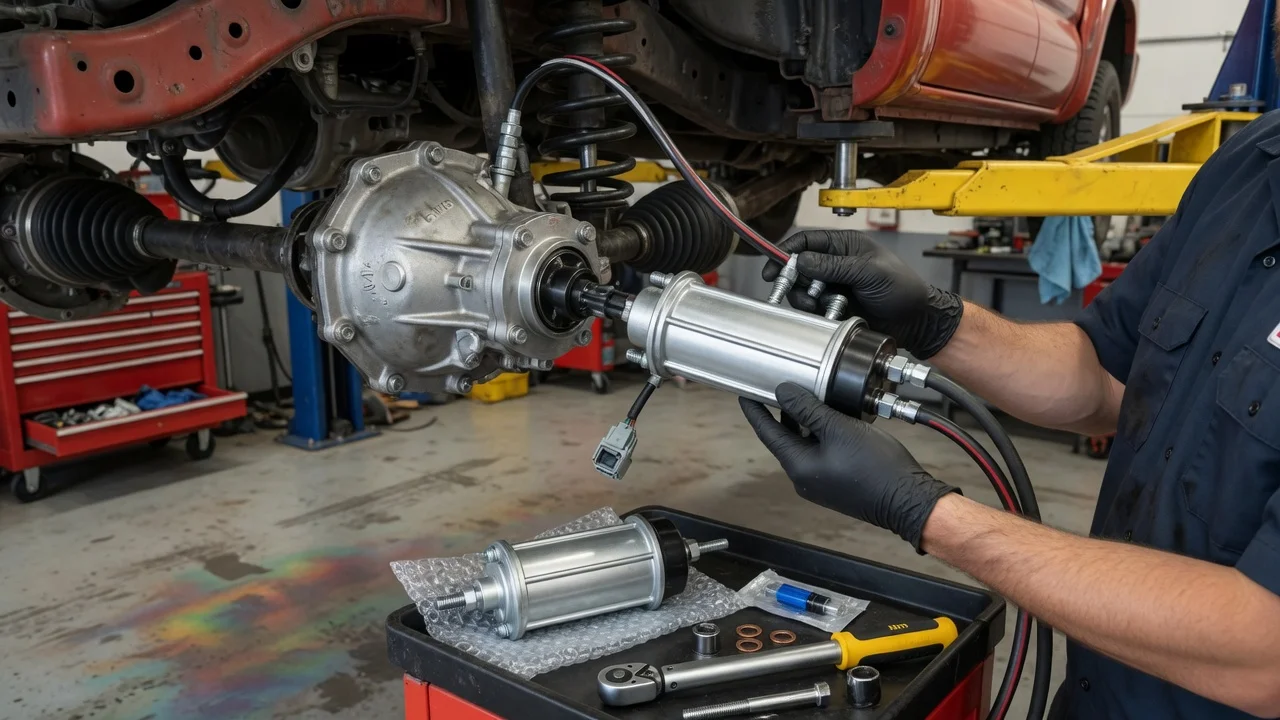
When a Toyota Tacoma won't engage four-wheel drive, the 4WD indicator keeps flashing, or the front axle never locks in, a failed actuator is a common suspect. An owner with the right service information can usually handle the job, but only after testing shows the actuator is the real fault. This guide covers confirming the part, preparing the truck, removing the old unit, installing the new one, and checking the result.
Confirm the part and repair scope
The Tacoma 4WD system can include more than one actuator, so start by identifying exactly which component you are replacing. Depending on generation and vehicle configuration, the term may mean the front differential actuator that couples the front axle, or the transfer case shift actuator on trucks with electronic shifting. Some earlier trucks use a vacuum-operated front differential disconnect controlled by switching valves instead of an electric motor. Match the replacement to your model year, drivetrain and VIN, and compare the part number on the original unit. Connector shape, mounting pattern and shaft design can differ between versions, and a part that looks similar may not fit or work correctly.
Many other faults produce the same symptoms as a failed actuator. These include a blown fuse, a damaged or corroded connector, chafed wiring, a faulty 4WD switch, a bad position switch, a 4WD control ECU problem, low battery voltage or, on vacuum systems, a leaking hose or failed switching valve. Read diagnostic trouble codes with a scan tool that can access the 4WD system. Then inspect the harness and use the wiring diagram to check power and ground at the actuator connector. Your service history matters too. Recent work near the front differential, a suspension lift or an earlier actuator replacement can point to the cause. If the actuator moves when commanded but the front axle still does not engage, the problem is probably inside the differential or transfer case, and a new actuator will not fix it.
Prepare tools and safe access
Get the factory repair information for your exact year and configuration before you start. It contains the removal steps, fastener torque values, gasket or sealant requirements, fluid specification and any initialization procedure, and you should not guess at any of these. Typical tools include: • A socket set with extensions; • A torque wrench; • A floor jack and properly rated jack stands; • Wheel chocks; • A scan tool that reads 4WD codes; • A drain pan; • A plastic scraper; • Shop towels; • The replacement gasket or O-ring, if the new part does not include one
Park on level, solid ground, set the parking brake, put the transmission in park and chock the wheels. Lift the truck only at the jacking points specified for your vehicle, and support it on jack stands before going underneath. Never work under a truck held up only by a jack. You may need to remove a skid plate to reach the actuator. Let the drivetrain cool, and disconnect the negative battery cable as the service procedure directs before unplugging any electrical components. Hand the job to a qualified technician if you are not comfortable working under a raised vehicle, can't read a wiring diagram, or diagnosis points to internal transfer case or differential damage.
Remove without avoidable damage
Clean the area around the actuator thoroughly before loosening anything, so dirt and grit can't fall into the differential or transfer case once the unit is out. Photograph the harness routing, clip locations and actuator orientation. Release the connector lock carefully, because older plastic connectors become brittle with heat and age and are easy to break. On vacuum-operated systems, label each hose so it goes back to the correct port.
Place a drain pan underneath, since some fluid may escape when an actuator mounted to a gear housing is removed. Check the service procedure to see whether the fluid should be drained first. Loosen the mounting bolts evenly. If sealant holds the actuator in place, free it gently and don't pry against the mating surfaces, because gouges can cause leaks later. Before pulling the unit away, note the position of the shift shaft or fork it engages. Avoid moving internal shift parts more than necessary. Clean the old gasket material off the housing, and check for metal debris or broken pieces, which point to internal damage that needs further inspection.
Install and restore the system
Compare the new actuator with the old one, checking the connector, mounting holes and shaft profile, before installing it. The actuator and the internal shift mechanism must be in matching positions, so follow the service procedure for the position each should be in during assembly. Fit a new gasket or O-ring, or apply the specified sealant, then seat the actuator by hand. If it won't seat flush without force, the shaft or fork is misaligned. Stop and correct it rather than drawing it down with the bolts. Tighten the fasteners to the manufacturer specifications and in the sequence the repair information gives.
Reconnect the harness until the lock clicks, and secure every clip so the wiring stays clear of the exhaust, driveshafts and suspension travel. Reconnect any vacuum hoses to their labeled ports. Check the differential or transfer case fluid level, and top up with the specified fluid to the level the manual calls for. Reinstall the skid plate and reconnect the battery. Then clear stored codes and complete any initialization or calibration step listed for your configuration. Some systems will not operate normally until that procedure is finished.
Check the completed work
Start with a stationary check. Cycle through the 4WD modes while following the conditions in your owner's manual, such as vehicle speed and transmission position for each shift. You should hear the actuator operate, and the 4WD indicator should stop flashing and stay steady once engagement is complete. Then drive slowly on a safe, loose surface and confirm that the front wheels pull. Avoid tight turns on dry pavement in part-time 4WD. Shift back to 2WD and confirm the indicator goes out and the front axle disengages without binding.
After a short drive, scan again for codes, check the mating surface for leaks and recheck the fluid level. Inspect the harness routing once more. Further diagnosis is needed if any of the following occur: • The indicator keeps flashing; • Codes return; • You hear grinding or clunking; • The front axle does not engage even though the actuator moves; • The system works only intermittently under certain operating conditions; Record the part number and date in the truck's service history. When the truck is raised for other work on its maintenance schedule, include a quick inspection of the actuator seal and connector.