Toyota Rear Axle Bearing Removal: Identify the Assembly Before Disassembly
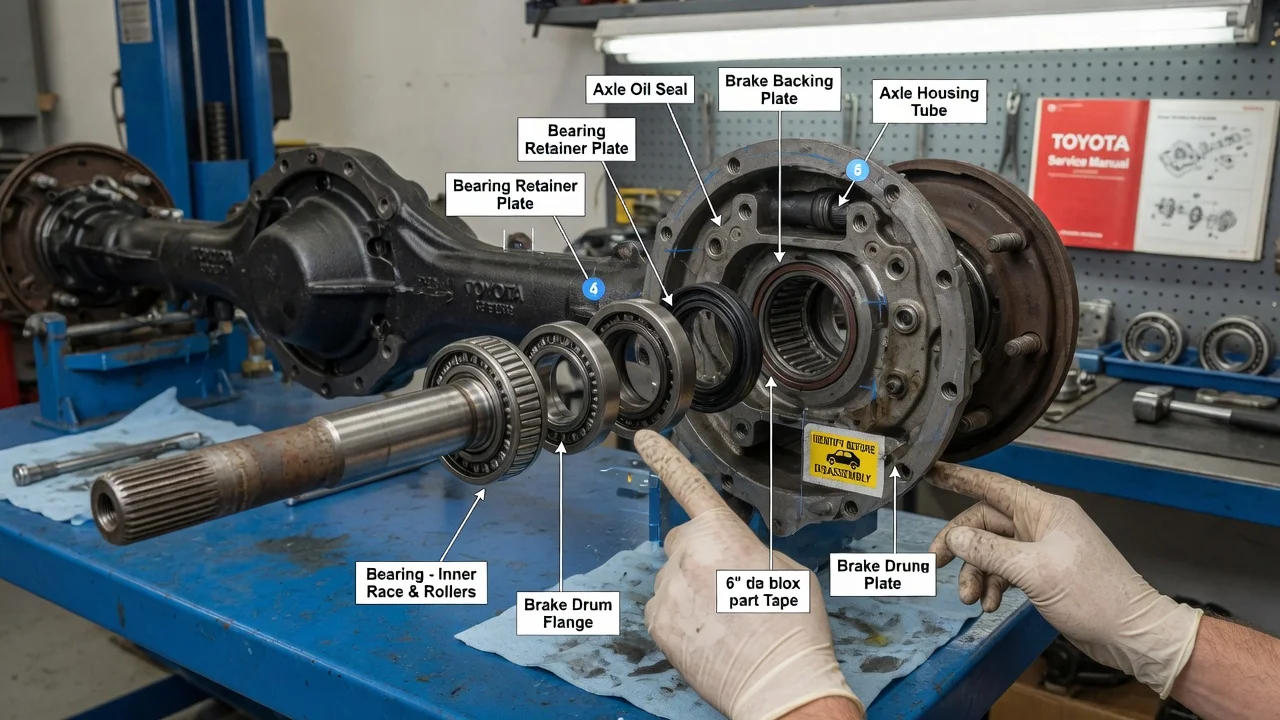
Removing a rear axle bearing on a Toyota is not one universal procedure. A Tacoma or 4Runner with a solid rear axle uses a bearing pressed onto the axle shaft, while most front-wheel-drive and many all-wheel-drive Toyotas use a bolted rear hub bearing assembly. Which design is under your vehicle decides the tools, parts and difficulty of the job. This guide covers confirming the assembly, preparing, removing, reinstalling and checking the work. Exact specifications come from the factory service information for your model.
Confirm the part and repair scope
Start by making sure the bearing is the actual problem. A worn rear bearing usually produces a hum or growl that rises with road speed and may change as weight shifts in turns. With the vehicle safely supported, a failing bearing may feel rough or show play when the wheel is spun or rocked by hand. On solid axles, gear oil on the brake parts or inside the wheel often points to a failed axle seal, which is commonly replaced along with the bearing. Irregular tire wear, differential noise and dragging brakes can sound similar, so a proper inspection comes before buying parts.
Next, identify the exact assembly. Look up parts by VIN, and note the drive layout, the rear axle type, the brake design (drums, or discs with a drum-in-hat parking brake) and how the ABS sensor is mounted. Parts catalogs often split rear bearings by these details. A bearing for another axle version can look nearly identical and still not fit. Your service history also matters: if the bearing was replaced before, you need to know what was installed and whether the job was done correctly.
Then set the repair scope. A bolted hub bearing is replaced as a complete unit. A pressed bearing on a solid axle requires press work, and the manufacturer's procedure usually calls for new seals, a new retainer collar and new gaskets or O-rings. Budget for those parts from the start.
Prepare tools and safe access
Work on level, solid ground with the opposite wheels chocked. Lift only at the points shown in the owner's manual and support the vehicle on rated jack stands, never on the jack alone. You will typically need sockets, a breaker bar, a torque wrench, brake tools, penetrating oil and a drain pan. A solid axle also needs a slide hammer or axle puller, plus the specified gear oil to replace what is lost. If any brake line will be opened, have the correct brake fluid and a way to bleed the system.
Get the manufacturer specifications and procedure for your exact vehicle configuration before you start. That means torque values, axle nut handling, the bearing press sequence, sensor routing and fluid requirements. Generic videos often show a different generation or axle version, so treat them as background and not as instructions.
Be honest about your experience and equipment. Pressing a bearing and retainer collar on or off an axle shaft needs a hydraulic press, proper support plates and eye protection. Cutting off an old collar can easily nick the shaft. Disconnecting brake hydraulics means bleeding afterward, and errors there affect stopping ability. Some owners handle disassembly, remove the shaft themselves and have a shop do the pressing. If you are unsure about the brakes or the press work, have the whole job done professionally.
Remove without avoidable damage
For a bolted hub assembly, remove the wheel, the caliper and its bracket, and the rotor. Hang the caliper so it does not hang from the brake hose. On all-wheel-drive versions the drive shaft passes through the hub, so the axle nut must come off first. These nuts are often staked and must not be reused unless the manual allows it. Disconnect the ABS sensor or its connector, then remove the hub mounting bolts from behind the carrier. Corrosion often seizes the hub in place. Use penetrating oil and controlled tapping on the carrier side, and avoid striking the sensor, the bearing seal or the flange face.
For a semi-floating solid axle, remove the wheel and the drum or rotor and disconnect the ABS sensor. Then remove the retainer nuts, reached through openings in the axle flange. On some designs the backing plate comes out with the shaft, so the brake line and parking brake cable must be disconnected first. The service manual for your model will say whether this applies. Pull the shaft straight out with a slide hammer, keeping the splines from dragging across the inner housing seal, and catch any gear oil that drains.
Once the shaft is on the bench, the old bearing and retainer collar are pressed or cut off according to the procedure. Before anything is separated, note or photograph the orientation of the retainer plate, the seal, any spacer and any sensor ring. Then inspect the bearing journal and seal surface for scoring, wear or overheating.
Install and restore the system
For a bolted hub, clean the carrier mating surface down to bare metal. Rust left under the flange can tilt the new hub, causing runout and early failure. Seat the new hub squarely, install the bolts and torque them to specification. Make sure the ABS sensor is clean and fully seated. On driven axles, install a new axle nut, torque it to the specified value and stake it if the procedure requires.
On a solid axle, assemble the parts in the original order: retainer plate, any seal or spacer, then the new bearing, pressed on with force applied to the inner race only, then the new retainer collar. Orientation matters, so follow the manual and your notes. Replace the inner housing seal and any outer seal, gasket or O-ring. Slide the shaft in carefully so the splines engage the differential without cutting the new seal, then torque the retainer nuts to specification.
Restore everything you disturbed. Reconnect any brake line and bleed the system. Adjust the parking brake as directed. Refill the differential to the correct level with the specified oil. Route the sensor wiring away from moving and hot parts, and torque the lug nuts to the specified value.
Check the completed work
Before driving, confirm that the brake pedal is firm, the parking brake holds and there are no leaks at brake fittings or around the axle housing. The wheel should spin freely without roughness or noise. With the engine running, no ABS or traction control warning lights should remain on.
Road test at low speed first, then at normal speeds, listening for the original noise. If the hum continues, the bearing on the other side or another source may be responsible. An ABS warning after the repair usually points to a damaged sensor, a sensor that is not fully seated or an unplugged connector. Recheck lug nut torque after a short distance if your manual recommends it.
Further diagnosis is needed if you see gear oil seeping behind the brake, hear grinding, notice a pull or find a hub that is noticeably hotter than the other side after a drive. A replacement bearing that fails quickly calls for a review of installation quality and operating conditions, such as heavy towing or deep water crossings. Record the parts and the date in your service history so the next inspection starts from known facts.