Toyota Corolla Brake Pad Replacement: Procedure and Service Planning
Essential Answer
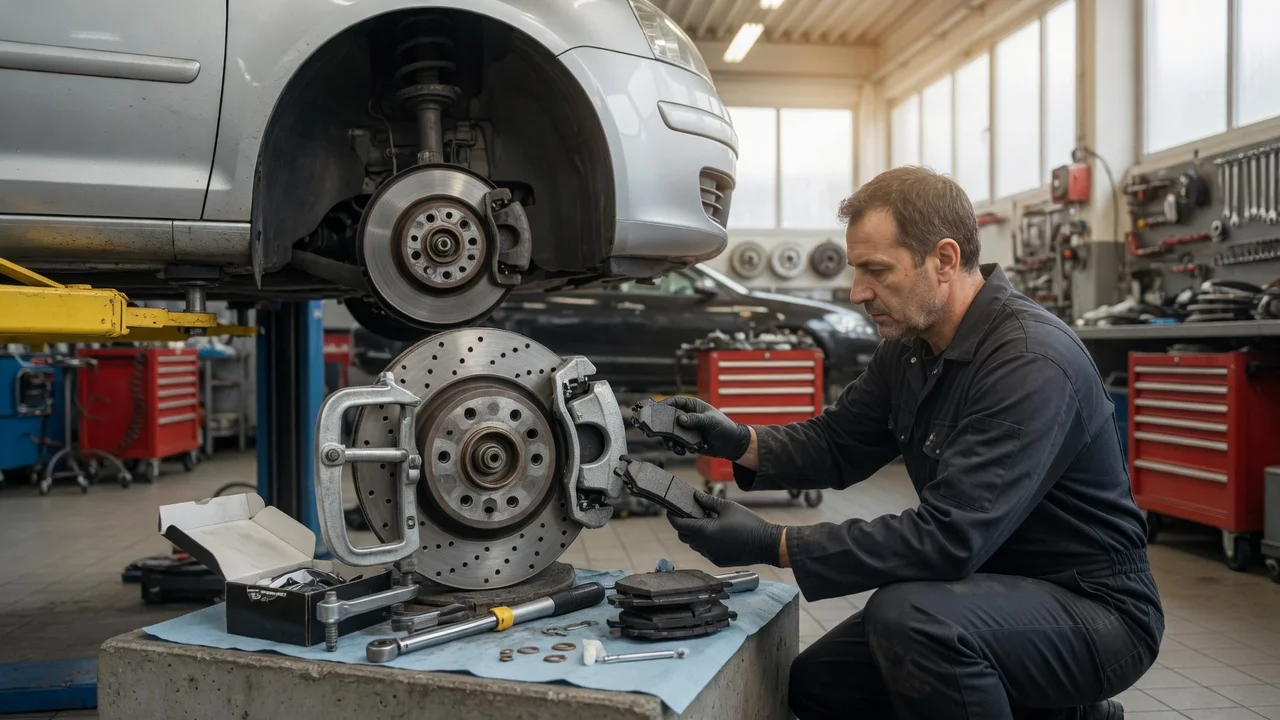
Brake pad replacement on a Toyota Corolla is a routine maintenance task. The core procedure is to safely lift and support the car, remove the wheel, unbolt the caliper, withdraw the worn pads, compress the caliper piston, install new pads with fresh hardware, refit the caliper, and repeat on the other side. The job is generally within reach for a home mechanic with the correct tools and care, but it is not universal across all Corollas. The most important qualification is that exact caliper bolt sizes, torque settings, electronic parking brake retraction, and wear-sensor layout vary by model year, generation, market and trim. Always confirm the procedure for the specific Corolla before starting. Because this task directly affects braking performance, professional service is recommended if there is any uncertainty about pad bedding, caliper condition, slide pin lubrication, or hydraulic system integrity.
Prerequisites and Tools
Before beginning, gather the correct replacement pads and any required hardware for the specific Corolla model year and brake package. Typical items include a lug wrench, a jack, a pair of jack stands, a wheel chock, a socket set and ratchet, a torque wrench, a C-clamp or brake caliper piston compression tool, a wire brush or brake cleaner, a bungee cord or wire hook to support the caliper, high-temperature brake grease for slide pins and pad contact points, and safety glasses and gloves. For Corollas with an electronic parking brake, a scan tool or manual retraction procedure may be required before the rear caliper piston can be compressed. The brake fluid level should be checked, and a clean container may be needed if fluid must be removed before pushing the piston back.
Ordered Procedure
The following steps describe a conventional front brake pad replacement. Rear disc variants follow the same general sequence, but may require retracting an integrated parking brake mechanism or using a caliper piston that rotates while being compressed. For drum brake versions, the procedure is different and is not covered here.
Step 1: Secure the Vehicle
Park the Corolla on a level, firm surface and set the parking brake. Chock the wheel diagonally opposite the corner being worked on. Loosen the lug nuts on the target wheel slightly while the vehicle is still on the ground. Place the jack at an approved lifting point and raise the car. Position a jack stand under a designated support point and lower the vehicle onto it. Never work under a car supported only by a jack.
Step 2: Remove the Wheel and Inspect
Remove the lug nuts and the wheel. Inspect the rotor surface, caliper, flexible brake hose and surrounding suspension for damage, leaks or excessive wear. If the rotor is deeply scored, cracked or below minimum thickness, pad replacement alone may not be safe or effective.
Step 3: Unbolt the Caliper
Depending on the Corolla generation, the caliper may be secured by two slide pin bolts or by a lower pivot bolt and an upper slide pin. Remove the bolt or bolts using the correct socket. Do not let the caliper hang by the brake hose. Support it with a bungee cord or wire hook from the suspension or body. Keep the brake hose relaxed and untwisted.
Step 4: Remove the Old Pads
Swing or lift the caliper away from the rotor and remove the old brake pads. Note the position of any shims, anti-rattle clips, wear indicators or sensors. Some Corolla models have a wear indicator on the inner pad; make sure the new pad is oriented the same way. Clean the caliper bracket and pad abutment areas with a wire brush or brake cleaner. Replace the abutment clips if the new set includes them.
Step 5: Compress the Caliper Piston
Before compressing the piston, check the brake fluid reservoir. As the piston is pushed back, fluid rises. If necessary, remove a small amount of clean brake fluid using a clean syringe or suction tool. Do not spill brake fluid on painted surfaces. For a front caliper with a simple hydraulic piston, use a C-clamp or piston compression tool to slowly press the piston straight back into its bore. For a rear caliper with an integrated parking brake, follow the manufacturer's required rotation or electronic retraction method. Forcing a rotating-type piston straight back can damage the caliper.
Step 6: Install New Pads
Apply a thin, even coating of high-temperature brake grease to the pad abutment points, backing plate contact areas and any shims where specified. Do not apply grease to the pad friction material or the rotor. Insert the new pads into the caliper bracket or caliper body, depending on the design, making sure they move freely without binding.
Step 7: Refit the Caliper
Position the caliper over the new pads and align it with the bracket. Insert the slide pin bolts. Tighten them to the manufacturer's specified torque. Torque values vary by generation and location, so verify the correct figure before tightening. A typical front caliper slide pin bolt may be in the range of 20 to 35 pound-feet, but this is not a universal value and must be confirmed.
Step 8: Complete the Corner
Reinstall the wheel, hand-tighten the lug nuts, lower the car, and torque the lug nuts to the Corolla's wheel torque specification in a star or cross pattern. Repeat the entire procedure on the opposite side. Brake pads should always be replaced in axle sets, meaning both front wheels or both rear wheels.
Completion Check
After replacing pads, press the brake pedal several times before driving. The pedal should firm up as the pads seat against the rotors. If the pedal remains soft, sinks, or requires excessive travel, stop and inspect for leaks, improperly seated pads, or air in the hydraulic system. Check the brake fluid level and top up only with the correct fluid type. During the first few hundred kilometres, avoid hard or prolonged braking unless an emergency occurs. Many pad and rotor combinations benefit from a bedding procedure that transfers an even film of pad material to the rotor, but follow the specific bedding instructions supplied with the pads or vehicle service information. If a firm pedal cannot be achieved or if there is any doubt about the repair, have the brake system inspected by a qualified technician before driving.
Professional Service Boundaries and Cautions
Brake work has narrow safety margins. If the caliper piston boot is torn, the piston is pitted or seized, the slide pins are corroded or binding, the flexible hose is cracked or bulging, or the rotor is below the minimum thickness specification, replacement or machining may be required beyond pad installation. Brake fluid is hygroscopic and degrades over time; a brake fluid flush is a separate service with its own schedule and should not be improvised. Where the service information calls for new single-use bolts, replacement slide pin boots, specific greases or electronic parking brake calibration, those requirements should be followed. If the exact torque values, retraction method or hardware are not known for the vehicle, do not guess. In those cases, the appropriate next action is to consult the applicable repair manual or a professional workshop.