Toyota 4Runner Coolant Flush: Procedure by Year and Engine
What a 4Runner coolant service actually is
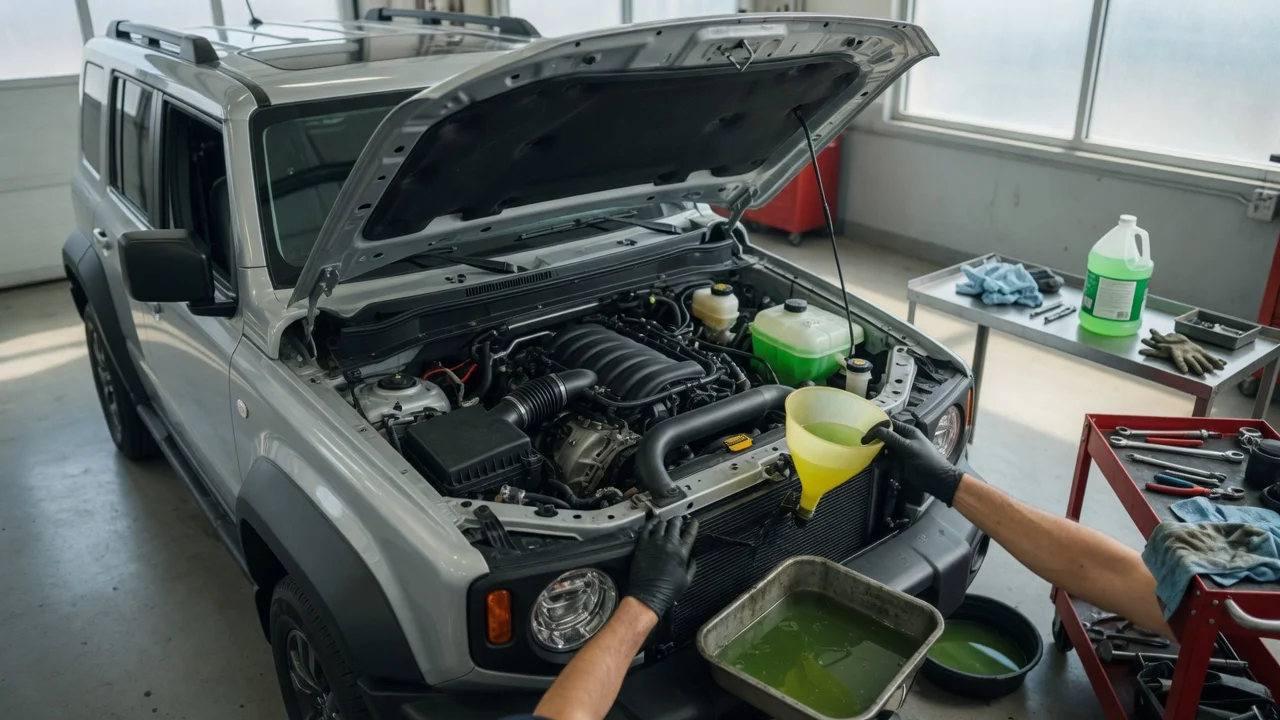
A Toyota 4Runner coolant flush, in shop language, is replacement of the engine cooling-system fluid so the mixture can still protect against freeze, boil-over, and internal corrosion. For most model years Toyota’s scheduled job is a drain and refill with the specified coolant, not a chemical cleaner run through the system. A true flush—draining, rinsing with distilled water until the discharge is clear, then filling with the correct mix—is reserved for contamination, mixed coolant types, or a conversion from an older formula. The right fluid, interval, drain points, and air-bleed method change with generation and engine, so those details belong to the owner’s manual and Toyota service information for that vehicle.
Scope by generation and engine
U.S.-market 4Runners group into a few cooling-system families. Confirm the engine code on the under-hood emissions label before buying fluid or opening drains; trim names do not identify the powertrain by themselves.
Generation Typical U.S. years Common engines; 3rd (N180) 1996–2002 2.7L 3RZ-FE I4; 3.4L 5VZ-FE V6; 4th (N210) 2003–2009 4.0L 1GR-FE V6; 4.7L 2UZ-FE V8 on some trims; 5th (N280) 2010–2024 4.0L 1GR-FE V6; 6th 2025– 2.4L turbo i-FORCE; i-FORCE MAX hybrid
Export, fleet, and early-production examples can differ. Rear-heater or auxiliary-heater plumbing, if fitted, adds volume and extra hoses that must be included in a complete exchange. Hybrid i-FORCE MAX models add a separate high-voltage electronics cooling loop; that circuit is outside a routine engine-coolant drain and is a professional-service boundary.
Coolant type and service interval
Later 4Runners leave the factory with Toyota Super Long Life Coolant (SLLC), a pink HOAT formula sold as concentrate or 50/50 premix. Toyota’s typical SLLC replacement schedule is the first change at 10 years or 100,000 miles, then every 5 years or 50,000 miles, whichever comes first. Earlier 4Runners were filled with red Toyota Long Life Coolant (LLC), which used a shorter interval. The current owner’s manual for that year is the controlling source; if the book, under-hood sticker, and service history disagree, treat the vehicle as unknown until the fluid is identified.
Do not mix SLLC with conventional green IAT coolant, silicate-heavy formulas, or stop-leak additives. If the existing color is muddy, rusty, or clearly mixed, plan a distilled-water rinse after the drain rather than a top-off. Equivalent coolants are acceptable only when they are labeled as compatible with Toyota SLLC (or LLC, if that is what remains in an unrestored older truck). Premixed 50/50 fluid is the simpler fill; concentrate must be mixed with distilled water to the freeze protection specified in the manual, commonly 50/50 for temperate climates.
Exact system capacity in quarts or liters is not restated here. Capacity varies by engine, heater configuration, and whether the block is drained. Read the lubricant-and-coolant or cooling-system specification table in the owner’s manual for that year and engine, and buy extra so the reservoir can be set after the first heat cycle.
When a flush is the wrong job
Skip aftermarket chemical flush products unless a Toyota procedure for that engine calls for a specified cleaner. Residual cleaner left in an aluminum radiator, heater core, or water-pump seal can cause leaks. A drain-and-fill, or a water rinse followed by the specified coolant, is the usual path. If the engine has overheated, the water pump is noisy, the radiator is clogged, or oil and coolant have mixed, cooling-system repair comes before a fluid exchange. Hybrid inverter-coolant work, cylinder-head gasket diagnosis, and heater-core replacement inside the dash are shop jobs.
Tools, fluid, and setup
Work only on a fully cold engine. A pressurized hot system can scald. Park on level ground, set the parking brake, and use jack stands if a block drain requires raising the vehicle; a bumper jack is not a support.
Owner’s manual cooling-system page for capacity, coolant specification, and any bleed-plug note for that engine; Toyota SLLC or the LLC equivalent that matches what the system is supposed to contain; distilled water if rinsing or mixing concentrate; Drain pan large enough for a full system, funnel, gloves, eye protection; Pliers for the radiator drain cock; the correct socket or wrench for an engine-block drain plug if that engine has one; Hose-clamp pliers if hoses must come off; a torque wrench if a block drain plug is removed—use the value in Toyota service information, not a guessed figure; Container for used coolant; ethylene glycol is toxic to people and animals and is handled as hazardous waste at an approved collection site
Drain-and-fill procedure
The sequence below is the common 4Runner method. Stop and use the factory steps wherever they name a bleed plug, fill order, or heater setting for that engine. Tightening values for drain plugs, thermostat housing bolts, and hose clamps are not listed here because they are year- and engine-specific.
Confirm the engine is cold. Open the radiator cap, or the pressurized reservoir cap on designs that use one, only after the system is depressurized and cool to the touch. Set the climate control to maximum heat so the heater core is in the flow path on engines that use a coolant control valve or a full-flow heater circuit. Place the drain pan under the radiator. Open the radiator drain cock; most 4Runner radiators drain from a petcock on the lower tank. Do not force a plastic cock until it snaps. If Toyota service information shows an engine-block drain for that engine, drain the block next. The 1GR-FE V6 used in many 4th- and 5th-generation 4Runners typically has a block drain; 3RZ-FE, 5VZ-FE, 2UZ-FE, and the 6th-generation turbo engines each have their own plug locations. Replace a damaged crush washer and tighten the plug to the service-information value. Drain the reservoir into the pan if the bottle is dirty or the fluid type is being changed. Wipe the bottle; do not leave old fluid to dilute the new fill. If this is a flush rather than a single drain, close the drains, fill with distilled water, run the engine to operating temperature with the heater on, cool fully, and drain again. Repeat until the water runs clear. Do not leave the engine running with a low water level. Close every drain. Fill slowly with the specified coolant through the radiator neck or the designated fill point so air can escape. On engines with a bleed plug on the water outlet or thermostat housing, open that plug until a steady stream of coolant appears, then close it to the specified torque. Fill the reservoir to the FULL COLD mark. Install the cap. Start the engine, hold idle with the heater on high, and watch the temperature gauge. Squeeze the upper radiator hose as it softens to help move trapped air. Add fluid at the fill point only when the engine is cool enough for the cap to be opened safely, or use the reservoir if that is the only cold-fill point. Bring the engine to operating temperature until the thermostat opens and the upper hose is hot. Shut down, cool fully, and reset the radiator and reservoir to the cold marks. Inspect the drain cock, block plug, hoses, and water pump for seepage.
Year- and engine-specific notes
3rd generation (1996–2002), 3RZ-FE and 5VZ-FE: Many of these trucks still contain red LLC or a mixed fill from later top-offs. Identify the fluid before adding pink SLLC. A distilled-water rinse is the conservative path when converting types. Heater-core and radiator condition matter on high-mileage examples; brown sludge or scale is a reason to inspect rather than only refill.
4th generation (2003–2009), 1GR-FE and 2UZ-FE: Factory fill on these years is generally SLLC. The V6 and V8 do not share drain locations or capacity. The 2UZ-FE V8 cooling system is larger and uses its own thermostat housing and bleed path. Follow the V8 procedure if that is the engine in the bay, even on a 4Runner that looks identical to a V6 model from the outside.
5th generation (2010–2024), 1GR-FE: This is the long-running 4.0-liter V6 family. Drain the radiator and the block for a meaningful exchange; radiator-only drains leave a large volume of old fluid in the engine. Use the bleed provision Toyota shows for the water-outlet area on this engine. After a refill, a low heater output or a climbing temperature gauge on a grade is a sign of remaining air, not an invitation to add stop-leak.
6th generation (2025–), i-FORCE and i-FORCE MAX: Use only the coolant specification printed for that powertrain. Turbocharged engines are sensitive to aeration and to running low. On hybrid models, treat any orange high-voltage warning, inverter-coolant reservoir, or service plug as out of scope for a driveway engine-coolant change. If the engine and hybrid loops share a service campaign or a distinct fluid, the dealer or a hybrid-qualified shop should handle that portion.
Completion check
The job is complete when all of the following hold after a full cool-down and a short drive that includes heater use: the reservoir sits on the cold mark, there is no drip at the radiator cock or block plug, the temperature gauge stays in the normal range, cabin heat is strong, and the overflow bottle is not sucking air or dumping fluid. Recheck the cold level again after a day of mixed driving. Used coolant is not poured on the ground or into household drains.
Precautions and shop limits
Never open a hot radiator or reservoir cap. Never run the engine with the system empty. Replace a weeping water pump, a swollen hose, or a stuck thermostat instead of masking them with fluid additives. If the engine overheated, if oil is in the coolant, if the hybrid inverter loop is involved, or if a bleed plug or block drain will not come free without damage, stop and have the vehicle serviced. Torque figures, bleed-plug locations, and fill capacities in this guide are intentionally omitted where the factory value is required; look those up for the exact year and engine before the first wrench turn.