Tire Bead Sealer: When and How to Use It
Before you start
Tire bead sealer is a thick sealing compound applied where the tire's bead meets the rim. It can fill small gaps caused by minor rim corrosion, light pitting, or a slightly damaged bead area, but it is not a permanent tire repair. Do not use it alone to fix a punctured tread, a cracked sidewall, or a bent rim. The job is manual and local; it does not require an online account, internet connection, or remote service.
Work only on a deflated tire that has been safely supported. Remove the wheel from the vehicle when possible, place it on a stable surface, and keep your hands away from the bead area while adding air. Check the tire and rim for damage first. If the tire is cut, bulging, or showing exposed cords, do not rely on bead sealer. Clean the bead and rim thoroughly because dirt, old rubber, and moisture can prevent the sealing compound from taking hold.
Think of a camera lens cleaning routine: the seal depends on a clean contact surface. The same rule applies here. Residue left on the rim bead seat can allow air to escape even after sealer is applied. Use a stiff brush or a mild cleaning method appropriate for the rim finish. Dry the surface completely before moving on.
Step-by-step instructions
The exact application method can vary by product. Many bead sealers are brushed or wiped on, while others are sprayed around the bead area. Read the product label for the required drying or setup time and for any temperature restrictions before you begin.
1) Deflate and separate the bead
Remove the valve core and let all air escape from the tire. Press the tire sidewall inward to move the bead away from the rim lip. On stubborn wheels, a proper bead-breaking tool may be needed. Do not use sharp tools that can cut the bead or scratch the rim.
2) Inspect and clean the contact area
Look for corrosion, flaking coating, or old rubber stuck to the bead seat. Clean the rim and the tire bead with a suitable brush or pad. Remove loose material and wipe the area dry. Bead sealer cannot compensate for heavy rust or a deeply scored rim.
3) Apply the sealer
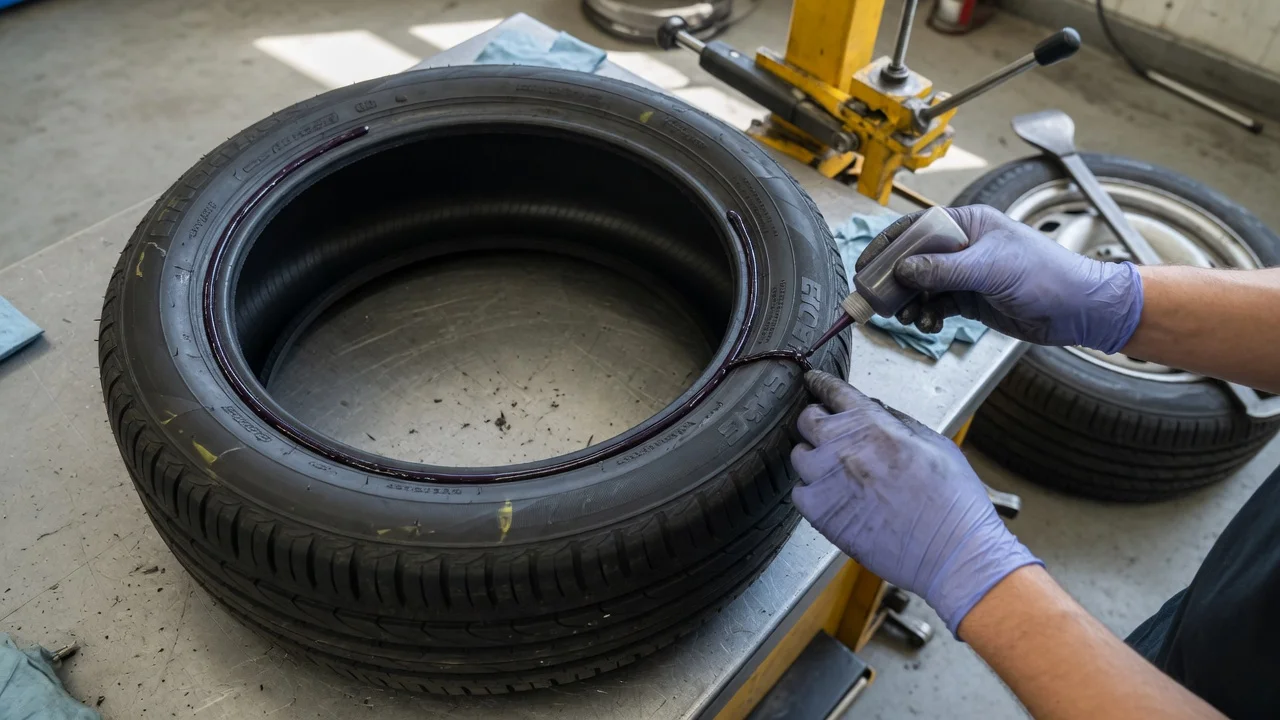
Apply a thin, even layer only to the tire bead or the rim bead seat, following the product directions. Avoid letting sealer run onto the tread or into the valve opening. A thin coat is usually enough; excess compound can squeeze out and make a later tire change more difficult.
4) Seat the bead and inflate
Position the tire back onto the rim and add air in short bursts. Keep your body out of the direct path of the tire and rim during inflation. The bead may pop sharply when it seats. Inflate to the vehicle manufacturer's recommended pressure, then reinstall the valve core and check for leaks.
Check the output
A correct result is a tire that holds air with no visible bubbling at the bead after the sealer has set. Mix a little soapy water and brush or spray it around the bead area, then watch for new bubbles. Small bubbles that form once and stop are usually residual air escaping from the application zone; steady, repeated bubbling means the seal is incomplete.
Recheck the pressure after a short drive and again before your next trip, because a slow leak can take time to become obvious. Bead sealer is a gap filler, not a structural repair. It can seal minor bead-area leaks, but it has no meaningful effect on tread punctures, valve damage, cracked rubber, or a rim that is out of round.
Common problems and next steps
If the bead is still leaking, the most useful corrections are to break the bead again, clean the surface more thoroughly, and apply a fresh thin layer. Leaks that continue after a second careful application often indicate a damaged tire bead, a corroded or cracked rim, or a wheel that should be inspected by a tire shop.
Do not layer more sealer repeatedly when the leak continues. Sealer in the wrong place can make the rim hard to clean later and can hide underlying damage. If the tire leaks quickly, does not hold pressure after a refill, or shows visible bead or sidewall damage, stop and have the wheel inspected rather than driving on it.
A tire pressure monitoring warning that returns after the repair may mean that the bead is still not fully seated or that another leak is present. Check the valve core, valve stem base, and the bead again with soapy water. If the warning persists with the tire at the recommended pressure, treat the wheel as unresolved.