Thule Roof Rack Installation: Following the Instructions for Your Mounting System
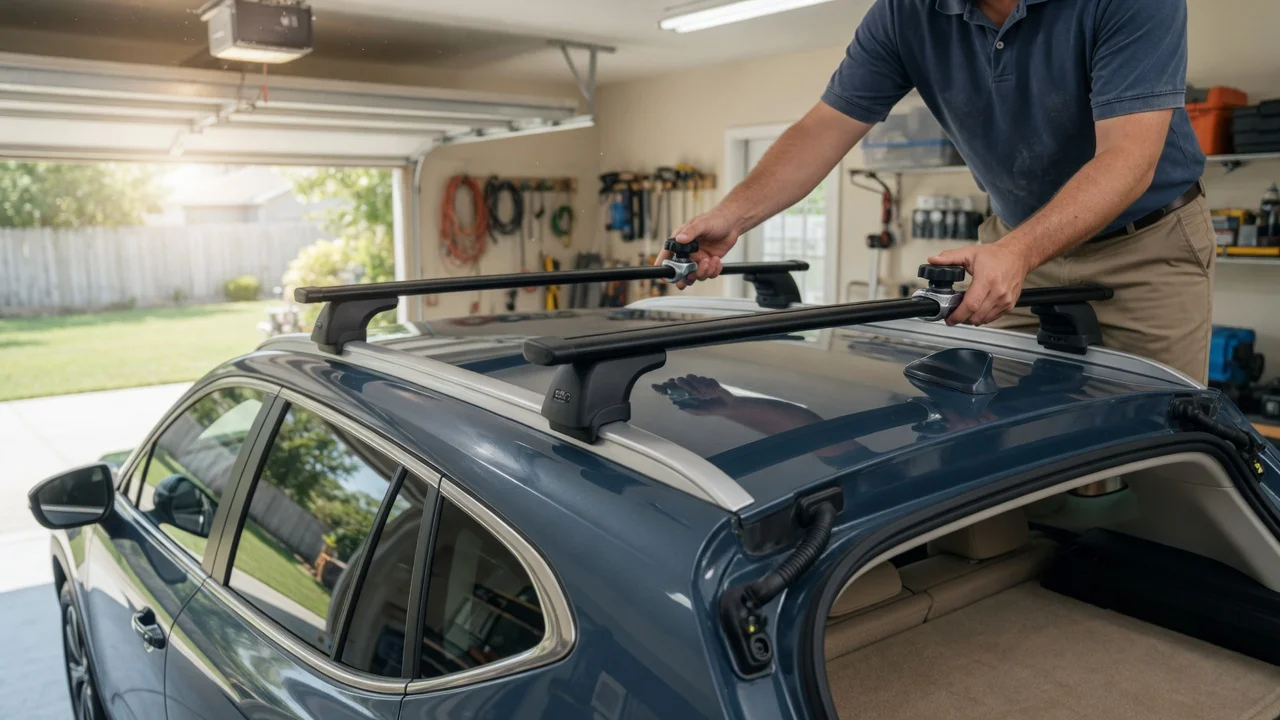
What this installation actually requires
A Thule roof rack is not a single universal product. It is a matched set of feet, load bars, and a vehicle-specific fit kit (sometimes called a mounting kit). The instructions that belong to your mounting system are the ones that govern placement, clamp or rail hardware, tightening sequence, and load limits. Those printed or kit-included instructions, together with the vehicle-specific fit information for your make, model, year, and roof type, are the source of record. This guide explains how to follow that package so the rack is assembled and seated correctly; it does not replace the kit booklet or any torque, spacing, or load figures printed there.
If the roof type, generation, or market of the vehicle does not match the fit kit, stop and obtain the correct kit before fitting hardware. Clamp feet, raised-rail feet, flush-rail feet, and fixed-point feet use different attachment methods. Mixing parts from another system, or using a kit written for a different roof, is outside the supported installation.
Confirm the system, the vehicle, and the kit
Before tools come out, identify three things: the roof architecture, the Thule foot and bar family you have, and the fit-kit part number. Common roof types include bare roof (no rails), raised side rails, flush or integrated rails, and factory fixed mounting points or tracks. Thule organizes feet around those roofs. The load bars (square, aerodynamic wing, or similar) sit in the feet and must be the length specified for that vehicle, not merely a length that looks close.
The fit kit supplies the pads, clamps, covers, and fasteners that interface with that exact roof. Kit contents and the matching instruction sheet are vehicle-dependent. Compare the kit number and the listed vehicle against the car in front of you, including model year and body style (sedan, wagon, SUV, and cab or bed configuration on trucks). A kit that fits one generation often does not fit the next, even when the nameplate is the same.
Match roof type: bare, raised rail, flush rail, or factory fixed points. Match foot pack and bar family to that roof and to each other. Match fit-kit number and listed vehicle, year, and body style. Keep the instruction sheet that shipped with the feet and the sheet that shipped with the fit kit; both apply. Do not proceed if any of those items disagree.
What you need on hand
Most Thule mounting systems are designed to be owner-installed with the tools named in the kit instructions. Typical needs are a clean, level parking surface, the included Thule tool or a compatible hex or Torx driver if the booklet specifies one, a tape measure for bar overhang and foot position, and a second person to hold bars while feet are aligned. Some kits include a torque tool or call for a torque wrench; use whatever the booklet specifies. Do not substitute a random driver size.
Manufacturer tightening values, pad positions, and minimum or maximum bar overhang are not interchangeable across kits. Those numbers appear in the instructions for your mounting system and fit kit. This article does not list torque figures, millimetre spacings, or load ratings because those values are variant-specific and were not verified here against a particular Thule booklet. If a figure is missing from your papers, obtain the current instructions for that exact foot pack and fit-kit number rather than estimating.
Safety boundaries before you start
Work on a parked vehicle with the parking brake applied. Keep doors, sunroof, and panoramic glass clear of clamps and feet until the instructions say those surfaces may be closed. Do not drill the roof unless the documented system for that vehicle is a drilled or fixed-point kit that explicitly requires it. Factory tracks and threaded points must be used only as the fit kit describes; aftermarket holes are a body-shop or professional-installer job when the official system does not call for them.
A rack that uses door-frame clamps must not pinch weatherstrip in a way the booklet forbids, and it must not sit on glass or on a plastic roof cladding the kit does not cover. If the roof has a factory crossbar, a glass roof, a carbon or composite panel, or a load rating printed on the door jamb or in the owner’s manual, those limits still apply. The lower of the vehicle roof rating and the Thule system rating is the working limit. Professional installation is appropriate when the roof is damaged, the threaded inserts are seized or missing, or the kit and the vehicle still do not agree after you recheck the fit list.
Installation steps
The sequence below is the common order for Thule foot-and-bar systems. Your booklet may add system-specific substeps (for example, inserting a rubber strip in a wing bar, clipping a clamp around a raised rail, or threading a bolt into a factory point). Follow those substeps at the point they appear. Do not skip a dry-fit.
1) Unpack and inventory against the instructions
Lay out feet, bars, pads, clamps or rail hardware, covers, locks if included, and every fastener. Tick each item against the parts list in the mounting-system and fit-kit instructions. Confirm left and right feet if the kit is handed. Missing pads or the wrong clamp profile is a stop condition; those parts set how load is spread on the roof.
2) Prepare the roof
Wash and dry the contact areas so grit cannot sit under pads. For clamp systems, open the doors if the instructions require access to the door frame. For rail systems, confirm the rails are firmly attached to the body and free of heavy corrosion at the clamp zone. For fixed-point systems, locate the factory covers or threaded points exactly as the fit-kit diagram shows; the diagram is vehicle-specific and is not interchangeable with a similar-looking roof.
3) Assemble feet and pads as the kit shows
Fit the rubber or plastic pads, adapters, and any internal plates to each foot in the orientation drawn in the instructions. Pad shape and orientation are part of the load path. A pad flipped or swapped left-to-right can concentrate load on a thin roof panel or miss the rail. Do not add extra packing, weatherstrip, or aftermarket pads unless the Thule sheet calls for them.
4) Position the feet on the vehicle
Place the four feet (or the number your system uses) at the stations the fit-kit diagram marks. That diagram typically defines position by a measurement from a roof feature, by a slot in a factory rail, or by a named fixed point. Measure both sides so the front pair is square to the rear pair and the bars will sit parallel. On raised or flush rails, set each foot so the clamp or hook engages the rail section the booklet names, not an arbitrary point that merely looks sturdy.
Door-frame clamp systems often require a specific fore-aft location so the clamp lands on the reinforced portion of the frame. If the instructions give a range, stay inside it. If they give a single station, use that station. Do not invent a position from another vehicle.
5) Fit the load bars to the feet
Slide or drop each bar into the feet according to the bar family’s instructions. Set left and right overhang so both sides meet the minimum and maximum overhang in the booklet, and so the bars are centred on the vehicle. Uneven overhang can leave a foot short of support or put the bar end outside the approved envelope. If the system uses a measurement to a door, drip rail, or bar end cap, take that measurement on both sides before you fully tighten.
6) Tighten in the order and to the values in the booklet
Snug the hardware first so the feet cannot walk, then apply the final tightening sequence the instructions describe. Many Thule systems tighten clamps or foot bolts in a left-right or front-rear pattern so the bar stays square. Use the Thule tool or torque wrench the kit names. Stop at the specified tightness; over-tightening can crush a rail, deform a door frame, or strip a fixed point. Under-tightening allows the rack to shift. Because the correct value depends on the foot pack and fit kit, read it from your sheet at this step. If the sheet is missing, do not guess a number from a different Thule product.
7) Install covers, locks, and any remaining clips
Fit the plastic covers and lock cylinders if the kit includes them. Covers are not only cosmetic; they often retain a clamp or protect a mechanism. Confirm that doors, hatches, and a sunroof still open and close without striking a foot or bar. If a door will not close, the foot is in the wrong station or the clamp is on the wrong part of the frame; loosen and return to the positioning step rather than forcing the door.
8) Completion check before you load cargo
Every foot sits fully on its pad or rail, with no twist or daylight where the instructions require full contact. Bars are parallel, centred, and within the stated overhang. All specified fasteners are present and tightened to the booklet values. Clamps or rail hooks capture the intended structure, not glass, cladding, or weatherstrip the kit forbids. Doors, hatch, and sunroof operate without interference. Locks, if fitted, turn and retain the covers. No kit leftover that the parts list says must be installed. Vehicle roof load and Thule system load both identified; cargo will stay at or below the lower figure.
After a short first drive, recheck tightness as the instructions require. Many Thule booklets call for a re-torque or a hand check after the first outing, because pads settle and clamps can lose a small amount of preload. Repeat that check after any removal and refit, and at the interval the booklet names for long trips.
What the instructions will not let you skip
Load rating is a system rating, not a bar-only rating. Accessories such as a cargo box, bike trays, or a kayak carrier have their own limits and attachment instructions. Those accessories mount to the bars only after the rack itself is complete and checked. Crosswind, speed, and on-road behaviour of a loaded rack are also covered in the Thule load-carrier instructions and in the vehicle owner’s manual; stay within both.
If anything in the physical fit contradicts the diagrams—feet that cannot reach the drawn station, a clamp that will not close on the rail, a fixed-point bolt that is too short or too long—the installation is not complete. That is a kit-mismatch or a damaged-roof problem, and it is the point to involve a Thule dealer or a professional installer rather than modifying brackets.
Gaps you should fill from your own papers
This guide does not contain verified millimetre positions, Newton-metre or inch-pound tightening values, bar lengths, or kilogram or pound load ratings for any named Thule foot pack, bar, or fit kit. Those figures change by mounting system, kit number, and vehicle. Pull them from the current instructions that ship with your feet and fit kit, and from the roof-load statement in the vehicle owner’s manual. If those documents disagree with an older printout or with a listing for a different year, treat the documents that match the parts in the box and the vehicle in the driveway as controlling.