Steering Linkage Ball Joints: Identification and Fitment
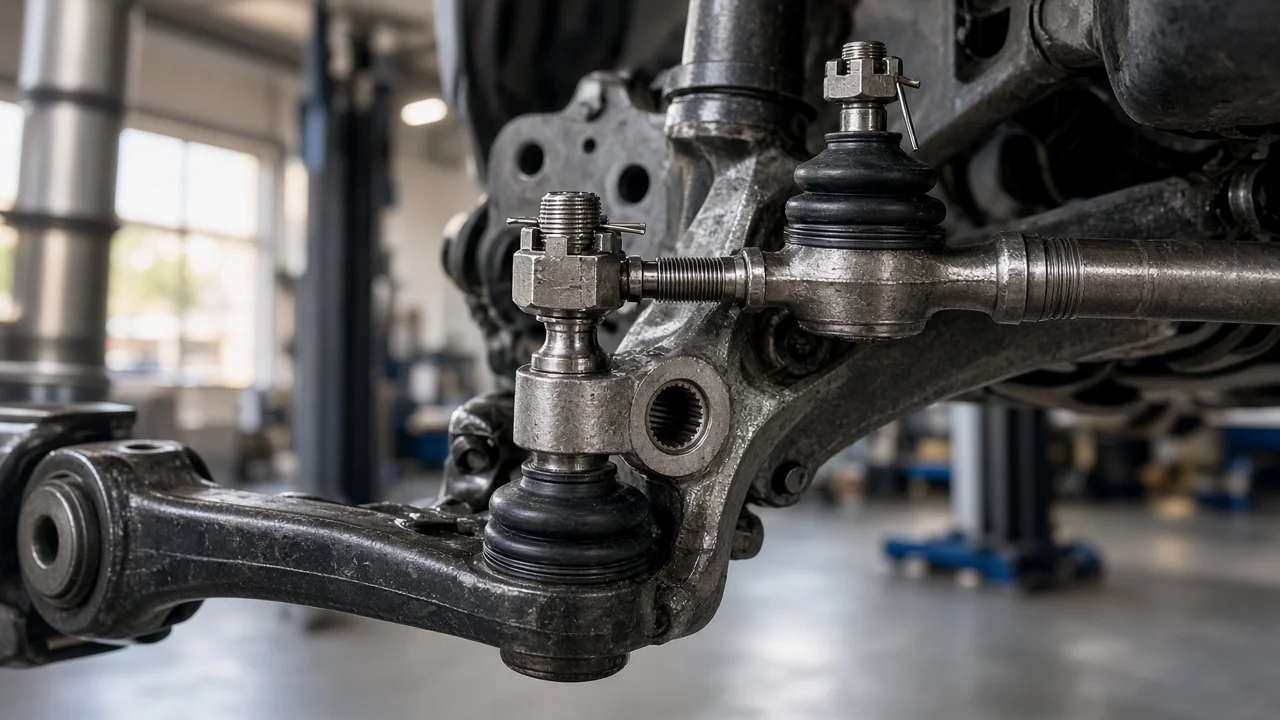
A steering linkage ball joint is any pivoting ball-and-socket connection that carries steering motion from the steering gear to the wheels. Most owners know them as tie rod ends, but drag links and center links use the same design. Buying the right one depends on knowing which joint is worn, which steering layout your vehicle uses and how the replacement must match the original. This guide covers identification, fitment checks and what to plan for after installation.
Which part you actually need
Identify the joint by its position in the linkage, then match the replacement to your exact vehicle build rather than to the part's appearance. On rack-and-pinion steering, the usual ball joints are the inner tie rod, which threads into the rack, and the outer tie rod end, which connects to the steering knuckle. On parallelogram or recirculating-ball systems found on many trucks and older vehicles, you may also find a center link or relay rod, a drag link, tie rod ends on both sides and adjusting sleeves between them. Steering linkage joints are separate from the upper and lower suspension ball joints that hold the knuckle to the control arms, although both can produce similar clunks and wander. Ordering by catalog listing for year, make, model, drivetrain and steering type is the starting point. Confirming the listing against the part on the vehicle is what prevents a wrong fit.
How a steering linkage joint works
Each joint is a hardened ball stud held in a socket, usually with a bearing insert and a spring or preload element, sealed by a rubber or polyurethane boot. The tapered stud passes through a matching tapered hole in the knuckle, pitman arm or another link, and a nut pulls the taper tight so the stud cannot turn in its seat. All rotation then happens inside the socket. This lets the linkage follow suspension travel and steering input at the same time while keeping the wheels pointed where the driver intends.
Wear shows up as joint play: the ball begins to move axially or sideways in its socket. Because tie rods set toe, even small play lets toe change under load, which can feel like vague steering, wander, a clunk over bumps or a knock when turning the wheel at a stop. A torn boot lets grit and water in and usually speeds up wear. Some joints have grease fittings for periodic service, while many modern ones are sealed and cannot be lubricated.
What changes the right replacement
Steering layout is the biggest factor. A rack-and-pinion car uses a fairly simple inner and outer tie rod pair, while a solid-axle truck may use a drag link and a tie rod between the knuckles with different tapers, lengths and thread directions. Within one model, drivetrain matters: two-wheel-drive and four-wheel-drive versions often use different knuckles and linkage. Heavy-duty or towing packages, chassis cab versions, mid-year production changes and different steering gear suppliers can also change the correct part, which is why a catalog may list two options for the same year.
Modifications change the answer too. Lift kits, leveling kits and lowered suspension alter ride height and linkage angles. Some kits require a specific drag link, a raised steering arm or a different tie rod configuration, and a stock-length part may bind or run out of adjustment. Adjusting sleeves often use a right-hand thread on one end and a left-hand thread on the other, so the replacement end must match the side it replaces. If an aftermarket or previously replaced component is installed, compare against what is actually on the vehicle, not only against the factory listing.
How to check joints and confirm fitment
Inspect only with proper vehicle support. For a steering check, many technicians keep the front tires loaded on the ground, on ramps or on a drive-on lift, then have a helper rock the steering wheel side to side while they watch and feel each joint. Movement between the stud and its socket, rather than the whole link moving together, indicates joint play. Never work under a vehicle held only by a jack. Also look for torn or missing boots, a bent link or sleeve, and a loose or missing nut or cotter pin. Follow the manufacturer's inspection method and wear limit where one is published, because the procedure differs between designs.
To confirm fitment, compare the old and new parts side by side before installing: overall or center-to-center length, stud diameter and taper, thread size and direction, whether the nut is a castle type with a cotter pin or a self-locking type, and whether the part is greaseable. The taper must seat fully in its mounting points without the stud shoulder bottoming out. Separate the old joint with a suitable puller or separator; a fork-style tool can tear the boots of neighboring joints. Count or measure the exposed threads on the old outer tie rod end so the new one starts at a similar position. This only gets the vehicle to an alignment shop and does not replace measuring toe.
Tighten every nut to the fastener specification in the service information for your vehicle, and replace any nut, cotter pin or hardware the manufacturer says must not be reused. If a castle nut slot does not line up with the cotter pin hole at the specified torque, follow the service manual's instruction for that situation instead of guessing. Never heat, weld or straighten steering linkage components.
Why an alignment follows replacement
Replacing a tie rod end, inner tie rod, drag link or adjusting sleeve changes the effective length of the linkage, so a wheel alignment is needed afterward. Careful thread counting leaves toe close but not correct, and incorrect toe can wear tires quickly and make the vehicle pull or feel unstable. On vehicles with an adjustable drag link, the alignment also centers the steering wheel. The vehicle should be at its normal ride height, with correct tire pressures and no unusual load, when alignment is measured. If other worn joints turn up during inspection, replace them first so the settings hold.
Limits of a home diagnosis and next steps
Not every clunk or wander comes from a steering linkage ball joint. Worn suspension ball joints, control arm bushings, wheel bearings, a loose steering gear mount or a worn steering shaft joint can produce similar symptoms, and some components can only be checked correctly with a specific load on the suspension. Part numbers, torque values, inspection limits and alignment settings are model-specific, so use the service information for your exact vehicle instead of general figures.
If you find obvious play, a separated joint, a bent link or a missing retainer, do not drive the vehicle until it has been inspected, because a failed steering joint can cause loss of steering control. Have a qualified technician confirm the diagnosis if you are unsure, and schedule an alignment after any linkage replacement. When ordering parts, keep your VIN, drivetrain, any lift or leveling details and photos of the old part ready so the supplier can match the exact fitment.