How to Replace an ABS Tone Ring on a Ford Escape
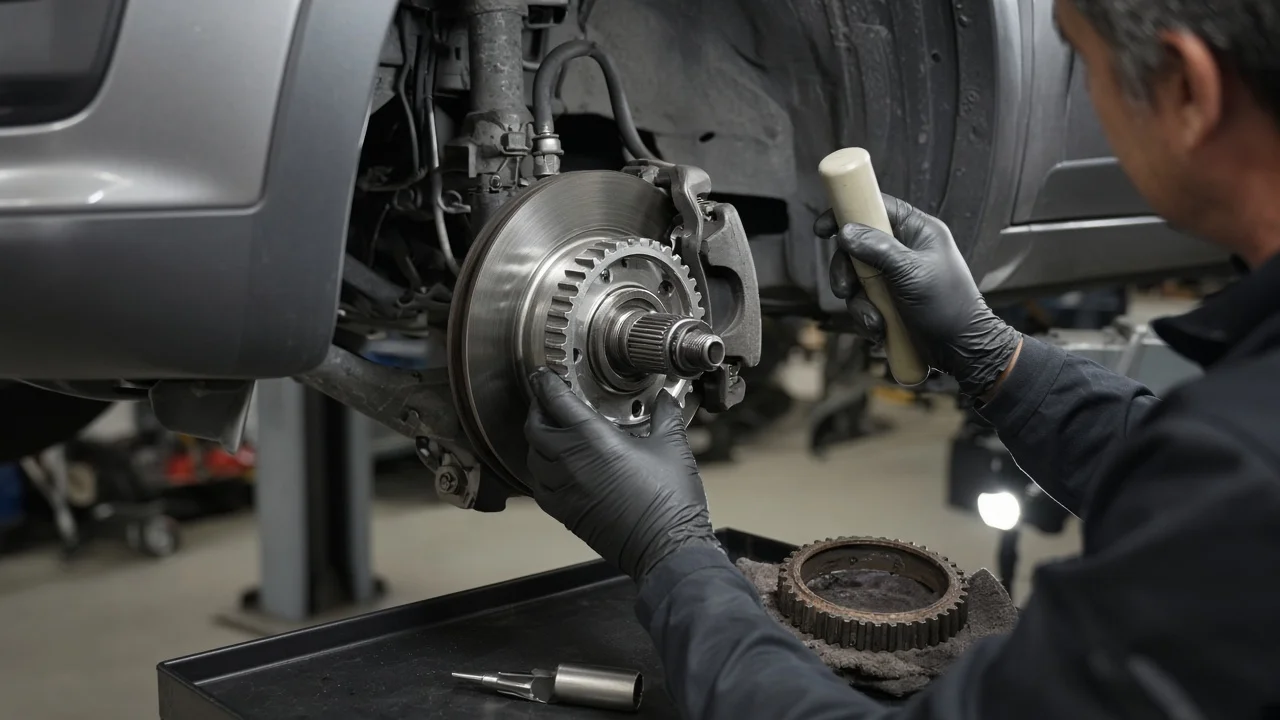
A damaged ABS tone ring can disable anti-lock braking and stability control on a Ford Escape. It usually shows up as ABS and traction warning lights. An experienced home mechanic can replace the ring, but the procedure depends on model year, drivetrain and where Ford placed the ring. This guide covers confirming the diagnosis, preparing safely, removing the old ring, installing the new one and checking that the system works.
Confirm the part and repair scope
Start by confirming the ring is the problem. A wheel speed sensor reads the ring's teeth or magnetic poles and reports wheel speed to the ABS module. A ring that is cracked, corroded, swollen, missing a tooth or shifted on its seat produces an erratic or dropped signal. That typically sets a wheel speed sensor trouble code and turns on the ABS light. A failed sensor, a chafed harness, a corroded connector or excessive bearing play can cause the same symptoms. Before buying parts, scan the codes, compare live wheel speeds while driving slowly, and inspect the ring with the wheel removed.
Vehicle fitment matters more than usual on this job. Depending on the Escape's generation and drivetrain, the ring may take one of three forms. It can be a separate toothed ring pressed onto the outer CV joint, a ring built into the hub, or a magnetic encoder integrated into the wheel bearing seal. A separate pressed-on ring can be replaced by itself. If the ring is part of the hub, bearing or CV axle, the repair means replacing that assembly instead. Match the part to your VIN, wheel position and drivetrain, and compare its tooth count and inner diameter with the original.
Prepare tools and safe access
Work on a level, firm surface with wheel chocks, a floor jack and rated jack stands. Never work under a vehicle held up only by a jack. Typical tools are a breaker bar and the correct axle nut socket, metric sockets and wrenches, a torque wrench, penetrating oil and a brass drift. You also need a wire or hook to support the caliper, plus a ring installer or a driver tube that contacts the ring evenly. A scan tool that shows ABS codes and live wheel speed data is strongly recommended for diagnosis and the final checks.
Get the service procedure for your exact model year before starting. It gives the torque values and tells you whether the axle nut must be replaced. It also gives the ring's press depth and says whether the axle has to come out of the vehicle. The job involves high-torque fasteners, brake components and precise pressing. A professional shop is the safer choice if you have never removed a caliper, rotor or axle nut, or have no way to seat the ring squarely. If the ABS and brake warning lights are on together, or the pedal feels abnormal, stop driving and have the braking system checked.
Remove without avoidable damage
With the wheel still on the ground, loosen the axle nut and lug nuts. Then raise and support the vehicle and remove the wheel. Unplug the wheel speed sensor and remove it, or at least move it clear so it doesn't get cracked or bent. Corroded sensors can seize in their bores. Soak them with penetrating oil and work them out gently instead of prying on the plastic body.
Remove the caliper bracket bolts and lift off the caliper and pads together. Hang the caliper from the suspension so the flexible brake hose carries no weight. Leave the hydraulic lines closed so the brake fluid circuit stays sealed, and don't press the brake pedal while the caliper is off. Next, remove the rotor and free the axle from the hub. If the axle must come out, follow the service information for separating the lower ball joint or tie rod. Support the axle so the inner joint is not overextended.
A pressed-on ring is usually removed with a puller sized for the ring. Another common method is a shallow cut with a rotary tool, followed by splitting the ring with a chisel. The risk is damaging the CV joint housing or the ring seat, so cut only partway through before splitting. Clean rust and scale off the seat without removing base metal. Check the seat for pitting or damage that would stop the new ring from sitting true.
Install and restore the system
Confirm the new ring matches the old one and look for a chamfer or step on its inner bore. That edge normally faces the joint so the ring starts squarely on the seat. Press the ring on with a tool that bears evenly on its full face, and never hammer on the teeth. Seat it to the depth in the service information, or to the original position. A ring that is cocked or not fully seated produces a wobbling signal. Some technicians warm the ring to ease installation; if you do, use gentle, even heat, and never heat a magnetic encoder. On bearing-integrated encoders, the encoder side must face the sensor. Keep the bearing free of metal debris, which can stick to the magnetic track.
Reinstall the axle, hub connections and suspension parts, then fit the rotor, pads and caliper. While the corner is apart, check the brake pads and rotors against their wear limits. Keep grease, oil and penetrating spray off the friction material and rotor surfaces. Clean the sensor tip and bore, push the sensor fully home, and route its harness through the original clips so it cannot rub on the tire or axle. Tighten every fastener to specification. Use a new axle nut where required; it is usually torqued with the wheel on the ground. Pump the brake pedal until it is firm before moving the vehicle.
Check the completed work
Clear the stored ABS codes with a scan tool. Then drive at low speed in a safe area while watching live wheel speed data. All four readings should rise and fall together smoothly. A reading that drops out, spikes or lags the others points to a remaining fault. Make sure the ABS and traction control lights go out after the self-check. Some faults only clear once the module sees a valid signal at speed.
Further diagnosis is needed if any of these occur: the warning light or code returns, the pedal pulsates, ABS activates during normal stops, or the repaired corner grinds or clicks. These signs can mean a misaligned or damaged ring, the wrong part, damaged sensor wiring, or wheel bearing play. Recheck your work, and if the cause isn't obvious, have a professional scan the system before you rely on the anti-lock brakes. If the service information calls for it, recheck axle nut and lug nut torque after a short drive.