Rebuilding an Alternator: What Wears Out, What Kits Include, and When It Makes Sense
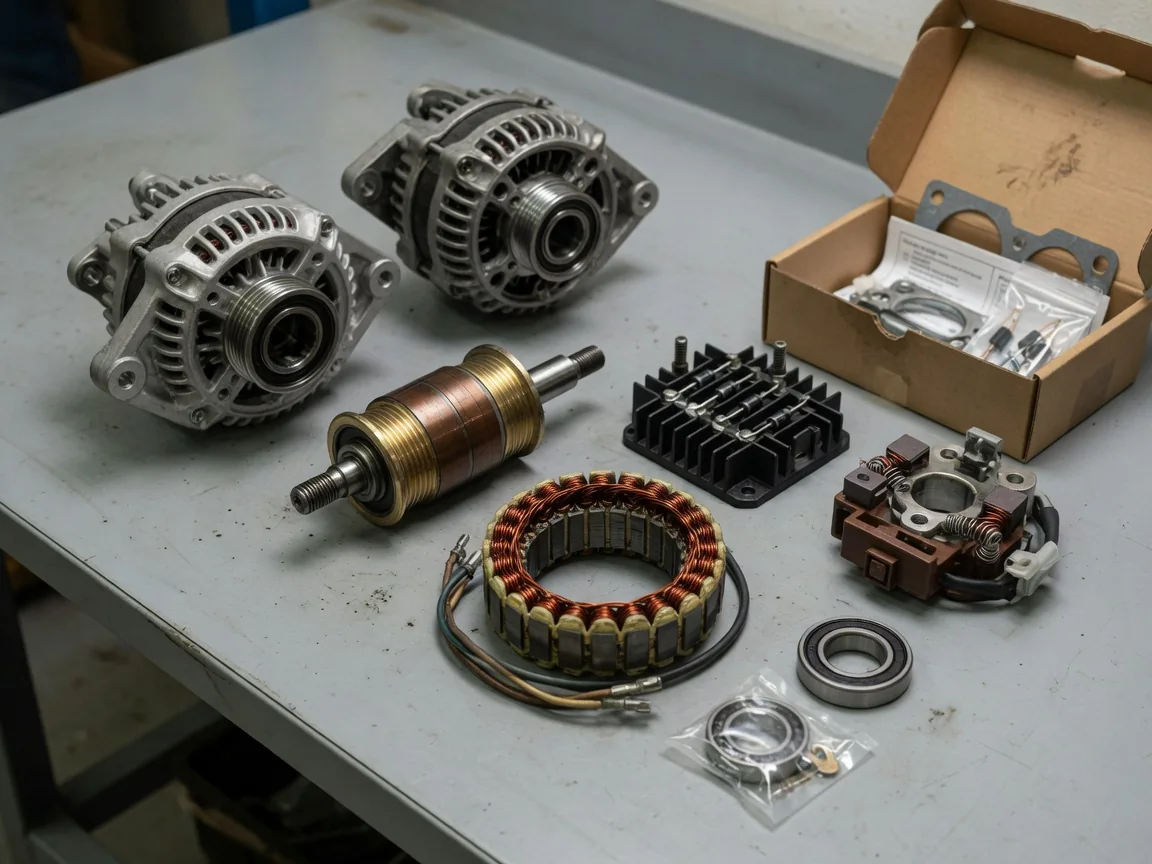
An alternator that stops charging properly isn't always a lost cause. A few internal parts do most of the wearing, and many of them can be replaced one at a time. It helps to know what an alternator overhaul involves, which parts fail and why, and what rebuild kits actually contain. With that, you can judge whether repairing the original unit is worth the effort.
What an Alternator Overhaul Actually Involves
An alternator overhaul means taking the unit apart on a bench, inspecting every internal part, and replacing the parts that wear instead of throwing out the whole assembly. The main pieces are the pulley, the front and rear bearings, the rotor with its slip rings, the stator windings, the rectifier and its diodes, the brushes, and the voltage regulator. The bearings, brushes, diodes, and regulator usually wear out first. The rotor and stator are normally expected to outlast them.
A rebuild replaces wear parts. It can't fix burned stator windings or a damaged rotor, and either of those problems usually makes replacement the better choice. The process runs from bench testing to confirm the fault, through teardown, cleaning, inspection, and replacing worn parts, to reassembly and a final output test. None of this is done with the alternator still on the engine. Removing it means dealing with the battery and the accessory drive belt, and that should be handled by someone qualified to do it safely.
Alternator Bearings: How They Wear and What Replacement Involves
Most alternators have two bearings: one in the front housing behind the pulley and one at the rear supporting the other end of the rotor shaft. The front bearing takes the side pull of the accessory drive belt, and both bearings deal with heat from the engine bay and from the alternator itself. That makes them among the most common wear points. A failing bearing usually causes a whine or grinding that rises with engine speed, or a pulley that feels rough or loose when you turn it by hand with the engine off.
Bearing noise is easy to mistake for a worn belt tensioner or idler pulley. Technicians find the source with a mechanic's stethoscope or by checking each part of the accessory drive separately. If the alternator spins roughly once the belt is off, the bearing is the likely culprit. In a rebuild, the bearings are pressed out of and into the housings, which takes a bearing press or proper tools so the housing isn't damaged. Bearing sizes vary between alternator models, so the replacement has to match the specific unit.
Alternator Diodes and the Rectifier: Failure Signs and What They Mean
The windings inside an alternator produce alternating current (AC), but the battery and the car's electronics need direct current (DC). The rectifier assembly does that conversion with a set of diodes, which let current flow in only one direction. When a diode fails, whether it shorts or stops conducting, output drops and AC ripple leaks into the electrical system. A shorted diode can also let the battery drain back through the alternator while the car is parked.
Common signs include dim or flickering lights, a whine through the radio that follows engine speed, a battery that keeps going flat overnight, and a charging warning light. These symptoms point toward the rectifier, but they don't prove it has failed. Confirmation comes from a ripple test or a diode test with a multimeter or bench tester, and reading the results correctly takes some electrical knowledge. In a rebuild, the diodes are normally replaced as a complete rectifier assembly matched to the alternator, not one diode at a time.
Brushes, Slip Rings, and the Voltage Regulator
Brushes are spring-loaded carbon blocks that ride on the rotor's slip rings. They carry current to the rotor, which creates its magnetic field. As the brushes wear shorter, their contact becomes unreliable. Typical signs are a charging light that comes and goes, output that sags at idle, or a charging system that only works after someone taps the alternator case. The slip rings need checking too. Grooved, pitted, or corroded rings wear out brushes quickly and may need light resurfacing or a new rotor.
The voltage regulator keeps alternator output within a safe range. That prevents undercharging or overcharging the battery and protects the electronics from voltage spikes. On many alternators, the regulator and brush holder are one replaceable module, so worn brushes and a regulator fault can be fixed together. Some vehicles, however, control charging through the engine computer instead of an internal regulator. On those, the symptoms and the right diagnosis depend on how that particular vehicle is designed.
What Alternator Rebuild and Repair Kits Contain
A typical rebuild or overhaul kit includes the common wear parts: front and rear bearings, a brush set or complete brush holder, and a rectifier or diode assembly. Some kits also include a voltage regulator, seals, and small hardware. A repair kit is usually narrower and often covers just one item, such as the brushes or bearings. Both types are specific to the alternator's manufacturer and part number, so identify the unit from its tag or the markings cast into the housing before ordering anything.
Kits don't include the rotor, stator, housings, or pulley, so no kit can save an alternator with a damaged winding or a cracked case. That's why the diagnosis should come before the purchase. If testing shows only worn brushes, a full kit adds cost for no benefit. A partial kit on a unit with a bad rectifier and noisy bearings leaves the job half done. Matching the kit to the confirmed faults keeps the repair focused and avoids paying for parts you don't need.
Rebuild or Replace: How to Decide
The choice between rebuilding and replacing comes down to three questions. Which parts have actually failed? Are the rotor, stator, and housings still sound? Do you have the right tools and skills? A rebuild usually makes sense when only one wear part has failed or when the original unit is hard to find or better built than typical replacements. It also makes sense on a classic or specialty vehicle, where keeping the original alternator matters for authenticity or fit.
Replacement usually makes more sense when the windings are burned, a housing is cracked, several parts have failed at once, or the alternator is a common design with good replacements easy to find. Tools matter too. A rebuild needs a bearing press, soldering equipment, a multimeter, and a way to bench test output, and buying these for one job can wipe out the savings. Compare the cost of a kit plus your time against a rebuilt or new unit for your vehicle.
Safe Observations and When Professional Testing Is Needed
You can make several useful checks without taking anything apart. Watch whether the charging warning light flickers or stays on, and notice whether the headlights or dash lights dim at idle. Listen for noise that rises with engine speed, and note any belt that squeals or slips. Beyond that, a charging system test at a repair shop or parts store can show low output, too much ripple, or a failed diode without removing the alternator. That gives you real evidence before you spend money on parts.
A charging symptom doesn't always mean the alternator is at fault. A weak battery, corroded cables, a loose belt, or a wiring problem can cause the same signs. Alternator work also involves stored battery energy, hot components, and moving belts. Disconnecting the battery, working on the accessory drive, and soldering are best left to someone with the right training and equipment. After any rebuild, have the unit professionally bench tested before it goes back in the car. An untested rebuild can leave you stranded.