How to Rebuild a Brake Caliper: Scope, Parts, Procedure and When to Replace Instead
The short answer
Rebuilding a brake caliper means taking it off the vehicle, removing the piston, replacing the rubber seals and dust boot, cleaning and inspecting the bore and piston, then reassembling, refitting and bleeding the brakes. It is a realistic job for a careful home mechanic with basic tools and a service manual for the specific vehicle. It only makes sense when the caliper body and piston bore are still sound. If the bore is pitted or the housing is cracked, a rebuild will not reliably fix it, and replacing the caliper is the correct repair.
Brakes are safety-critical. If you are unsure about any step, or you cannot get the vehicle-specific torque values and procedures, have a qualified technician do the work or inspect it before the vehicle is driven.
What this guide covers and what it does not
This guide covers the common hydraulic disc brake caliper, both the sliding (floating) type with one or two pistons on one side and, more briefly, fixed multi-piston calipers. It does not give torque figures, fluid specifications or part numbers. These vary by manufacturer, model, model year and sometimes trim or market, and none were supplied for this article. Take them from the factory service information for your vehicle or from the caliper or kit manufacturer.
Rebuild or replace?
A rebuild is worthwhile when the problem lies in the parts a kit replaces: hardened or swollen seals, a torn dust boot, or light deposits on the piston. It is not worthwhile when the metal parts are damaged. Many owners also compare the cost and time of a rebuild with buying a remanufactured caliper, which often comes as an exchange unit with a core charge. That choice depends on local pricing and availability, which this guide cannot assess.
Signs a rebuild is reasonable: the bore is smooth, with no pitting where the seal and piston sit; the piston surface is smooth and undamaged; the bleeder screw comes out without breaking; the slide pin bores and threads are intact. Signs replacement is the better choice: pitting or deep corrosion in the bore; a scored, pitted or chipped piston, unless a new piston is available; a cracked or distorted housing; stripped mounting or banjo-bolt threads; a bleeder screw that has seized or snapped off in the body. Situations needing extra care or a professional: rear calipers with an integrated mechanical parking brake; calipers on vehicles with an electronic parking brake; fixed calipers whose halves are bolted together.
What a brake caliper rebuild kit usually contains
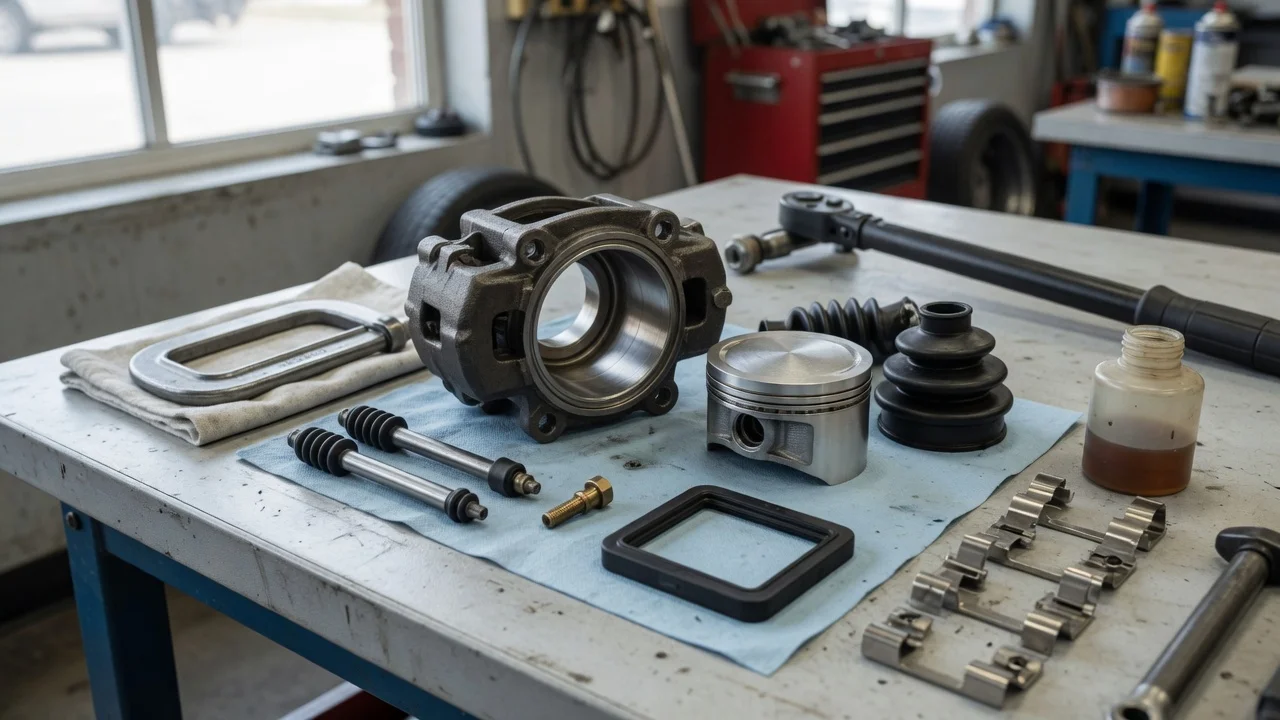
Kit contents vary by supplier and application, so check the listing for your exact caliper. A basic kit (also sold as a caliper repair kit or brake rebuild kit) typically includes the square-section piston seal, which sits in a groove in the bore and also pulls the piston back slightly when you release the brake, plus the dust boot that keeps dirt and water away from the piston. Some kits add slide pin boots, slide pins, bleeder screws, banjo-bolt sealing washers or assembly lubricant. Complete kits may include new pistons.
Pistons are commonly steel, often plated, or phenolic, a heat-resistant composite. Replace a piston with the type specified for the caliper. A phenolic piston that is chipped or cracked, or a steel piston with corrosion or pitting on its sealing surface, should be replaced, not polished and reused.
Tools and materials
Vehicle-specific service information, including torque values, brake fluid specification and bleeding procedure; Jack, rated axle stands and wheel chocks; Sockets or wrenches for the caliper bolts, bracket bolts and brake hose fitting, plus a flare-nut wrench if the line uses a tube nut; A hose clamp designed for brake hoses, or caps or plugs for open lines; Compressed air with a blow nozzle, or another piston removal method the caliper manufacturer recommends; A wooden block or folded rag to cushion the piston when it is ejected; A plastic or wooden pick for removing the seal, so the groove is not scratched; Brake cleaner, clean lint-free rags and a drain pan; Fresh brake fluid of the type specified for the vehicle; Brake-specific grease compatible with the rubber parts, for slide pins and contact points; A torque wrench; Safety glasses and nitrile gloves
Step-by-step: rebuilding a sliding caliper
The steps below describe the general process. Where your service manual differs, follow the manual.
1) Prepare and remove the caliper
Loosen the wheel nuts, raise the vehicle, support it on axle stands and remove the wheel. Clamp the flexible brake hose or be ready to cap the line to limit fluid loss. Disconnect the hose from the caliper, remove the caliper mounting bolts and take the caliper to a clean bench. Note how the pads, clips and any anti-rattle hardware fit before removing them. Brake fluid can damage paint, so wipe up spills promptly.
2) Remove the piston
Drain the remaining fluid. Place a wooden block or thick rag in the caliper opening, then apply short, low-pressure bursts of compressed air into the fluid inlet to push the piston out. Keep your fingers and hands out of the piston's path, because it can come out with considerable force. If the piston will not move, do not raise the air pressure indefinitely or pry against the piston edge. A seized piston often points to corrosion that rules out a rebuild. Some owners refit the caliper to the vehicle before disconnecting it and use the brake pedal to push the piston partway out, but this releases fluid and should only be done with the service information to hand.
3) Strip the seals and clean
Remove the dust boot, then lift the piston seal out of its groove with a plastic or wooden pick. Metal tools can scratch the groove and cause a leak later. Remove the bleeder screw. Clean the bore, the seal groove, the piston and the fluid passages with brake cleaner, then blow them dry. Remove the slide pins, clean them and clean out their bores.
4) Inspect
This step decides whether the rebuild goes ahead. Look at the bore under good light, paying most attention to the seal groove and the area where the piston slides. Light staining that cleans off is generally acceptable. Pitting, flaking or any damage you can feel with a fingernail generally is not. Practice differs on lightly cleaning a bore with fine abrasive. Some calipers have coated or plated bores, and some manufacturers advise against honing, so check the guidance for your caliper before using any abrasive. Inspect the piston the same way, and check that the slide pins are straight and free of heavy corrosion.
5) Reassemble
Lubricate the new piston seal with fresh brake fluid, or with the assembly lubricant supplied in the kit, and seat it in its groove without twisting it. Fit the dust boot as the kit instructions describe. Depending on the design, it goes onto the piston first or into the caliper first. Lubricate the piston, then press it squarely into the bore by hand or with a clamp and a flat block, without cocking it. Seat the dust boot fully. Refit the bleeder screw. Fit new slide pin boots if supplied, and grease the slide pins with brake-specific grease. Do not use general-purpose grease, which can swell rubber parts.
6) Refit and bleed
Refit the pads and hardware, mount the caliper and tighten all fasteners to the specified torque. Reconnect the brake hose using new sealing washers where the design calls for them. Bleed the caliper, and the rest of the system if needed, using the fluid type and bleeding sequence specified for the vehicle. Some vehicles with ABS or stability control need a scan-tool procedure to bleed fully. Do not mix fluid types. In particular, silicone-based DOT 5 must not be mixed with glycol-based fluids.
Rear calipers with a parking brake
On many rear calipers with an integrated mechanical parking brake, the piston screws back into the caliper rather than pressing straight in, and the internal mechanism can make removal and reassembly more involved. A wind-back tool is usually needed. Vehicles with an electronic parking brake often need a scan tool or a specific service-mode procedure to retract the actuator before you work on the caliper. Forcing the piston can damage the mechanism. For these calipers, check whether a rebuild kit is even offered for the internal parts, and consider replacement or professional service if it is not.
Fixed multi-piston calipers
Fixed calipers have pistons on both sides and are usually made of two halves bolted together. Some manufacturers say these halves must not be separated during service. In that case, the seals and pistons have to be serviced without splitting the body, or the caliper has to be sent to a specialist. Kit availability, and whether splitting is allowed, depends on the caliper maker and application. Confirm both before starting.
Checks before driving
With the engine running where the system has a vacuum or electric booster, pump the pedal until it is firm. Pistons pushed back during the job need several strokes to reach the pads. Check that the pedal stays firm and does not slowly sink under steady pressure. Inspect the hose connection, the bleeder and the piston boot for leaks. Check the fluid level in the reservoir and top up with the correct fluid. Spin the wheel by hand to confirm the brake releases and does not drag. Test at low speed in a safe place before normal use, then bed in the pads as the pad manufacturer instructs.
Do not drive the vehicle if the pedal is soft or sinks, if any fluid leaks, if the brake warning light stays on, if the vehicle pulls strongly to one side under braking, or if a wheel gets noticeably hot after a short drive. Each of these points to a fault that needs correcting first, such as air in the system, a seal installed incorrectly or a sticking piston or slide pin. If you cannot find and fix the cause, have the brakes inspected professionally.
Information gaps to fill before you start
This guide does not provide torque values, brake fluid specifications, kit part numbers or vehicle-specific bleeding procedures, and it cannot confirm whether a rebuild kit exists for a particular caliper. Get these from the factory service information for your vehicle's make, model and model year, and from the caliper or kit manufacturer's instructions.