Left or Right Rear Electric Parking Brake Actuator Circuit Open: Diagnosis
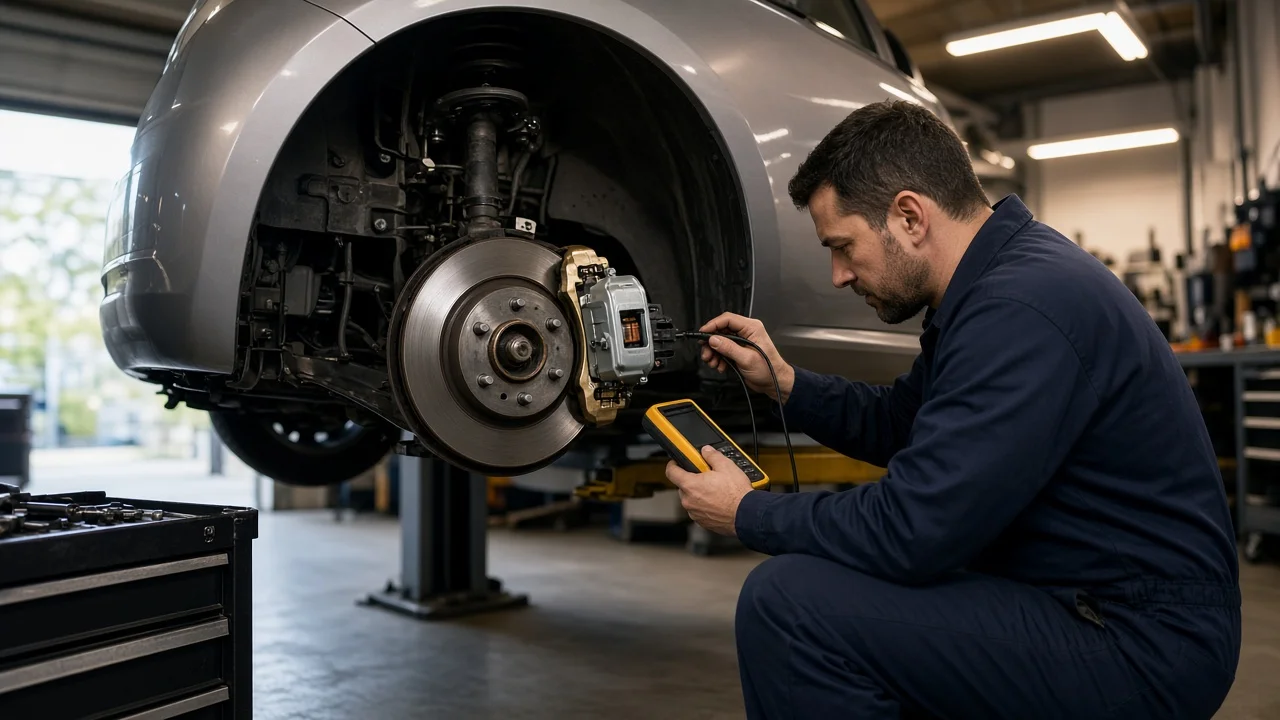
A fault reporting that the left rear electric parking brake actuator circuit is open means the control module tried to drive the motor at that wheel and did not see a complete electrical path. The right rear version of the fault points to the opposite caliper. Either way, the parking brake on that side may not apply or release as commanded. This guide covers the symptoms worth recording, the likely causes, a sensible order of checks, and what the results do and do not prove.
Establish the symptoms
Start by noting exactly when the problem shows up. Does the warning appear when you apply the switch, when you release it, during the startup self-test, or only when automatic hold engages? Does it follow a cold morning, a car wash, heavy rain or a hard pothole? Note which lamps or messages appear: a parking brake warning, a general brake system message, and on some vehicles stability or ABS lamps when the parking brake control is built into that module. With the vehicle secured, listen at each rear wheel while the brake applies. A healthy actuator makes a short motor whir; a silent side on the reported wheel is a useful observation. Also check whether the vehicle holds on a gentle slope and whether the brake releases fully without a dragging wheel.
Recent changes matter as much as symptoms. Record any rear brake pads, brake rotors or caliper work, suspension or wheel bearing repairs, tire service, battery disconnection or jump-starting. Write down the exact code text, whether it is current or stored, the mileage, and which side is named. A left rear fault and a right rear fault are not interchangeable, so do not assume both sides share the problem without evidence.
Distinguish plausible causes
The wiring and connector at the caliper are the most exposed part of the circuit. The harness flexes with every suspension movement and sits in road spray and salt, and the connector can be left unlatched or damaged after a brake job. A fault that appeared right after service, comes and goes over bumps or when the wheel is turned, or a connector showing green corrosion or broken locking tabs all point here. A clean, fully seated connector with an undamaged harness and a constant fault weakens this explanation.
An internal open in the actuator motor is the next candidate. Water intrusion, worn internal contacts or a failed motor winding can all break the circuit inside the unit. This is supported when the harness tests good end to end but the actuator itself measures open or far out of specification, and when the motor stays silent while the other side runs. A seized or corroded mechanism more often triggers a performance or overcurrent fault rather than an open circuit, although water damage can cause both.
The power and control side is less likely but still possible. Some designs share a fuse between both actuators, in which case a working opposite side makes a fuse problem unlikely; others fuse each side separately. A failed output driver inside the control module should be considered only after wiring and actuator are proven good. An incorrect replacement actuator, chosen without confirming vehicle fitment and side, can also set unexpected faults.
Checks in a useful order
Begin with safe observations that need no disassembly. Park on level ground, place an automatic transmission in Park or a manual in gear, and chock the wheels. Confirm the battery is in good condition, since low voltage can produce confusing electrical faults. Scan all modules, save the codes and any freeze frame data, then clear them once and test the parking brake to see whether the open circuit fault returns immediately or only later. With a flashlight, follow the harness from the caliper connector to the body mounting clips, looking for chafing, stretched sections, broken clips and corrosion at the connector.
The next steps need a multimeter and the manufacturer's service information. With the ignition off and the connector unplugged, measure the actuator resistance at its terminals and compare it with the published specification rather than a guessed value. Check continuity of each harness wire from the module connector to the caliper connector, check for shorts to ground, and repeat while gently moving the harness to reveal an intermittent break. Inspect terminal fit, because a spread or pushed-back pin can create an open even when the wire is intact. Many scan tools can command each actuator individually, which helps confirm the result. Avoid applying battery voltage directly to the actuator unless the service procedure allows it, as this can damage the unit or drive it past its intended travel.
Some work belongs with a qualified technician. Removing the caliper or replacing pads on a vehicle with an electric parking brake normally requires placing the system in maintenance mode through a scan tool or a specified procedure. Forcing the piston back can destroy the actuator. Many vehicles also require a calibration or initialization after repair.
Interpret the findings
If the actuator measures open at its own terminals and the connector pins are intact, the actuator is the likely failure. If the actuator is within specification but a harness wire shows no continuity, repair the wiring using an approved method instead of replacing the caliper. If the actuator, harness and connector all test good, the fault may be an intermittent break that only opens under movement or temperature change, poor terminal tension, or, less commonly, the module output. In that case, repeat the wiggle test and check terminal grip before suspecting the module.
Before buying parts, confirm the correct part for the exact vehicle and side using the VIN. If the caliper is coming apart anyway, inspect the brake pads and friction material, and measure the rotors against the manufacturer's wear limits, since worn components change piston travel. Check the caliper slides and look for brake fluid seepage at the piston boot. After the repair, clear the codes, complete any required calibration, and verify several apply and release cycles with no warning and no dragging wheel.
Urgency and next action
Stop driving if the parking brake stays fully or partly applied on one side. Signs include a hot wheel, a burning smell, the vehicle pulling or feeling held back, or smoke from a rear brake. Also stop and arrange transport if a red brake warning appears together with a soft or low pedal or visible fluid loss, because that points beyond the parking brake circuit. If the parking brake simply will not apply, the vehicle cannot be reliably secured with it: park on level ground, use Park or a gear, and chock the wheels. Automatic hold and hill hold features may also be disabled. A stuck brake can make towing difficult, so tell the tow operator; a flatbed is often required, and some owner's manuals describe an emergency release.
There is no safe remaining distance to rely on with this fault. For an efficient repair, give the shop the VIN, the exact codes with their status and freeze frame data, which side is affected, when the fault occurs, any recent brake or suspension work, and the results of any checks already performed. That information lets the technician confirm the cause before replacing an actuator, caliper or module.