Rear Axle Shaft Pullers: Choosing the Right Removal Tool
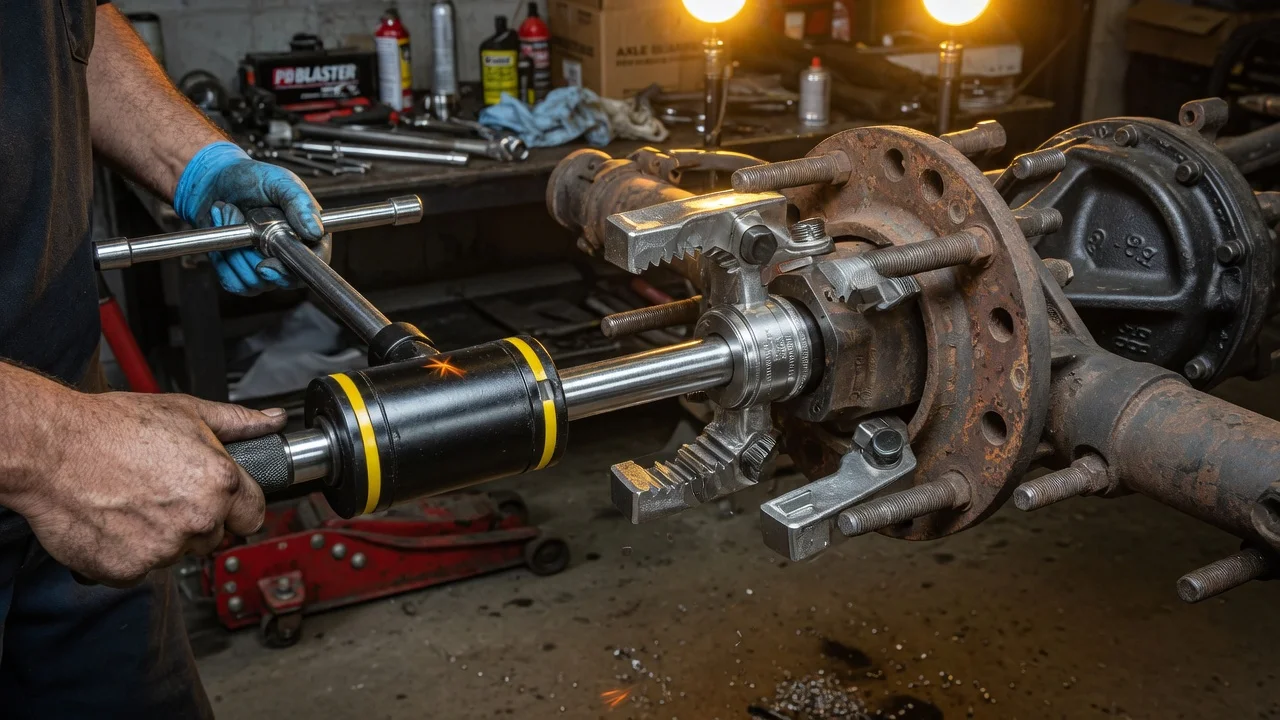
A rear axle shaft puller has a narrow purpose. It extracts a semi-floating axle that is held in the housing by a pressed bearing and retainer, or it removes a bearing or seal that stays behind in the axle tube. The wrong style wastes money and can damage the axle flange, studs or housing. This guide explains how to match a puller to your vehicle configuration, which features matter and what the tool cannot do on its own.
Define the job the puller must do
Start with how the axle is retained, because that decides whether you need a shaft puller at all. Many rear-wheel-drive cars and light trucks with a semi-floating axle hold the shaft with C-clips inside the differential. Once the cover is off, the pinion shaft is removed and the clips are taken out, the shaft usually slides out by hand. On these axles you need a tool for the bearing and seal left in the axle tube, not for the shaft itself.
Other semi-floating designs press the bearing onto the shaft and bolt a retainer plate to the end of the housing. After you remove the retainer bolts, you still have to overcome the bearing's fit in the housing. That is the job for a slide-hammer axle puller with a flange adapter. Full-floating axles, common on heavier-duty trucks, work differently. The shaft bolts to the hub and normally comes out without a puller, although stuck locating cones or dowels may need attention. Confirm the design in the service information for your exact vehicle before you buy anything.
Practical constraints matter too. Consider how often you will do this job and whether you work on one vehicle or several. Check how much space you have around the wheel area. Also consider whether operating conditions, such as road salt, are likely to have corroded the bearing into the tube. A one-off seal replacement on a single vehicle justifies a different purchase than regular axle work on a mixed group of vehicles.
Check compatibility
A flange-mount puller only works if its adapter fits the axle flange. The key interfaces are the lug bolt pattern (the number of studs and the bolt circle), the stud thread size, and the clearance between the flange and the slide hammer shaft. Slotted adapters cover a range of patterns, but check that the listed range includes yours rather than trusting a universal label. The lug nuts must thread fully onto the studs to hold the adapter securely. Partial thread engagement under hammer loads can damage the threads.
For removing a bearing or seal from the tube, compare the jaw or hook sizes with the bearing and seal bore dimensions for your axle. Also check whether the internal puller attachments thread onto the slide hammer you already own. A thread mismatch between the attachments and the hammer shaft is a common reason a kit ends up unusable. If your vehicle has an ABS tone ring or wheel speed sensor near the axle end, make sure the puller can be used without touching it. Take dimensions from the manufacturer specifications and the vehicle's service information, because product listings rarely say whether a tool fits a particular axle.
Features that affect the choice
The slide hammer's weight determines how much impact each stroke delivers. A heavier weight helps with a bearing that has corroded into the housing, but it is harder to control and puts more shock into the flange and studs. Shaft length affects the stroke and the clearance around the wheel well. A secure grip and a solid stop at the end of the stroke make repeated blows safer and more consistent.
A screw-type puller works without impact. It braces against the housing or a reaction plate and draws the part out with a forcing screw, applying steady force. That can be gentler on parts, but it needs a suitable surface to brace against and takes more setup. Some kits combine a slide hammer, a flange adapter, and internal bearing and seal attachments. They are convenient if you work on both C-clip and bolt-in axles, but only if each piece fits your vehicles.
Treat marketing labels with caution. Words like heavy-duty, professional or universal say little on their own. Useful evidence includes the stated bolt patterns and thread sizes, the listed attachment dimensions, the materials and construction of the adapter, and clear instructions. If a listing gives no dimensions, assume you will have to verify the fit yourself.
Limitations and ownership costs
An axle puller removes parts, but it does not complete the repair. On a pressed-bearing axle, removing the old bearing and retaining ring from the shaft and installing new ones generally requires a press and suitable support tooling. Typical procedures do not reuse the retaining ring. A new seal needs a driver or installer of the correct diameter so it seats squarely. Follow the manufacturer's procedure for which parts must be replaced.
Budget for the consumables that come with the job. These include axle seals, bearings and retaining rings where required, a gasket or sealant for the differential cover or retainer, and the correct gear oil to refill the axle. Brake work often overlaps, because the drums or rotors and the parking brake parts must come off first. Use torque values and fluid specifications from the service information rather than generic figures. The tool needs little maintenance. Keep the threads clean, check adapters for cracks or distortion, and replace worn nuts or attachments.
The tool is also no substitute for diagnosing noise or leaks. Before you pull any parts, inspect the bearing, the seal surface and the condition of the gear oil, and check the vehicle's service history to confirm the cause. Excessive hammering on a seized bearing can bend a flange or damage the housing. Penetrating oil, patience and, where needed, professional help are part of the real cost.
Build a practical shortlist
Narrow the options with a short checklist. First, confirm your axle type from the service information: C-clip, bolt-in retainer with a pressed bearing, or full-floating. Second, record the lug pattern, stud thread size, and bearing and seal bore dimensions for every vehicle you plan to service. Third, decide whether the impact of a slide hammer or the steady force of a screw-type puller better suits your work and your workspace.
Then compare candidates on concrete points. Does the flange adapter list your bolt pattern? Do the attachments thread onto the included hammer or the one you own? Are the internal puller sizes stated? Is the slide hammer weight suited to the corrosion you expect? Does the kit include pieces you will never use? Drop any option that relies on vague claims instead of listed dimensions. If two tools meet the same requirements, the deciding factors are usually visible build quality, complete instructions and the availability of replacement parts. Buy the seals, bearings and fluids the job requires at the same time, so the vehicle can return to its normal maintenance schedule without delay.