Ram 1500 Rear Axle Shaft Replacement
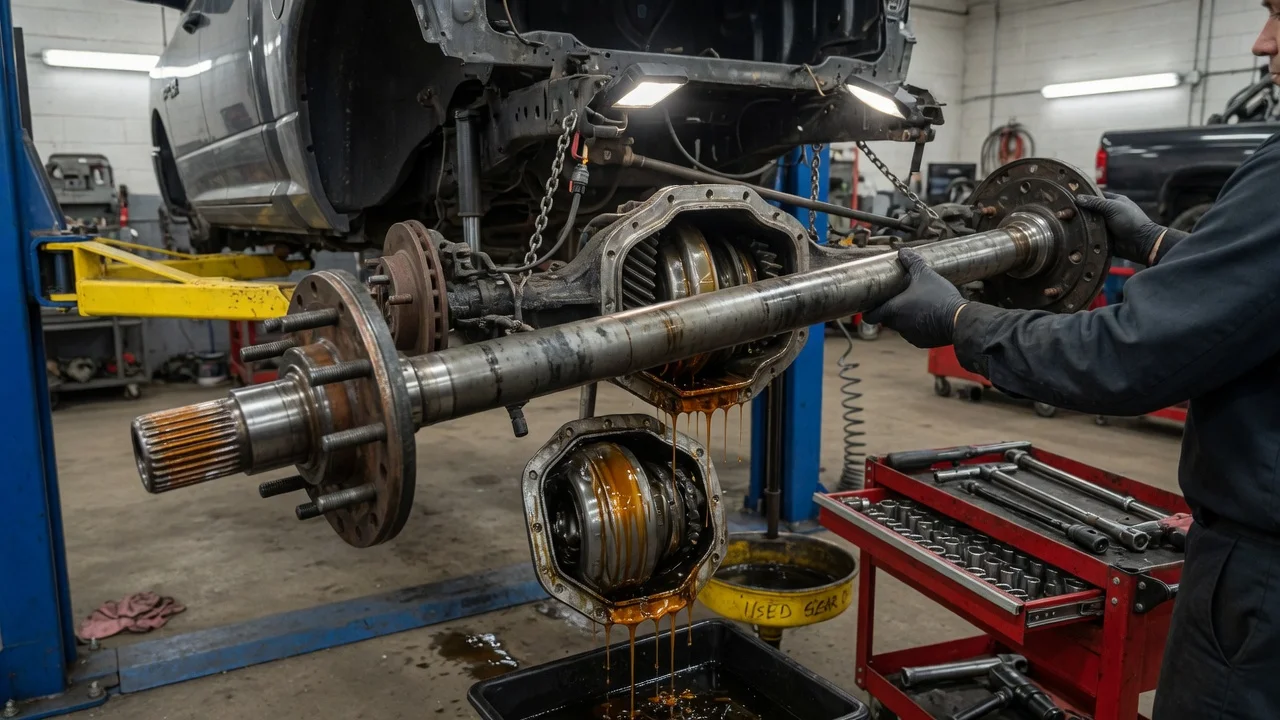
Replacing a rear axle shaft on a Ram 1500 is manageable for an experienced home mechanic, but the details depend on model year, axle type and options such as an electronic locking differential or air suspension. This guide covers confirming the repair, preparing safe access, removing the old shaft, installing the new one and verifying the result. Take torque values, fluid type and capacities from the service information for your exact truck rather than from generic figures.
Confirm the part and repair scope
Common reasons for this job include a humming or grinding noise from one rear corner, gear oil on the inside of the wheel or brake parts, a clunk or wobble at that wheel, or a broken shaft. Several of these symptoms can come from a worn wheel bearing, a failed axle seal or a differential problem rather than from the shaft itself. A leaking seal alone does not call for a new shaft unless the bearing surface on the shaft is pitted, grooved or worn. Do a careful inspection first so the repair matches the actual fault, and check the service history for earlier seal, bearing or differential work.
Fitment matters because Ram 1500 trucks have used different rear axles across generations, trims and drivetrain options. Shafts can differ in length, spline count, flange and wheel stud pattern, tone ring design and compatibility with a locking differential, and left and right shafts may not be the same length. Identify the axle from the tag on the housing or cover, the build data tied to the VIN and the gear ratio. Do not rely on model year alone, since a Classic version may have been sold alongside a newer generation with different hardware. Compare the replacement against the vehicle configuration before you start disassembly.
Prepare tools and safe access
Typical tools include a floor jack, properly rated jack stands, wheel chocks, a socket set, a torque wrench, a drain pan, a gasket scraper and a seal puller and driver. A slide hammer and bearing puller may be needed if the wheel bearing is replaced. Have the new axle seal, a cover gasket or the sealant the procedure calls for, the specified gear oil and any friction modifier required for a limited-slip differential on hand. If the service information calls for threadlocker or a new retaining bolt for the differential cross shaft, buy those as well.
Work on level ground, chock the front wheels and support the truck on stands at the lift points listed by the manufacturer, never on the jack alone. Trucks with air suspension must be placed in the jack or tire-change mode described in the owner information before lifting, and an electronic parking brake may need a service mode before the rear brakes are touched. If you lack stands and a torque wrench, cannot work safely under the truck, or your axle uses a pressed-on bearing that requires a hydraulic press, this is a job better left to a shop.
Remove without avoidable damage
Many Ram 1500 rear axles are semi-floating designs that retain each shaft with a C-clip inside the differential, but confirm this for your axle before following the sequence below. Remove the wheel, then the brake caliper and its bracket. Hang the caliper from the frame or suspension with wire so it never hangs by the brake hose. Remove the rotor, disconnect any mechanical parking brake hardware attached at the wheel and move the wheel speed sensor wiring aside if it could be stretched or damaged.
Place the drain pan, remove the differential cover and let the gear oil drain. Rotate the carrier until you can reach the cross shaft retaining bolt, remove it and slide the cross shaft out while keeping the side gears and pinion gears in place. Push the axle shaft inward slightly, remove the C-clip from the shaft end, then withdraw the shaft slowly and straight so its splines do not drag across the wheel bearing and seal. Do not rotate the carrier or the opposite wheel while the cross shaft is out. Locking differentials can use a different internal arrangement, so follow the specific procedure for that unit.
With the shaft out, inspect the wheel bearing for roughness or looseness, the seal bore for damage and the gears and cross shaft for wear. Check the drained oil for metal debris; heavy contamination suggests a wider differential problem that should be diagnosed before reassembly. A rough bearing should be replaced together with the seal now rather than after the new shaft is installed.
Install and restore the system
Lay the new shaft beside the old one and compare length, spline count, flange, studs and tone ring before installation. Install the new seal, and bearing if replaced, with a proper driver so it sits square in the housing. Lightly lubricate the shaft splines and bearing surface, then guide the shaft in without letting it strike the seal. Engage the side gear splines, install the C-clip in its groove and pull the shaft outward so the clip seats in the side gear recess. Reinstall the cross shaft and its retaining bolt, using threadlocker or a new bolt if specified, and tighten it to the manufacturer specifications.
Clean the cover and housing mating surfaces thoroughly. Install the cover with a new gasket or the specified sealant, tightening the bolts evenly in the recommended pattern to the listed torque. Refill with the gear oil type and quantity specified for your axle, adding friction modifier only if the procedure calls for it, and fill to the level given in the service information.
Reinstall the rotor, caliper bracket and caliper, tightening each fastener to specification. Reconnect any parking brake components and secure the wheel speed sensor wiring away from moving parts. Mount the wheel, lower the truck, torque the lug nuts and return the air suspension and parking brake to normal operation. Pump the brake pedal until it is firm before the truck is moved.
Check the completed work
Before driving, check for gear oil leaks at the cover and the new seal, confirm a firm brake pedal and make sure the dash shows no ABS, traction control or brake warnings. Take a short, low-speed drive in a safe area, turning in both directions, and listen for clicking, clunking or grinding from the rear axle. A clean result is quiet operation with no vibration, no warning lights and no new leaks.
After the test drive, recheck the seal and cover for seepage and confirm the fluid level if the procedure calls for it. Recheck lug nut torque as recommended. An ABS or traction light can point to a tone ring or sensor problem, persistent noise may indicate a bearing or differential fault, and oil on the brakes means the seal or installation needs attention. Record the repair, parts and fluid used in the service history. Follow the maintenance schedule for rear axle fluid service, keeping in mind that towing and other demanding operating conditions can affect the recommended interval.