Ram 1500 Rear Axle Shaft Removal: Step-by-Step Guide for Owners
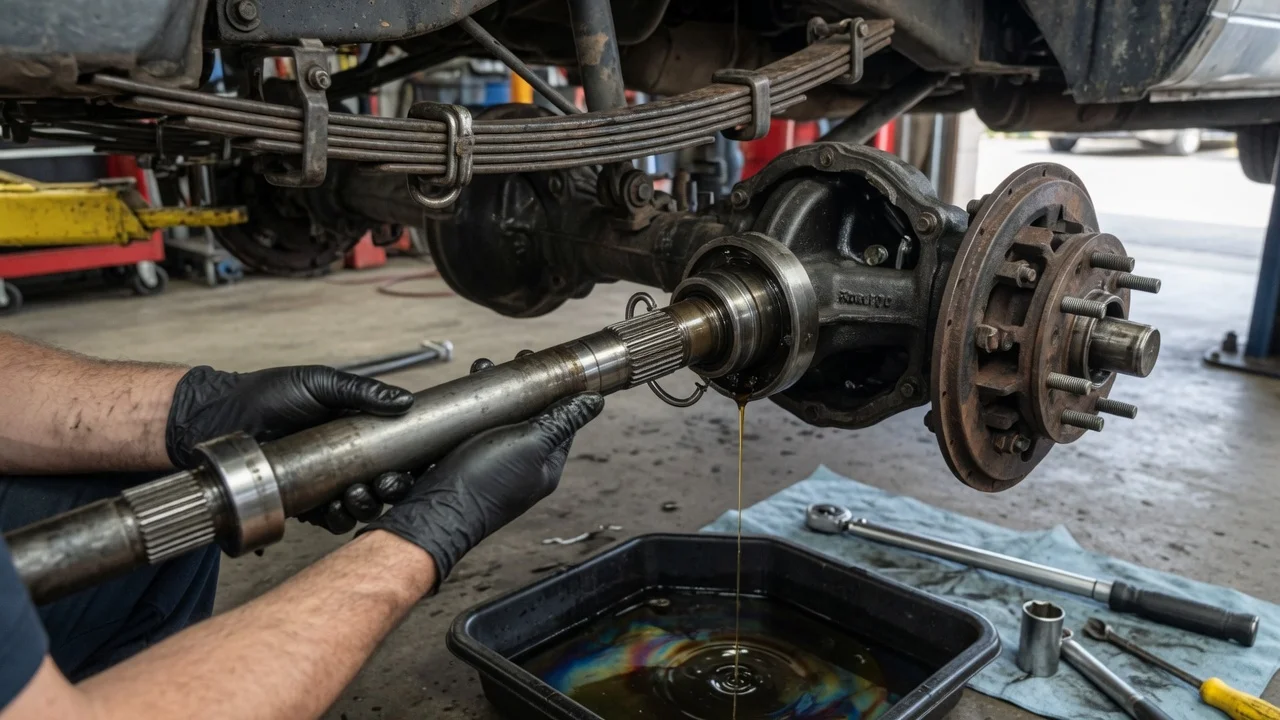
You usually pull a rear axle shaft on a Ram 1500 to replace a wheel bearing, an axle seal or a damaged shaft. The exact procedure depends on how the shaft is held in the housing. This guide covers the general sequence for removing and reinstalling the shaft, including on a 2015 Ram 1500, and shows where the factory service information for your truck has to take over.
Confirm the part and repair scope
Before you remove anything, make sure the axle shaft is really the problem. Typical reasons for pulling a shaft include gear oil seeping past the axle seal onto the brake components, a growl or hum from one wheel that changes as the load shifts in turns, and a shaft or bearing journal that is visibly damaged. Other faults can sound or look similar. Tire wear, a dragging brake, a worn pinion bearing or a leaking differential cover gasket can all cause comparable symptoms. Do a careful inspection, check the vent on the axle housing, and look at the service history for earlier bearing or seal work so you replace the right part instead of guessing.
Next, identify the exact vehicle configuration. Ram 1500 trucks have used different rear axle assemblies, ratios and differential types across model years and trims. The axle may have an open differential, a limited-slip unit or an electronic locker. The detail that matters most is how the shaft is retained. Some designs hold the shaft with a C-clip inside the differential. Others use a bearing retainer plate bolted to the end of the housing. Check the axle tag on the housing, or identify the axle from build data tied to the VIN. Order seals, bearings, gaskets and fluid that match that configuration rather than a generic listing.
Prepare tools and safe access
For a typical job you will need the following: a floor jack, properly rated jack stands, wheel chocks, a socket and wrench set, a breaker bar, a torque wrench, a drain pan and a gasket scraper. You will also need a seal puller and a seal driver of the correct diameter, plus threadlocker if the service information calls for it. Bolted-retainer designs often need a slide hammer with an axle flange adapter. Replacing a bearing that is pressed onto the shaft usually requires a hydraulic press. Buy a new differential cover gasket or the specified sealant, and the gear oil and any additive listed in the manufacturer specifications for your axle.
Get the factory service procedure for your model year and axle before you start, because it lists the torque values, fluid type and capacity, and any steps specific to locking differentials. This is a moderate job. It is not suitable for an owner who has never worked on brakes, cannot support the truck safely on stands, or does not have a press when the bearing is pressed onto the shaft. Never work under a truck held up only by a jack. Chock the front wheels, and support the axle housing on level, solid ground.
Remove the shaft without avoidable damage
Loosen the lug nuts, then raise the rear and support it on stands. Remove the wheel. Make sure the parking brake is released so the rotor can come off. Remove the brake caliper and hang it from the frame with wire so the flexible hose carries no weight, then remove the caliper bracket and rotor. If a wheel speed sensor or its wiring sits near the axle end, disconnect or reposition it according to the service information before you pull the shaft.
On a C-clip axle, drain the gear oil by removing the differential cover, and catch the fluid for inspection. Rotate the carrier until you can reach the lock bolt that holds the differential cross shaft. Remove the bolt, then slide the cross shaft out. Keep the spider gears and thrust washers in position. Push the axle shaft inward toward the center of the axle, remove the C-clip from the groove at the shaft's inner end, and pull the shaft straight out. Support its weight the whole way so the splines do not scrape the bearing or the seal surface in the housing. Electronic locker and some limited-slip units may require a different method to reach the clip, so follow the procedure for that differential.
On a bolted-retainer design, remove the retainer nuts through the openings in the axle flange. Then attach a slide hammer and draw the shaft out with the bearing still on it. Watch for any brake backing plate hardware, O-rings or seals that come out with the assembly, and note their order and orientation.
Install and restore the system
Clean the housing end and inspect the shaft. On a C-clip design, the bearing rides directly on the shaft, so a pitted or grooved bearing journal means the shaft needs replacing, not just the bearing. Remove the old seal and install the new one square to the bore with a properly sized driver. If the procedure calls for a new bearing, install it the same way. Lubricate the seal lip as directed. Slide the shaft in carefully, keeping it centered, and rotate it slightly to engage the side gear splines without forcing it.
For a C-clip axle, push the shaft inward, fit the C-clip into its groove, and pull the shaft outward so the clip seats in the side gear recess. Reinstall the cross shaft and the lock bolt, using the threadlocker and torque the service information specifies. Clean both sealing faces, then install the cover with a new gasket or the specified sealant. Fill the axle to the correct level with the specified gear oil. Add friction modifier only if your limited-slip differential and the manufacturer specifications call for it. For a bolted-retainer design, install the retainer hardware to the specified torque. Finally, reinstall the rotor, caliper bracket, caliper, sensor and wheel, torquing each fastener to its value, and pump the brake pedal until it is firm.
Check the completed work
Before you lower the truck, spin the wheel by hand. It should turn smoothly, with no grinding or binding, and no brake drag beyond normal pad contact. Check that the fill level is correct and that there are no drips at the cover or the axle end. Lower the truck, torque the lug nuts to specification, and confirm that the brake pedal is firm before you move the vehicle. Start the engine and check that no ABS, traction or brake warning lights come on.
Road test at low speed first, then under normal operating conditions, listening for hum, clicking or clunks in turns. Inspect the axle end and cover again after the drive, and once more after a few days of use. A hum that continues with a new bearing may point to the pinion or carrier bearings. A seal that leaks again can mean a damaged housing bore, a worn shaft sealing surface or a blocked vent. A warning light may point to a sensor that was disturbed. Any of these needs further diagnosis before the truck goes back into regular service, and the repair should be noted in the maintenance schedule records.