Radiator Hoses: What They Do and How to Inspect Them
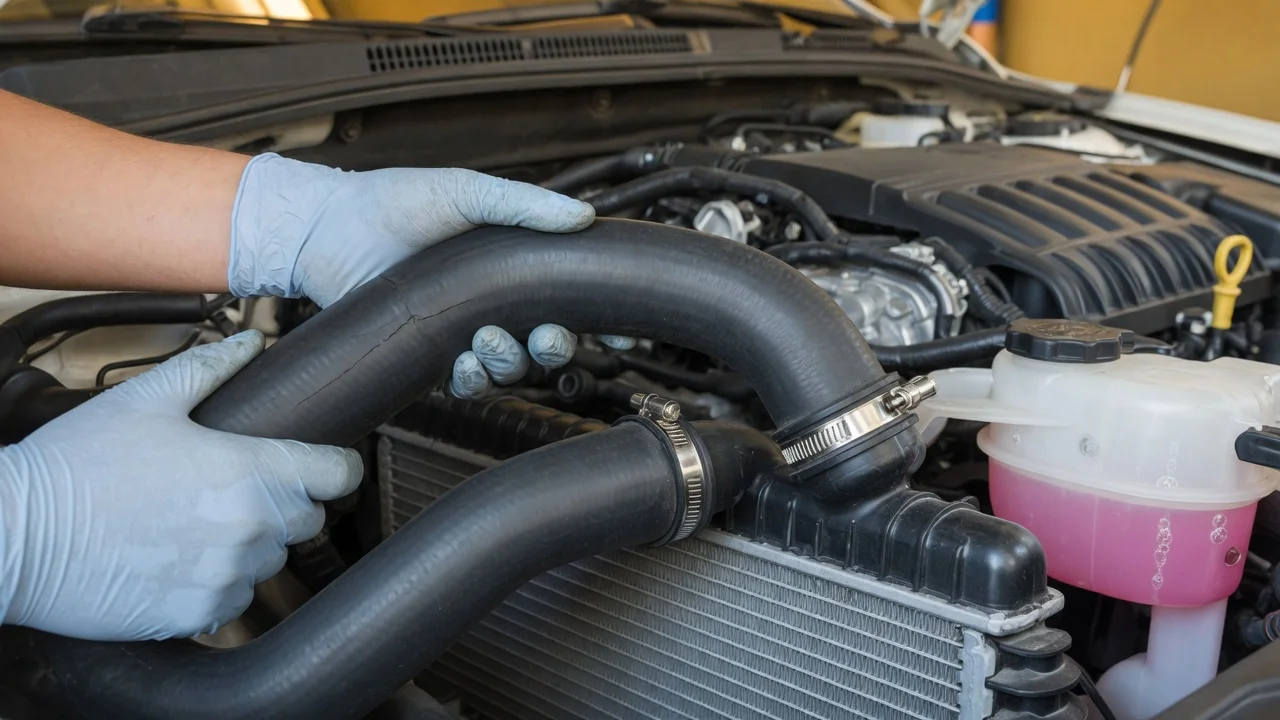
Before you start
Radiator hoses carry coolant between the engine and radiator, so they are only safe to inspect properly once the cooling system is cool and the car is parked on level ground. Wait at least 30–60 minutes after driving, or longer after sustained highway use or hot weather. Opening the radiator cap or squeezing a hot hose can release pressurized coolant and cause burns, so do not begin while the upper hose is warm or firm.
The inspection is usually local and needs no special service, but replacement is a repair that may require draining or partially draining the cooling system. Check your owner's manual for the recommended coolant service interval and any hose-specific guidance. A flashlight, gloves and a clean cloth help you see and feel surface damage without cutting your hands on nearby clamps or brackets.
Step-by-step instructions
Start by locating the two main hoses. The upper radiator hose usually runs from the top of the engine or thermostat housing to the top of the radiator. The lower radiator hose normally connects the bottom of the radiator to the water pump or another lower engine fitting. Some vehicles also use smaller heater hoses and bypass hoses, but the upper and lower hoses are the main visual check.
1) Check the parked position and steering. Shift into park or first gear with the parking brake set. Make sure the hood support holds the hood firmly before reaching into the engine bay. 2) Identify the upper and lower radiator hoses. Trace each one from the radiator to the engine or water pump, watching for brackets, belts and fans that might interfere with your hand. 3) Look before touching. Scan each hose for cracks, cuts, bulges, collapsed areas, chalky marks, dried coolant residue or swollen ends near the clamps. Daylight and a flashlight both help reveal fine surface cracks. 4) Press the hose with your thumb. A healthy hose should feel firm but pliable. It should not feel brittle, overly soft, sticky, mushy or crunch when squeezed. 5) Check the clamps and connection points. Look for dampness, white or green crust, rust staining or fresh coolant around the hose neck and clamp area. A dry, crusty ring may indicate a slow leak. 6) Inspect nearby surfaces. New-looking coolant streaks or staining on the radiator, fan shroud or engine parts can point to a pinhole leak that only releases coolant under pressure. 7) Note the coolant level. With the engine cold, check the coolant reservoir or, if the manual permits, the radiator fill neck. A repeated drop in level may relate to hose leakage, although other cooling system parts should also be considered.
If you need to inspect a hose more closely while the engine is cold, you can often rotate or reposition a spring clamp carefully with pliers. Avoid moving hoses that are attached to brittle plastic fittings. The procedure is reversible when all caps are reinstalled and clamps are returned to their original positions.
Check the output
A passable visual result should leave you with a clear answer: the hose surface is smooth and resilient, clamps are seated, and there is no active wetness or fresh coolant residue at the fittings. You should also be able to notice whether the hose is deformed when cool, since a collapsed hose may look flattened rather than round.
The main limitation is that a cold, unpressurized inspection cannot reveal every internal weakness. A hose may look acceptable outside while the inner lining is cracked, or it may leak only when the cooling system reaches operating temperature and pressure. Do not treat a clean visual check as proof that every part of the cooling system is healthy.
Common problems and next steps
A soft or swollen hose often indicates oil or chemical contamination and may fail without much warning. Hardening, cracking or visible webbing on the outside is more common with age. Coolant odor, white smoke or fluid under the front of the car can suggest a leak, but these signs can also come from other cooling system components. A burst upper radiator hose is sometimes a symptom of a sticking thermostat or excess pressure rather than the only failed part.
If you find a damaged hose, do not keep driving until the cause is understood. Replacement is usually the correction, and the cooling system should be refilled and bled according to the vehicle service procedure. If the hose looks fine but coolant is still disappearing, inspect the radiator, water pump, heater core, expansion tank and pressure cap. When in doubt, a professional cooling system pressure test is the safer next step.