Peak Wireless Backup Camera Not Working: Power, Wiring and Fuse Checks
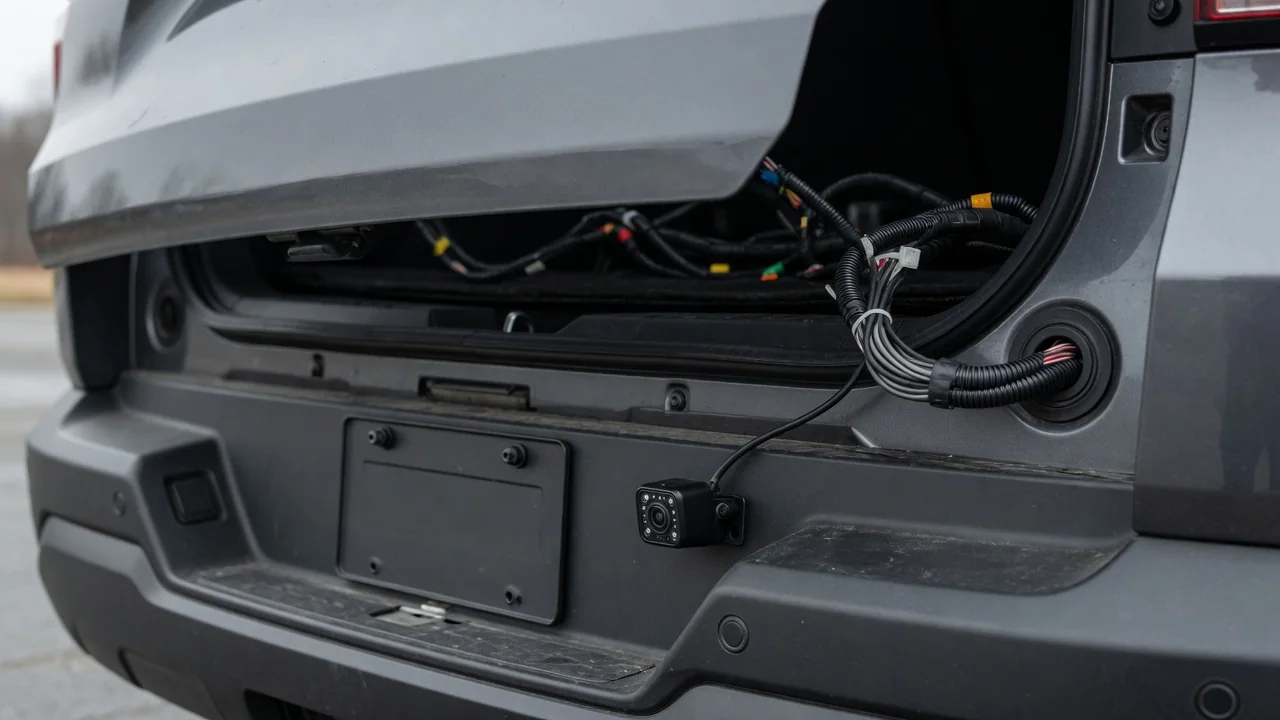
When a Peak wireless backup camera is not working, the problem usually becomes easier to trace once you separate power from signal. Aftermarket rear camera kits rely on ordinary vehicle circuits to run, so a blank screen or a no-signal message often comes back to a fuse, a loose connector or a lost pairing. This guide walks through practical checks in a sensible order.
Why a Wireless Backup Camera Still Depends on Wired Power
In aftermarket rear camera kits, the word wireless usually describes only the video link between the camera and the display. Each unit still needs its own electrical supply, so a wireless design removes the long video cable but not the need for power. That is why a Peak wireless backup camera that is not working can have a cause at either end of the vehicle, and why checking power is usually the first sensible step.
In a common setup, the camera draws power from a rear lamp circuit, often the reverse light power feed. The monitor uses a power adapter in the 12V accessory socket or a hardwired feed. Installation methods vary, so confirm the details in your kit's manual. A failure then falls into one of three groups: no power at the camera, no power at the monitor, or both powered but not linked. Factory-installed cameras use different systems and diagnostics, so this guide covers add-on kits only.
Pin Down the Symptom Before Touching Any Wiring
Start by noting exactly what the display does. A completely dark monitor with no indicator light points toward its power supply, socket or fuse. A lit screen showing a no-signal message or a blue screen means the monitor is alive but receiving nothing. That shifts attention to camera power, pairing or the wireless link. Writing down which of these you see, and when it happens, saves time and guesswork later in the diagnosis.
Patterns matter too. A picture that appears only sometimes, flickers when the engine cranks, or drops out over bumps hints at a loose connection, a weak voltage supply or a chafed wire. Also note whether the trouble began after a recent install, a bulb change, a car wash, heavy rain or a collision. Still, a symptom narrows down the likely cause without proving it, and one fault can easily look like another.
Checking Monitor Power, the 12V Socket and Its Fuse
For a dark monitor, begin with the basics. Make sure the plug is fully seated in the socket, since adapters can work loose with vibration, and look for a power indicator on the adapter or the screen. Then test the socket with another device you know works, such as a phone charger. If that device also gets no power, the socket circuit is the likely suspect rather than the monitor itself.
Find the 12V accessory socket fuse using the owner's manual and fuse box diagram, because fuse locations vary widely between vehicles. Some plug-in adapters contain their own small fuse, but check the kit documentation instead of assuming yours does. Also remember that many sockets are switched and only get power with the ignition on or in accessory mode. A monitor that seems dead may simply be waiting for key-on power.
Confirming Camera Power From the Reverse Light Circuit
Because many kits tap into the reverse lamps, those lights give you a useful clue. Park on level ground, set the parking brake, and have a helper watch from a safe spot beside the vehicle while you select reverse. If the lamps light up, the circuit is delivering power to that point. Attention then moves to the camera tap, its connectors or the camera itself.
If the reverse lamps also fail, a burned-out bulb or a blown fuse is a reasonable first suspect. The reverse switch and wiring are possibilities to test, not assume. Look for loose splice or tap connectors, a corroded camera connector, and chafed tailgate wiring where cables flex at the trunk lid or hinge. Vehicles with LED lamps or bulb-out monitoring may react differently to added taps, so confirm compatibility for your own vehicle rather than guessing.
Pairing, Signal Range and Interference Problems
When both units clearly have power yet the screen still shows no signal, the cause may be a lost link rather than a wiring fault. Pairing can be disturbed after a power interruption or a component swap, and re-pairing the camera usually follows a sequence specific to the kit, so follow the manual. Also keep in mind that a voltage dip at the camera can look exactly like a signal dropout, which is why power checks come first.
Range limits also matter. Long vehicles, metal body panels, window tint with metallic film and towed trailers can all weaken the signal, and antenna position on either unit can make a noticeable difference. Other electronics in the cabin, such as chargers, dash cams and radar detectors, can sometimes cause wireless interference. Unplugging them one at a time while watching the display is a safe way to check whether one of them is causing intermittent camera dropout.
Moisture, Corrosion and Physical Damage at the Camera Mount
The camera mount sits in a harsh spot, so a careful visual inspection is worthwhile. Look for fogging or droplets inside the lens, cracks in the housing, and loose license plate or bracket mounts that let the camera shift. Check where cables run near license plate frame screws and trim edges. A screw driven through a wire, or a sharp edge pressing on insulation, can quietly damage the cable over time.
Water that reaches exposed connectors or poorly sealed grommets often causes faults that come and go. They typically show up after washing or rain, then fade as things dry out. Green or white residue on the terminals points to corrosion. However, internal camera damage usually cannot be confirmed by looking. If the camera has confirmed power and correct pairing but still fails, contacting the manufacturer's support or using the warranty may be the right next step.
When to Stop and Get Professional Help
A fuse that blows again after being replaced points to a short circuit or overload that needs proper testing. Never fit a higher-rated fuse, because it can let the wiring overheat. Likewise, avoid removing trim panels, wiring looms or components near airbags and other safety systems without the right knowledge. Disturbing them can create new faults or safety risks far more serious than a blank backup camera screen.
Intermittent faults, CAN-bus vehicles and kits wired into factory systems often need professional diagnostic tools to trace properly. An installer familiar with aftermarket rear camera kits can test the circuits under load. Until the camera works reliably, keep looking over your shoulder and using the mirrors while reversing. A backup camera only adds to those checks and should never replace them, especially around pedestrians and children.