P0135 Code: Upstream O2 Sensor Heater Fault and Diagnosis
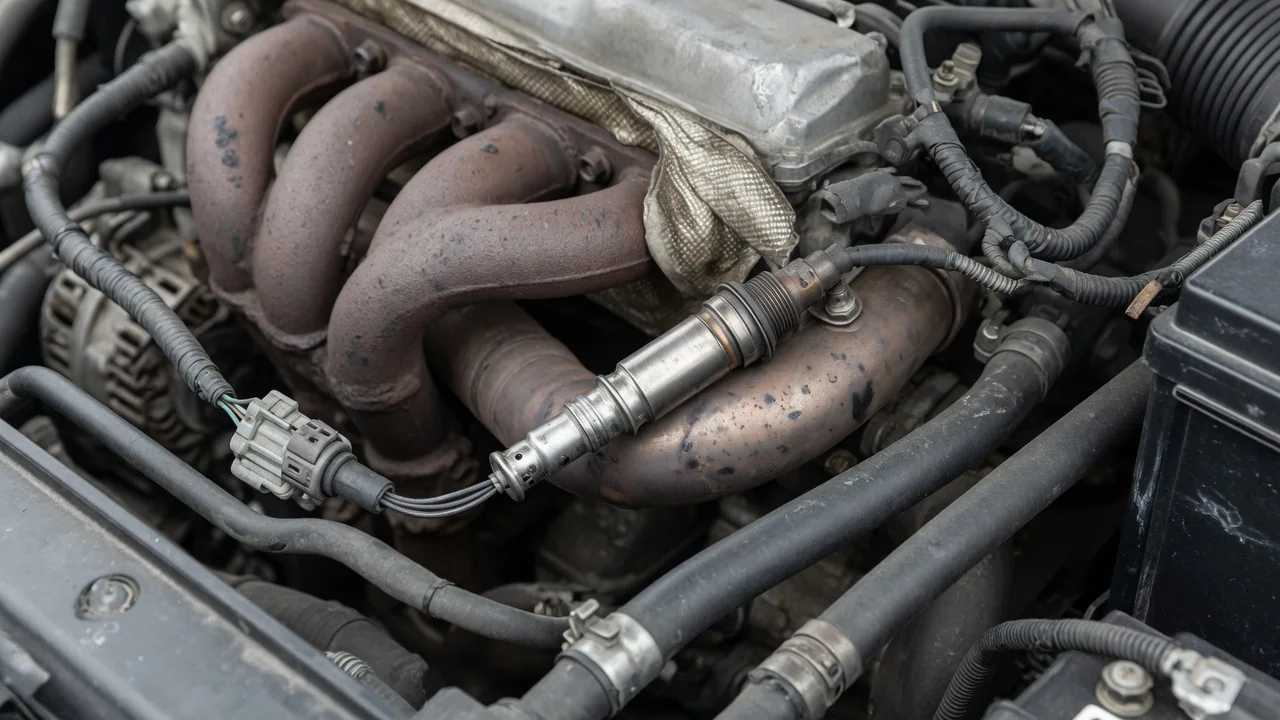
A P0135 code points to a problem in the heater circuit of the upstream oxygen sensor on bank 1. It can appear on a car that seems to drive perfectly well. It still deserves attention because this sensor plays a central role in fuel control and emissions. Knowing what the code monitors, what can trigger it and how testing works helps you approach the repair with realistic expectations.
What P0135 Means for the Upstream Oxygen Sensor
In generic terms, P0135 describes an oxygen sensor heater circuit malfunction at bank 1, sensor 1. An oxygen sensor must be hot before it can produce a usable signal, and exhaust heat alone can take a while to get it there after a cold start. A built-in electric heater shortens that wait, so the engine computer can start using the sensor sooner. Sensor 1 sits upstream of the catalytic converter, and bank 1 is the side of the engine that contains cylinder 1. The physical location varies, so confirm it in vehicle-specific service information.
The code tells you the engine computer saw something wrong in a circuit it monitors. It doesn't prove that the sensor itself has failed. The heater element, its wiring, its connector, its power feed or its control side could each produce the same result. Manufacturers also word the description and set the diagnostic criteria differently. Some watch circuit current, while others evaluate voltage or heater response. Before interpreting any test result, check the service information for your exact vehicle to get the correct code description, circuit layout and conditions that set the fault.
Symptoms You May Notice With P0135
Often the only sign is an illuminated check engine light, with no change you can feel from the driver's seat. The car can run normally because the sensor eventually warms up from exhaust heat alone once the engine is running. The difference shows up mostly in the first minutes after a cold start, when the computer may wait longer before entering closed-loop fuel control. Depending on the vehicle, that delay can raise cold-start emissions and slightly increase fuel consumption, especially if most of your trips are short.
Some drivers report rough running or hesitation, but those complaints are nonspecific. A heater circuit problem alone may not explain a pronounced stumble or misfire, so noticeable drivability issues deserve their own investigation beyond the heater circuit. Symptoms also can't tell a failed heater element apart from a corroded connector, a broken wire or a missing power supply, because each one leaves the sensor without heat. Only electrical testing can separate those possibilities. That's why guessing from how the car feels rarely leads to the right part.
Faults That Can Trigger the Heater Circuit Code
An internal heater failure is one possible cause. If the element inside the sensor opens or shorts, the circuit no longer behaves the way the computer expects, and the heater can't do its job. Wiring faults can produce the same result. The upstream sensor harness runs near hot exhaust parts and is exposed to road debris, so insulation can melt or chafe, terminals can loosen and corrosion can build up inside the connector. Any of these can interrupt current or add resistance, which can make a healthy heater look faulty.
The heater also needs a power supply, which on many vehicles passes through a fuse or relay. A missing supply, a blown fuse or a fault on the control side of the circuit can all set the code. If the light came on after recent work, consider whether the replacement sensor was the correct part for that vehicle, and whether the wiring was stretched, pinched or left unplugged during installation. A control-module fault is also possible, but it should be considered only after test evidence rules out simpler explanations.
Safe Checks Before Scheduling Diagnosis
Before you clear anything, record every stored and pending code along with any available freeze-frame data. That snapshot captures conditions such as engine temperature and speed when the fault set, which helps a technician reproduce it. Also note when the light first appeared: after a cold start, shortly after an oxygen sensor was replaced, or after exhaust or other engine work. Codes related to circuit voltage, power supply or other sensors are especially useful because they can point a technician toward an efficient testing sequence.
A visual check is reasonable only with the engine off and the exhaust fully cool. Look at the accessible harness and connector for obvious melted insulation, broken locking tabs or a plug that has worked loose, without taking anything apart. Don't touch hot exhaust components, reach near fans or belts, or crawl under a vehicle that isn't properly supported. Don't probe connectors or energized circuits either, because that can damage terminals and create new faults. If something looks wrong, photograph it and share the photos with the technician.
How Professional Testing Identifies the Failed Component
A technician starts by confirming which sensor is bank 1, sensor 1 on that particular engine. They then work from the correct wiring diagram and the manufacturer's diagnostic procedure. Testing typically checks that the heater receives supply voltage, that the control side operates when commanded and that the wiring has continuity without shorts. It also checks whether the heater element's electrical characteristics match vehicle-specific specifications. Scan-tool data on heater status and sensor warm-up is weighed alongside those measurements, because either source alone can mislead and lead to an unnecessary replacement.
If testing finds a failed fuse, fitting a new one doesn't finish the job. A fuse usually opens for a reason, such as a short in the heater or its wiring, so the cause has to be found before the fuse is replaced. The circuit should never be bypassed or bridged. After the repair, verification means confirming that the code doesn't return and that the relevant monitor completes under the manufacturer's specified conditions. This step matters because an intermittent connector fault can seem fixed at first and then come back days later.
Driving Concerns and Planning the Repair
A steady check engine light with the car running normally usually calls for timely diagnosis rather than an emergency stop. The code alone still can't establish that continued driving is safe, because other faults may be present at the same time. Watch for any change in how the vehicle behaves. If the light starts flashing, or you notice severe rough running, stalling, smoke or a strong fuel odor, pull over safely and arrange assistance rather than pressing on. Those signs point to problems beyond a heater circuit.
Where emissions inspections apply, an active fault or incomplete readiness monitors can keep the vehicle from passing. The scope of the repair depends on what testing confirms, whether that's the sensor, a section of wiring, a connector or a supply problem, so costs vary. Clearing the code isn't a fix. It doesn't repair the fault, it erases freeze-frame evidence a technician could use, and it resets readiness monitors. The vehicle may then not be ready for inspection until it has been driven enough for the monitors to complete.