Nissan Altima Shift Lock Release: How to Release the Selector
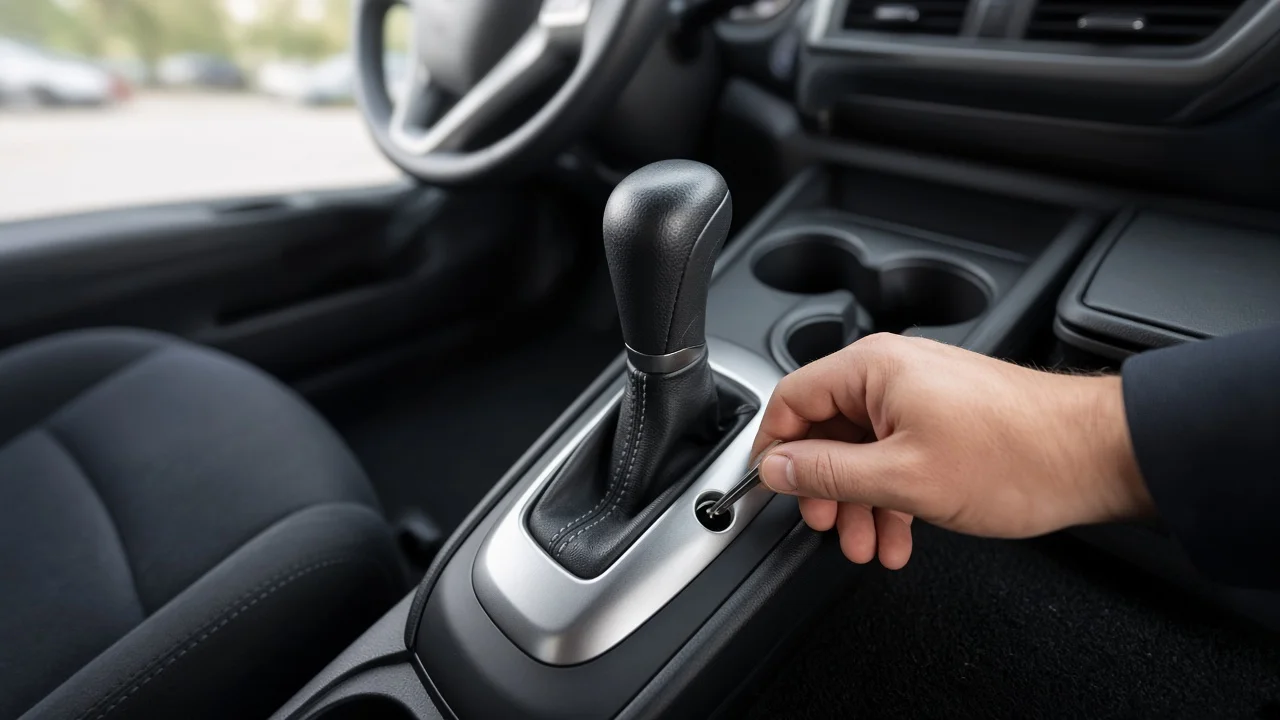
When an Altima's selector refuses to leave Park, the shift lock release lets you move it by hand so the car can be pushed, loaded onto a truck or repositioned. It is a temporary override, not a repair. This guide explains what the release does, how to confirm it applies to your car, how to use it safely, what a stuck lever may be telling you and how to plan the next step without guessing at parts.
When you need the shift lock release
The shift lock is an interlock. On an automatic or CVT Altima, the selector stays locked in Park until the ignition is on and the brake pedal is pressed. A solenoid in the shifter assembly frees the lever when it receives the brake signal. If any link in that chain is missing, such as a discharged battery, no signal from the brake pedal, a failed solenoid or a mechanical bind, the lever stays put. The manual release bypasses the electrical side so you can move the selector yourself.
Owners usually reach for it in a few situations: the battery is dead and the car has to roll to a spot where it can be jump-started or winched onto a flatbed, the car is blocking a garage or parking space, or the lever will not move even with a healthy battery and the vehicle needs to get to a shop. Before you start, consider your practical constraints: whether the ground is level, whether someone can sit in the driver's seat to steer and brake, and how far the car needs to go. For anything beyond a short push, follow the towing guidance in your owner's manual, which typically favors methods that keep the driven wheels off the ground.
Confirm your transmission and configuration
A shift lock exists only on cars with an automatic transmission type. Over the years the Altima has used conventional automatics, a CVT and, on some earlier trims, a manual gearbox. A manual car has no Park position and no shift lock, so if your lever has a clutch pedal beside it, this procedure does not apply. If you are unsure what your car has, the owner's manual, the original window label or a dealer VIN lookup will confirm it.
Fitment matters even among automatic cars, because the release location and exact steps vary by model year and console design. On many Altimas the release sits under a small removable cap next to the selector gate, sometimes labeled or marked with a symbol. Whether your car uses a push-button or keyed ignition also changes how you switch the ignition and whether the steering wheel unlocks. The starting and driving section of the owner's manual for your specific year shows the exact cap location and sequence, so check it before prying at trim.
How to release the selector step by step
Start with safety. Once the selector is in Neutral the car can roll freely, so work on level ground if possible, set the parking brake firmly and chock the wheels until you are ready to move the vehicle. Have a helper available if the car needs to be pushed, since someone must be able to steer and brake.
Place the ignition in the position your manual specifies; many Nissan procedures call for OFF. Gently lift the release cover with a small flat tool wrapped in tape to avoid marring the console. Insert the key blade or a slim screwdriver into the slot and press straight down, holding it there. While holding the release, press the brake pedal, push the selector button and move the lever to Neutral. If the manual instructs you to switch the ignition back on to unlock the steering, do so now.
Do not force the lever. If it will not move with the release held down, the cause may be mechanical, such as a binding linkage or cable. On an incline, the car's weight resting on the parking pawl can also make the lever very stiff, which is why setting the parking brake before you begin helps. When you are done moving the car, return the selector to Park, set the parking brake and refit the cover.
Reading the symptom before choosing a fix
The way the lever behaves offers clues, but none of them confirms a failed part on its own. If the dashboard is dim or the car will not crank, low battery voltage is the first thing to rule out. If the brake lights do not come on when the pedal is pressed, the brake light switch, its fuse or the wiring become likely leads, because the shifter often relies on that same signal. A faint click from the shifter when you press the brake suggests the solenoid is receiving power; no click is worth noting but does not prove the solenoid itself has failed.
Diagnostic codes can help narrow things down, though a basic code reader may not access the body or chassis modules where brake switch faults are stored, and the absence of a code does not clear a component. Your service history is also useful evidence: recent console, stereo or electrical work can disturb connectors, and spilled drinks are a well-known cause of sticky shifter mechanisms. When shopping for parts, a label like OEM quality tells you little; a part number matched to your VIN is what establishes fitment.
Limitations and ownership costs
The release is meant for moving the car, not for daily driving. Relying on it every time you leave Park hides the underlying fault, and if the brake lights are part of the problem, driving that way is a safety risk to you and other road users. The cover and its clips are small plastic trim pieces that can crack if pried carelessly, so expect a minor parts cost if one breaks.
The shift lock is an electrical and mechanical interlock, not a hydraulic one, so adding transmission fluid will not free a stuck selector. If the car is due for transmission service anyway, use the fluid specification Nissan lists for your exact transmission, because CVT fluid and conventional automatic fluid are not interchangeable. Repair options range widely, from charging or replacing the battery, replacing a fuse or adjusting the brake switch to cleaning the shifter mechanism or replacing the solenoid or shifter assembly. Actual costs depend on the confirmed cause and local labor rates, which is why diagnosis should come before buying parts.
A practical checklist before you pay for parts
Work through a short comparison checklist so each possibility is tested rather than assumed. Confirm the model year and transmission type. Check the battery's state of charge. Have a helper watch the brake lights while you press the pedal. Inspect the stop lamp fuse using the fuse chart in your manual. Listen for the shifter click with the ignition on and the brake pressed. Look around the console for spill residue or loose trim. Scan for codes with a tool that reads body and chassis modules, and review recent service history for work near the console or brake pedal.
Take the car to a qualified technician if the lever stays locked even with the release held, if the brake lights are out and the cause is unclear, if several warning lights appear together, or if you have any doubt about safely moving the vehicle. Bring your notes on what you observed, since that saves diagnostic time. Compare repair quotes on the stated diagnosis first and the part second, and confirm any replacement component fits your car by VIN before it is installed.