Mustang Rear Axle Bearing Removal: Identify, Remove, Install and Verify
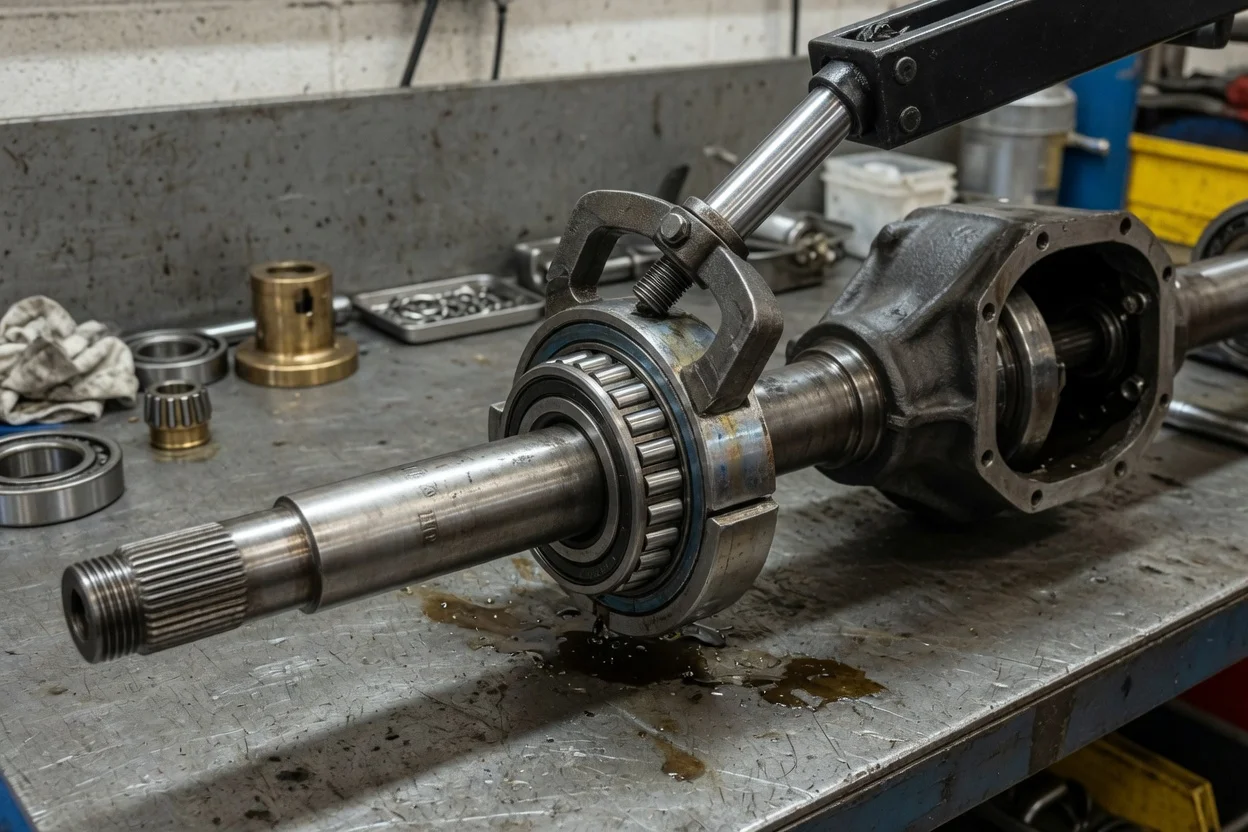
How you remove a rear axle bearing on a Mustang depends on the rear suspension the car uses. Most solid-axle Mustangs have C-clip retained shafts, early cars use press-fit bearings held by a retainer plate, and independent rear suspension models carry the bearing in the knuckle. This guide covers confirming the repair is needed, preparing safely, removing the bearing without damaging the axle or housing, reinstalling it correctly and checking the result.
Confirm the part and repair scope
Start with the exact vehicle configuration. Most solid-axle Mustangs from the Fox platform through the 2014 model year use a C-clip axle. In this design a clip inside the differential holds the shaft in place, and the bearing is pressed into the end of the axle housing. First-generation cars from the 1960s and early 1970s typically use press-fit bearings on the shaft, retained by a plate bolted to the housing flange. Independent rear suspension appears on 2015 and later models and on some earlier SVT Cobra models. On those cars the wheel bearing sits in the rear knuckle, so the procedure is entirely different. Check the axle tag, build data or a parts lookup by VIN before buying anything, because bearing and seal sizes vary between axle families.
Next, make sure the bearing is really the problem. A worn rear wheel bearing usually makes a hum or growl that rises with road speed and may change as the load shifts in turns. Cupped or unevenly worn tires, a failing pinion bearing and worn differential gears can sound very similar, so a careful inspection and a review of the service history help avoid replacing good parts. A leaking axle seal puts gear oil on the backing plate or brake components, and any contaminated brake parts need attention as part of the job. On C-clip axles the bearing rollers run directly on the axle shaft. A pitted or grooved journal therefore means replacing the shaft or using a repair-style bearing designed to ride on a different section of the shaft, where one is offered for that axle.
Prepare tools and safe access
For a C-clip axle you will need: • Rated jack stands and wheel chocks; • A slide hammer with an internal bearing puller attachment; • A bearing and seal driver that contacts only the outer race; • A drain pan and a torque wrench; • A new differential cover gasket or the specified sealant; • The gear oil, plus any limited-slip friction modifier, that the manufacturer specifications call for; Get the factory service information for your model year, because it lists fastener torque values, fluid type and capacity, and any limited-slip handling steps. Press-fit axles need a hydraulic press, and the bearing retaining ring has to be removed and replaced. Many owners leave that work to a machine shop. Independent rear suspension hub work can also require press tools. If you have never worked inside a differential, consider having a shop do the job.
Park on level, solid ground and chock the front wheels. Raise the rear and support the car securely on stands; never work under a car held only by a jack. Release the parking brake so the drum or rotor can come off. Clean the area around the differential cover before opening it so dirt does not enter the gear set. Treat brake dust as a hazard: wipe it up with a damp cloth and avoid blowing it off with compressed air.
Remove without avoidable damage
On a C-clip axle, follow this sequence: 1) Remove the wheel and the brake drum, or the caliper and rotor. Hang the caliper so the brake hose does not carry its weight. 2) If a wheel speed sensor is mounted at the axle end, disconnect and remove it. 3) Drain the gear oil and remove the differential cover. 4) Remove the pinion shaft lock bolt and slide the pinion shaft out. Do not rotate the gears while it is out, because the side gears and thrust washers can shift out of position. On limited-slip units, follow the service information, since some designs include a preload spring that must be handled carefully. 5) Push the axle inward, lift the C-clip off the button end of the shaft, and pull the axle straight out so it does not drag across the bearing and seal.
Pry out the old seal, or pull it out together with the bearing. Then set the slide hammer puller behind the bearing and work it out of the housing bore. Keep the puller and any pry tool away from the bore surface, because a gouged bore can cause a permanent leak. With the parts out, inspect the shaft journal, splines and clip groove. Also check the drained gear oil for heavy metal debris, which can point to other wear inside the axle.
On press-fit axles, remove the retainer plate nuts through the access holes in the axle flange. Then pull the shaft and bearing together using a slide hammer adapter mounted on the wheel studs. The bearing retaining ring is usually split by drilling or chiseling so the bearing can be pressed off. Never use heat, because it can weaken the shaft. On independent rear suspension models, the service procedure covers the hub nut, halfshaft separation and whether the bearing is a bolt-in unit or pressed into the knuckle. Follow it rather than improvising.
Install and restore the system
Clean the housing bore and drive the new bearing in square until it is fully seated, pressing only on the outer race. Install the new seal with its lip facing inward toward the differential and lubricate the lip with gear oil. Some seals call for sealant on the outer edge, so follow the instructions supplied with the part. Support the axle as you slide it in so the splines do not cut the seal lip, then turn it gently until it engages the side gear splines.
Fit the C-clip into the groove on the shaft end, then pull the axle outward to seat the clip in the side gear recess. Reinstall the pinion shaft with its bolt hole aligned. Install the lock bolt using threadlocker or a new bolt, as the service information specifies, and torque it to the listed value. Clean both cover mating surfaces, install the gasket or sealant, and refill with the specified fluid up to the fill plug level, adding friction modifier if the limited-slip unit requires it. Reassemble the brakes and wheel speed sensor and torque the lug nuts to specification. On press-fit axles, use a new retainer gasket where one is used and torque the retainer nuts. On independent rear suspension models, the hub nut torque and any requirement to use a new nut come from the manual.
Check the completed work
Before lowering the car, spin each rear wheel by hand and confirm it turns smoothly without binding or roughness. Pump the brake pedal until it is firm so the caliper pistons or brake shoes are reseated. Confirm the fluid level at the fill plug, and inspect the axle seal and the differential cover for seepage.
Road test at low speed first, then at normal speeds, listening for the original noise. If the noise remains, look at the opposite bearing, the tires, the pinion bearing or gear wear. An ABS or traction control warning light usually points to a sensor connection or sensor position problem. After the drive, check again for leaks. Fresh oil on the backing plate means the seal or the installation needs correcting before the brakes are contaminated. Record the work and the fluid used in the service history, and follow the maintenance schedule for gear oil service that matches your operating conditions.