MOOG Control Arm Bushings: Fitment and Selection
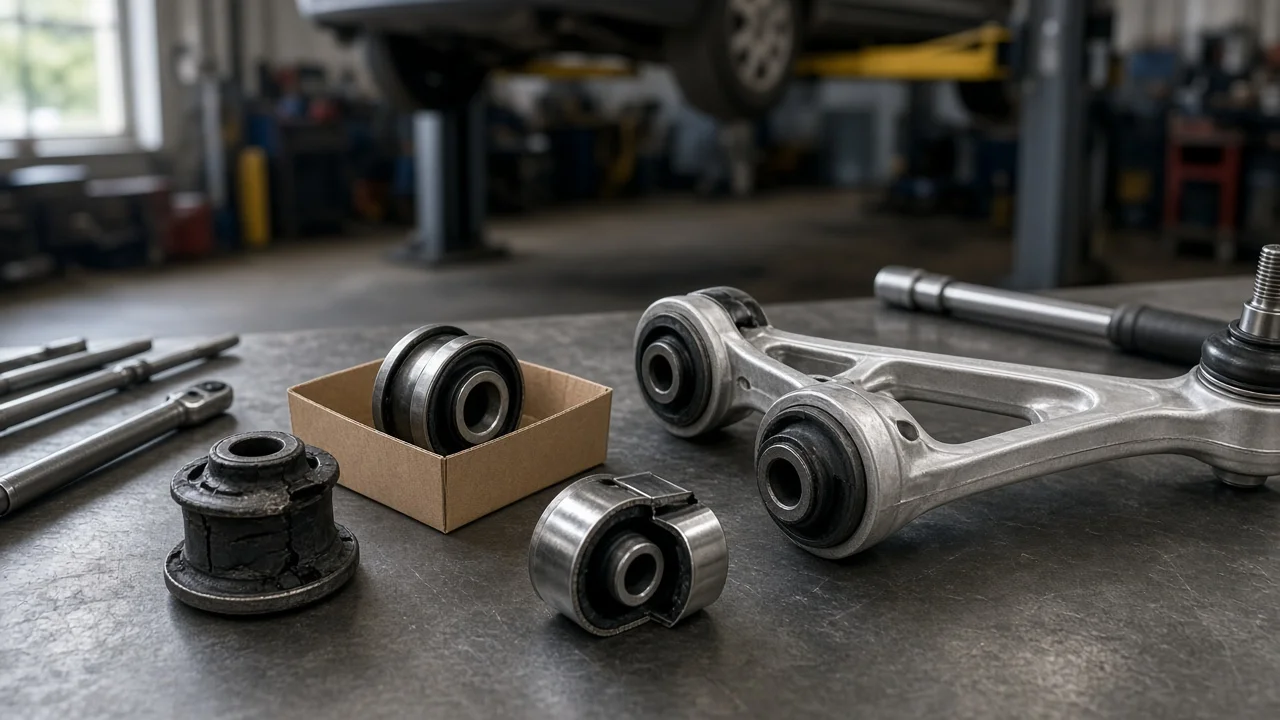
MOOG control arm bushings replace the rubber or composite pivots that locate a control arm against the frame or subframe. Choosing the right one depends less on the brand name and more on matching the exact position, design and installation method your vehicle uses. This guide covers defining the job, confirming fitment, weighing features, and understanding what a new bushing can and cannot fix, so you can build a realistic shortlist before ordering.
Define the job the product must do
Start with the symptom and the evidence. Worn bushings often show up as clunks over bumps, vague or wandering steering, the car shifting under braking, or uneven tire wear. Ball joints, tie rod ends, sway bar links and strut mounts cause similar symptoms, so confirm the source before you buy. With the vehicle on stands at the manufacturer's lift points, inspect each bushing. Look for cracked or torn rubber, rubber separating from the outer sleeve, or an arm that moves visibly when gently pried. Note exactly which bushing is worn: front or rear axle, upper or lower arm, and front or rear pivot.
Next, define your constraints. A daily driver usually benefits from original-style ride comfort and quiet operation. A vehicle that tows, carries heavy loads or sees rough roads may justify a firmer design. Decide whether you can press bushings yourself. Check whether the existing arm is worth reusing, meaning it has no heavy corrosion, bent sections or worn ball joint. If it isn't, replacing the whole arm may be more practical than renewing the bushings alone.
Check compatibility
Fitment is decided by part number, not appearance. Look up the part in the MOOG catalog by year, make, model, engine, drive type and submodel. Read the application notes carefully: front or rear position, upper or lower arm, left or right side, and production date splits. Many arms use two different bushings, one at the front pivot and one at the rear, with different sizes and orientation.
Compare the interfaces that matter. These include the outer sleeve diameter and length that press into the arm, the inner sleeve bore and width at the mounting points, and any flange. Check for voids that must be clocked to a specific angle, and note whether the design is bolt-through, pressed or bonded. If your original arm has a hydraulic or fluid-filled bushing, check whether the replacement duplicates it or substitutes a solid design, because that changes ride and noise behavior. If the listing and your old part look different, compare them side by side before installation.
Features that affect the choice
Material is the main trade-off. Rubber isolates vibration and road noise best and behaves most like the original part, but it flexes more under load. Firmer compounds and polyurethane resist deflection and can sharpen steering response, but they transmit more noise and harshness, and some need periodic lubrication to avoid squeaks. Confirm which material a specific MOOG part number uses rather than assuming it from the brand or price.
Look past marketing labels to details you can verify on the listing: material, included hardware, bonded or unbonded sleeves, grease fittings, installation instructions and warranty terms. Words like heavy-duty or improved design are only useful if the listing says what changed, such as a different compound, an added sleeve or a revised void pattern. A part that targets a known failure mode of the original is worth a look. A vague strength claim is not evidence on its own.
Limitations and ownership costs
Loose bushings usually need a hydraulic press or a bushing tool kit with the correct receiving cups and drivers. On some arms, careless removal can damage the housing. If you lack the tools, budget for shop press time. Rubber bushings should generally have their pivot fasteners tightened at normal ride height with the vehicle's weight on the suspension, not with the arm hanging at full droop. Tightening at droop preloads the rubber and can cause early tearing. Follow the fastener specification and procedure in the service information for your exact vehicle, never guess torque values, and replace single-use bolts or nuts where the manual requires it.
Plan a wheel alignment as part of the job. Replacing arm bushings can change camber, caster and toe, and only an alignment check against your vehicle's specifications confirms the result. A new bushing will not fix a bent arm, excessive joint play in a ball joint, loose steering parts, sagging springs or damaged subframe mounts. It also cannot undo tire wear that has already happened. Seized fasteners can add hardware, penetrating oil and extra labor to the cost.
Build a practical shortlist
Run each candidate through a short checklist before ordering. Does the part number match your year, make, model, submodel and drive type, with the correct position and side? Do the sleeve dimensions and mounting style match the original? Does the material suit your priority, comfort or firmness? Would a complete arm with bushings and ball joint already installed save time and replace other worn parts? Do you have the tools to press the bushing, or is shop labor in your budget? What does the listed warranty cover?
Keep only the options that pass every fitment question, then choose based on how you use the vehicle and how you plan to install the part. Replacing bushings in pairs on the same axle is often recommended to keep handling balanced. Keep the old parts until you confirm the new ones fit, and book the alignment when you schedule the repair.