Kia Picanto ABS Reluctor Ring Replacement: Diagnosis, Removal and Installation
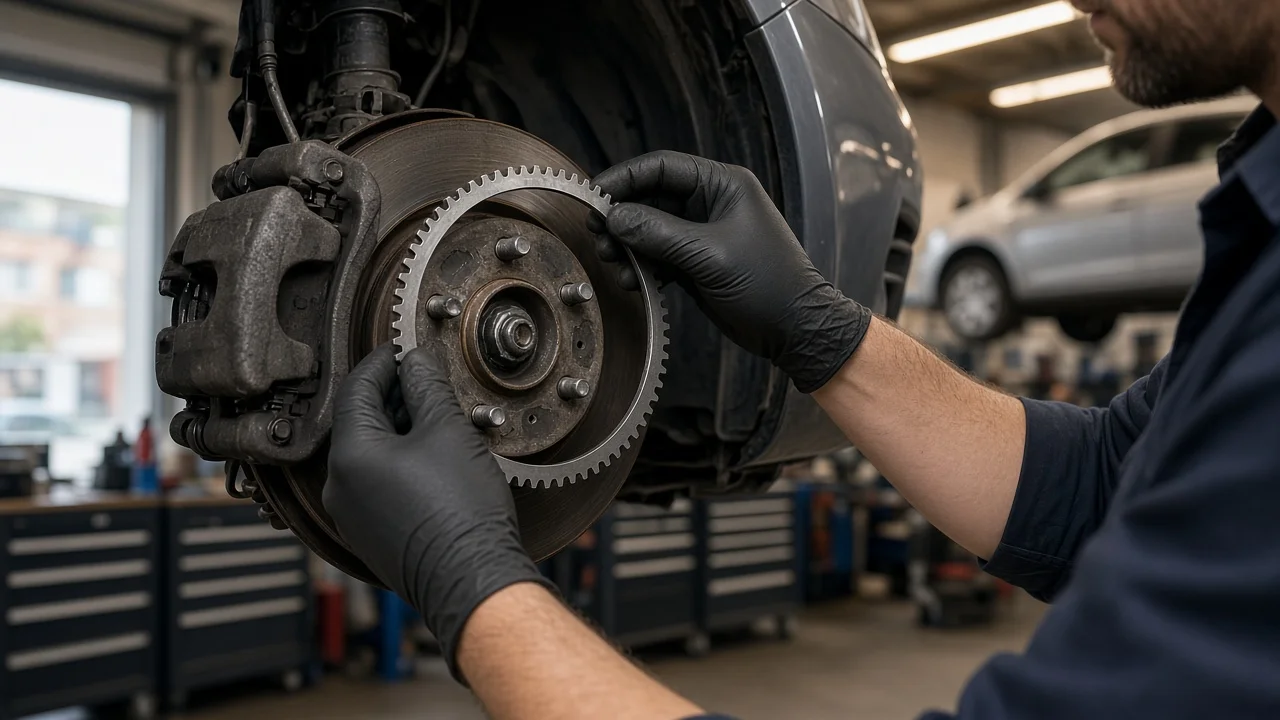
When the ABS warning light comes on in a Kia Picanto, a damaged reluctor ring is one of the less obvious causes. This toothed ring, also called a tone ring, spins with the wheel so the wheel speed sensor can read it. Once corrosion swells or cracks the ring, the signal turns erratic and the ABS module shuts the system down. This guide explains how to confirm the ring is actually at fault before you replace it, and how to remove, install and check the new one without creating new braking problems.
Confirm the part and repair scope
Start with a scan tool that can read the ABS module, not just engine codes. A stored fault for one wheel speed sensor tells you which corner to check, but it does not prove the ring is bad. Live data is more useful. A wheel that reads correctly at walking pace and then drops out or jumps around as speed rises often points to a ring with cracked, missing or rust-lifted teeth. An open-circuit or short-circuit code usually points to the sensor, its wiring or the connector instead. With the wheel off the ground, rotate it slowly and inspect the whole ring with a light. Look for hairline splits, teeth packed with rust or debris, and a ring that has shifted on its seat. Also rule out wheel bearing play, because a loose bearing changes the gap between the sensor and the ring and produces similar symptoms.
Vehicle fitment matters because the design varies by Picanto generation, by axle and sometimes by market. On many versions, the front ring is a separate steel band pressed onto the outer CV joint of the driveshaft, so it can be replaced on its own. Other layouts read a magnetic encoder built into the wheel bearing seal or hub. In that case there is no separate ring to buy, and the repair becomes a bearing, hub or driveshaft replacement. Confirm the correct part with a parts supplier or dealer using your VIN. Before you take anything further apart, compare the new ring with the old one for tooth count, inner diameter and width. A ring with the wrong tooth count makes the ABS module calculate a false speed for that wheel.
Prepare tools and safe access
Get the vehicle-specific service information for your model year before you start. It gives the torque values for the hub nut, caliper bracket, ball joint and sensor bolts. It also states whether the hub nut is single-use and shows the approved way to separate the driveshaft from the hub. Do not guess these figures, because an undertightened hub nut or caliper bolt is a safety risk. Typical tools include a breaker bar, a torque wrench, a socket set, a jack with rated stands, wheel chocks, penetrating oil, a wire brush, a ball joint separator, and either a bearing separator or a fine chisel for the old ring. To fit the new ring evenly, you need a press or a tubular driver that bears on the ring's full circumference.
Work on firm, level ground, chock the wheels that stay on the ground, and never rely on the jack alone. The job is reasonable for an owner who has already removed a driveshaft or hub. It does involve disturbing steering and suspension joints and possibly the brake caliper. If you have not done that kind of work before, or if the ring turns out to be integrated with a bearing that must be pressed out, a professional shop is the safer choice. Keep open flame away from the joint area, because heat damages the CV boot, the joint grease and the sensor.
Remove the old ring without avoidable damage
On the front axle, release any staking on the driveshaft hub nut and loosen the nut while the wheels are still on the ground. Then raise and support the car and remove the wheel. Unbolt the wheel speed sensor first and withdraw it by twisting it gently. Prying a seized sensor out by its body or pulling on the lead often snaps it, which adds a sensor to the parts list. Unclip the harness so it cannot be stretched. If the procedure calls for caliper removal, hang the caliper from the suspension with wire so the hose carries no load. The hydraulic system stays closed throughout, so the brake fluid is not disturbed. Separate the specified suspension or steering joint and push the driveshaft out of the hub without hammering on its threaded end.
With the outer joint exposed, measure the ring's position relative to a fixed shoulder on the joint and write it down, so the new ring can go on at the same depth. A cracked ring can often be split with a fine chisel at its weakest point. Work carefully so the blade does not score the seat. An intact ring can be drawn off with a bearing separator and puller. Wrap the CV boot to keep grit out, then clean the seat with a wire brush or fine abrasive until it is smooth. If the seat is deeply pitted, the new ring may not hold, and the driveshaft itself may need replacing. On the rear axle, check whether the ring is part of the hub or drum assembly before you attempt to remove it separately.
Install the new ring and restore the system
Before fitting the new ring, confirm that its orientation matches the old one. Some rings have a chamfer or lead-in edge on one side, and a magnetic encoder must have its active track facing the sensor. Start the ring square on the seat and press it on with a driver that contacts its full face, stopping at the depth you recorded. Never strike the teeth directly, and do not tap one side at a time. A slightly tilted or distorted ring produces the same erratic signal you are trying to cure. Finally, rotate the joint and sight across the ring to check that it runs true.
Reassemble in reverse order and tighten every fastener to the specified torque. If the original hub nut is single-use, fit a new one, then torque and stake it as instructed. Clean the sensor bore and the sensor tip, fit a new O-ring if one is supplied, and seat the sensor without forcing it. On most installations of this type, the mounting sets the air gap and it cannot be adjusted, so confirm this for your model. A sensor that will not sit flat usually means rust or debris in the bore. Route the lead through its original clips, clear of the driveshaft and the suspension's range of travel. If the caliper was removed, press the brake pedal several times before moving the car so the pads seat against the rotor again.
While the corner is apart, check the brake pads and brake rotors. Measure the remaining friction material and the rotor thickness against the wear limits for your vehicle, and inspect the caliper slides and the brake hose. These parts are not part of the ring repair, but finding a problem now saves you a second teardown.
Check the completed work
Clear the stored ABS codes with the scan tool, start the engine, and confirm that the warning light goes out after the self-check. Some systems keep the light on until the car has moved and every wheel has reported a valid signal, so a light that stays on at a standstill is not yet a failure. Take a slow test drive, ideally with the scan tool showing live wheel speeds. All four readings should rise and fall together smoothly. The repaired wheel should match the others across the whole speed range, not only at low speed.
In a safe, empty area, make a firm stop to check the pedal feel and confirm the car brakes in a straight line. Afterward, recheck the hub nut and wheel nut torque and look for disturbed boots or hoses. Further diagnosis is needed if the ABS light returns, the same code reappears, or one wheel reads zero or erratic values. The same applies if you notice grinding, pulsation or a change in pedal feel. A low or spongy pedal, a lit brake warning light, or a pull under braking means the car should not be driven until a qualified technician has inspected it.