Jeep YJ Transfer Case Linkage Adjustment: How to Set It Correctly
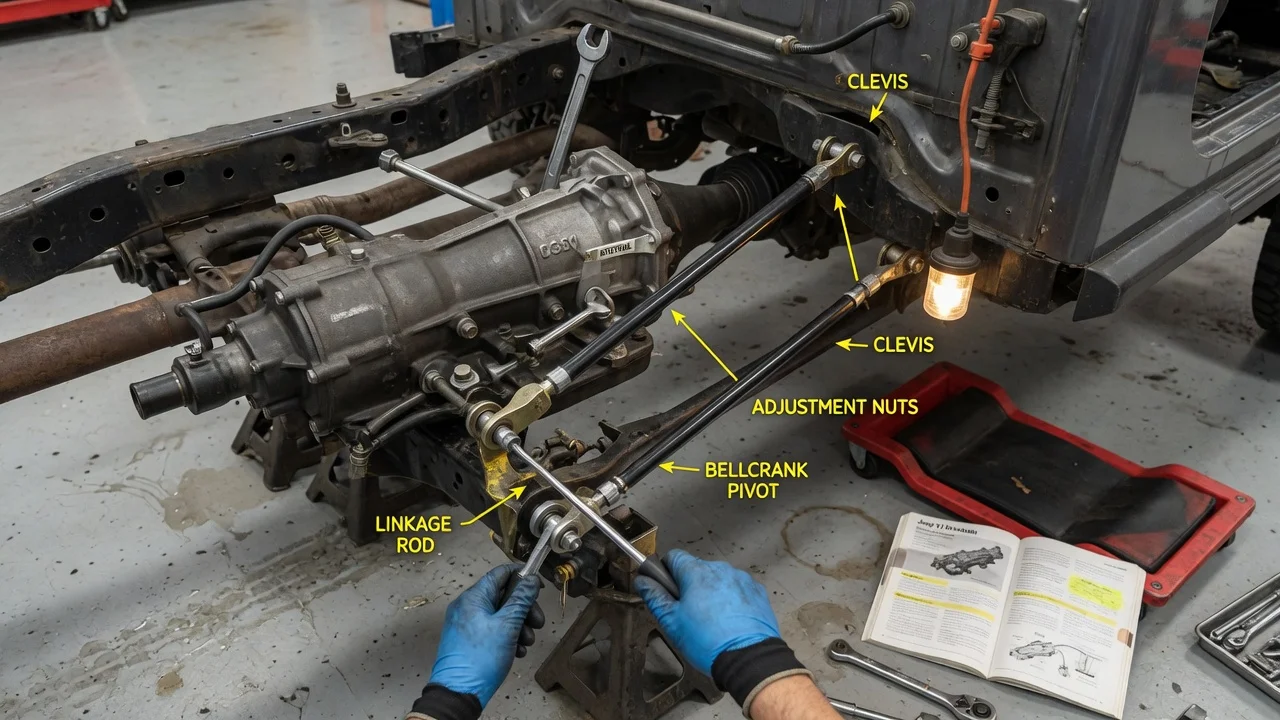
If the transfer case shifter in your Jeep Wrangler YJ won't reach every position, pops out of 4WD Low, or sits at an odd angle, the linkage between the floor shifter and the transfer case is often out of adjustment or worn. Adjusting it is usually a short job under the vehicle, but it only fixes problems that come from the linkage itself. This guide covers the procedure, what changes it, and the signs that the trouble lies elsewhere.
The short answer
Adjusting the transfer case linkage on a YJ means making the position of the in-cab shift lever match the detent position of the range lever on the transfer case. The rod that connects them passes through an adjustable trunnion, sometimes called a swivel, which is clamped by a lock bolt. With the vehicle safely supported and the engine off, you put the shifter and the transfer case in the same reference position and loosen the lock bolt. You then let the rod settle so neither lever is preloaded and retighten the bolt. Finally, you confirm that every range engages with a clear detent and that the lever doesn't bind or touch the floor, boot or console.
The reference position matters. Many service procedures for NP231-equipped Wranglers use 4L as the setting point, because an incomplete engagement there causes the most noticeable problems. Confirm the reference position and the lock bolt torque in the factory service manual for your model year rather than relying on a general rule.
How the shift linkage works
The transfer case decides where each range sits. Inside the case, a shift fork moves with the range lever, and spring-loaded detents hold it in 2H, 4H, Neutral or 4L. The cab shifter only passes motion to that lever through the rod. If the effective rod length is wrong, the shifter runs out of travel at one end before the transfer case reaches its detent. The typical result is a range that feels engaged in the cab but is only partly engaged in the case, or a lever that won't go all the way into one position.
Wear causes symptoms that look similar. The rod ends and the shifter pivot ride in bushings, often plastic or rubber, that crack, dry out or disappear with age. Worn bushings add free play that adjustment can't remove, so the lever feels sloppy even when the trunnion is set correctly. Rust can also lock the rod inside the trunnion, so loosening the bolt doesn't let the rod slide. In that case the adjustment never actually changes until the parts are freed.
What changes the answer
Start with the exact vehicle configuration. Most YJs use the NP231 part-time transfer case, but some early YJs left the factory with a different unit. A previous owner may also have swapped the case. Check the identification tag on the transfer case before you rely on any procedure. The TJ Wrangler that followed also uses an NP231 in most trims, with a similar rod-and-trunnion linkage, so the same adjustment approach generally applies. Rubicon models use a different transfer case, so confirm their reference position and specifications separately. On either generation, the service history tells you whether the shifter, bushings or case have been replaced before.
Modifications change the geometry. Body lifts, replacement motor or transmission mounts, transfer case drop kits, skid plate changes and aftermarket shifters can all move the transfer case relative to the shifter. After such changes, the factory setting may no longer give full travel at both ends. The fix may then be a different rod, bracket or shifter rather than another adjustment. Also, many YJs engage the front axle with a vacuum-operated disconnect. If the transfer case shifts cleanly but the front wheels don't drive, check the vacuum system, not the linkage. If the case jumps out of 4L under load even though it reaches its detent, the cause is more likely internal wear.
What the owner can do
Begin with an inspection rather than a wrench. With the engine off, move the shifter through each position and note where the detents feel weak or where the lever stops early. Then have a helper move the shifter while you watch the range lever on the transfer case from a safe position under the supported vehicle. Check whether the case lever reaches its detent before the shifter reaches the end of its travel. Look for missing or split bushings, a bent rod, loose shifter bracket bolts and a rusted trunnion. Replace worn bushings and straighten or replace damaged parts before adjusting, or the setting won't hold.
To adjust, park on level ground, chock the wheels and support the vehicle on jack stands, never on a jack alone. Put the shifter in the reference position listed for your vehicle. Under the vehicle, make sure the range lever on the transfer case sits fully in the matching detent, moving it by hand if needed. Loosen the trunnion lock bolt and confirm the rod slides freely, cleaning and lubricating it if it is stuck. With neither lever under tension, tighten the lock bolt to the manufacturer specifications.
Check the result while stationary, then in a controlled area. Every range should engage with a distinct detent, and the lever should clear the boot and console. Shift into and out of 4L under the conditions in the owner's manual, normally with the vehicle nearly stopped and the transmission in neutral. Because the system is part-time, test four-wheel drive on a loose or slippery surface rather than dry pavement. Note the adjustment and any replaced parts in your maintenance records so the next owner or technician knows what was done.
Limitations and next step
Linkage adjustment fixes problems with lever travel and alignment, not internal faults. If the transfer case still pops out of a range after a correct adjustment, grinds, makes noise in one range, leaks around the range lever shaft, or shifts much harder than before, it needs an internal inspection by a technician familiar with these units. The same applies if you can't support the vehicle safely or if modifications mean factory parts no longer fit the geometry.
For the reference position, torque values and fluid service, use the factory service manual for your exact model year and transfer case. There is no universal interval for checking linkage adjustment. Heavy off-road use, rock contact with the rod, and drivetrain mount or lift work are good reasons to check it again. If the shifter suddenly changes feel after any of these, inspect the linkage before driving in four-wheel drive.