Jeep TJ Transfer Case Linkage: Identification and Diagram
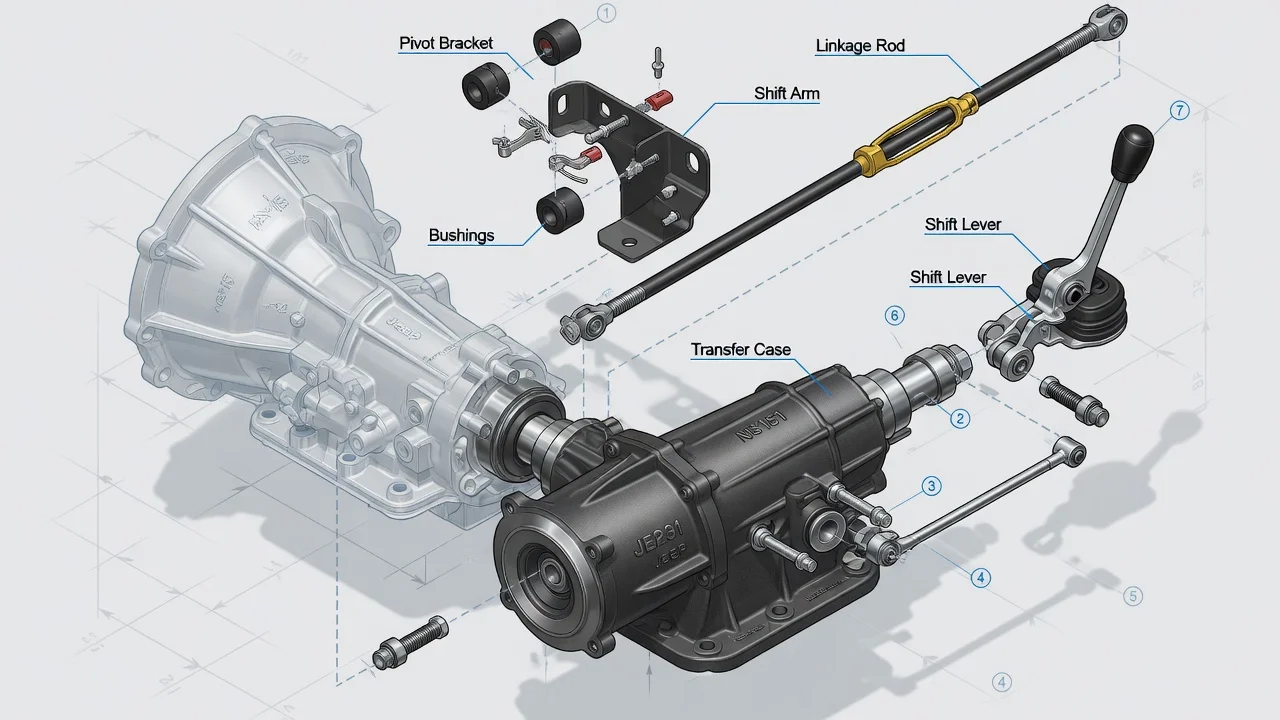
The transfer case linkage on a Jeep Wrangler TJ connects the floor-mounted shift lever to the range lever on the transfer case. When it wears or drifts out of adjustment, shifting between two-wheel drive, four-high, neutral and four-low can become stiff, vague or incomplete. This guide explains how to identify the parts on your TJ, how the linkage is laid out, what changes between configurations, and what an owner can reasonably check before using the service manual or going to a shop.
Short answer: what the TJ linkage is
The Wrangler TJ, built for the 1997 through 2006 model years, uses a manual floor shifter for its part-time transfer case. A single linkage rod carries the shifter's movement to the range lever on the side of the transfer case. The parts you will handle are the knob and shift lever, the shifter assembly with its pivot bracket, the linkage rod, an adjustable trunnion or swivel with a lock bolt that sets the effective rod length, bushings where the rod connects at each end, retaining clips, and the range lever on the transfer case. Complaints like a sloppy lever or trouble reaching a position often trace back to worn bushings, a slipped adjustment or a bent rod. Rule these out before suspecting an internal problem.
Identifying your transfer case and linkage
Most TJ models left the factory with the NP231 transfer case. Rubicon models, offered from the 2003 model year, used the NV241OR, which has a deeper 4:1 low range. Both are part-time units operated by a floor lever. To confirm which case is installed, look for the identification tag on the transfer case housing. If the tag is missing or unreadable, a dealer parts department or a VIN-based parts catalog can confirm the original vehicle configuration. Model year alone is not proof, because transfer cases are sometimes swapped, especially on modified Jeeps.
The overall linkage layout is similar across TJ variants. Still, do not assume every bracket, rod or bushing interchanges between trims or years. Parts listings are often split by trim, transfer case and sometimes transmission, so match replacement parts to your configuration rather than to a generic Wrangler listing. If the Jeep has an unknown service history, check whether the linkage you see underneath is factory or aftermarket before ordering anything.
The linkage diagram in words
Starting in the cab and working downward: the knob and lever pass through the floor boot and pivot in the shifter assembly. The lower end of the lever holds one end of the linkage rod, usually through a bushing secured with a clip. The rod then runs to the range lever on the transfer case, where it is again held in a bushing and clip. Along the rod, typically at one of its ends, an adjustable trunnion clamped by a lock bolt sets how far the range lever moves for a given lever position.
The most reliable diagram for your Jeep is the exploded view in the factory service manual for your model year. The second most useful one is your own photo. With the vehicle safely supported and the exhaust cool, trace the rod from the shifter to the transfer case and photograph every connection before taking anything apart. Lifts, skid plate changes and earlier repairs can make a generic drawing misleading. A photo of your actual setup also makes reassembly much easier.
How the shift linkage works
Moving the lever rotates it on its pivot, which pushes or pulls the rod. The rod rotates the range lever on the transfer case, and that lever turns the shift sector inside the case. On these part-time units, one sector controls both range selection and two- or four-wheel-drive mode. Each position is held by a detent. The linkage must let the sector reach each detent fully. If the effective rod length is off, the lever can run out of travel before the sector seats. The result can be partial engagement, grinding, popping out of gear, or an inability to reach four-low or two-high.
The bushings remove free play from the joints. As they crack or wear, the lever gets loose, positions feel vague, and some of the lever's travel is lost before the range lever moves at all. Not all shift effort comes from the linkage, though. Driving in four-wheel drive on high-traction pavement causes drivetrain wind-up, which can make the lever hard to move out of 4WD; that is normal under those operating conditions. Shifts into and out of four-low should follow the owner's manual procedure, which involves the vehicle being stopped or barely rolling with the transmission in the specified state.
What changes the answer
The transfer case model is the first variable: an NP231 Jeep and a Rubicon with the NV241OR need parts and procedures for their own case. Modifications are the second. The following can all change how the lever, rod and range lever line up: • transfer case drops or lowered skid plates; • motor mount lifts; • slip yoke eliminator kits; • transfer case swaps; • aftermarket shifters; A body lift moves the floor and boot relative to the lever. After this kind of work, the linkage may need readjustment, a different rod, or parts supplied with the modification.
Searches for this topic often bring up linkage diagrams for the YJ, XJ Cherokee, ZJ Grand Cherokee and JK Wrangler. These vehicles use different transfer cases and shifter mountings; some ZJ models, for example, use the full-time NP249. A diagram or part that fits one of them does not establish fit on a TJ. Treat information from other Jeep models only as background.
What the owner can check and adjust
Begin with an inspection, under these conditions: • engine off; • parking brake set; • wheels chocked; • exhaust cool, since it runs near the transfer case; First feel for free play at the knob. Next, have a helper move the shifter through its positions while you watch the range lever and the rod ends from underneath. Look for these faults: • cracked, flattened or missing bushings; • missing clips; • a bent rod; • a loose trunnion lock bolt; • contact with the exhaust or skid plate; • a torn floor boot; In every position, check that the four-wheel-drive indicator matches the lever and that the vehicle behaves accordingly.
Bushing replacement is a common owner job. Remove the clip, separate the rod from the lever, and fit new bushings matched to your configuration. Adjustment follows the service manual procedure: 1) Place the transfer case in the position the manual specifies. 2) Loosen the trunnion lock bolt. 3) Make sure both the range lever and the shift lever are where the manual calls for. 4) Tighten the lock bolt to the specified torque. Do not guess a torque value. Afterward, test every position in a safe area. Confirm that four-low engages fully and that two-high actually releases front-wheel drive.
If the linkage moves cleanly and the range lever reaches every detent, but the case still grinds, pops out or makes noise, the cause is probably inside the transfer case rather than in the linkage. Checking transfer case fluid level and condition, using the fluid named in the manufacturer specifications for your unit, belongs in your regular maintenance schedule. A healthy linkage cannot compensate for low or incorrect fluid or for internal wear.
Limitations and next step
This article describes the general layout and logic of the TJ linkage. Exact part numbers, the adjustment position and torque values depend on model year, trim and transfer case. Use the factory service manual for your year and a VIN-based parts lookup for replacements. Get professional help if symptoms suggest an internal fault, if the drivetrain has been swapped or heavily modified, or if you cannot confirm that each position fully engages.
Take one safety point seriously. A linkage that does not fully engage can leave the transfer case in or near neutral. In transfer case neutral, the drivetrain is disconnected from the wheels, so the Jeep can roll even with the transmission in park or in gear. Until the linkage is confirmed to work correctly, use the parking brake and chock the wheels whenever the vehicle is parked.