Jeep TJ Transfer Case Linkage Removal and Reinstallation
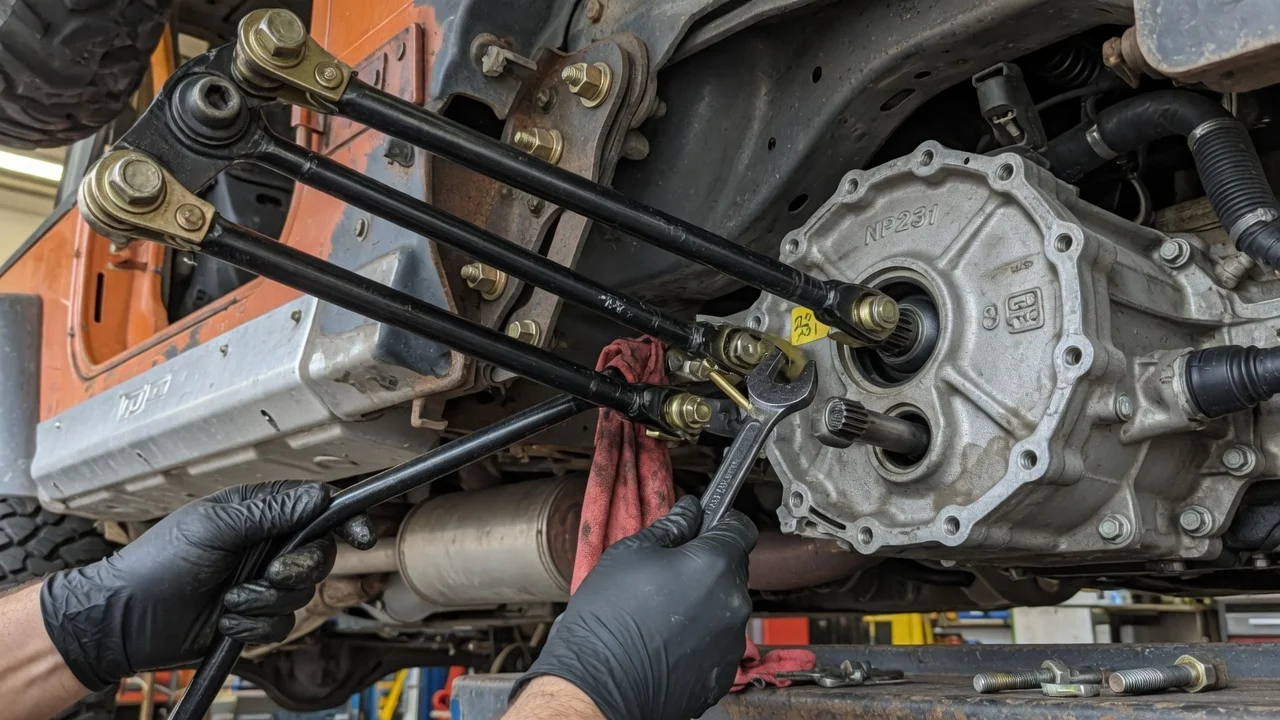
The Jeep TJ Wrangler (1997 to 2006) shifts its part-time transfer case with a floor-mounted lever connected to the case by a short linkage rod. When that linkage wears, bends or binds, shifting between 2H, 4H, Neutral and 4L becomes vague or incomplete. Removing the linkage is a manageable job for an owner with basic tools. Reinstalling and adjusting it correctly matters just as much. This guide covers confirming the fault, preparing the vehicle, removing the linkage, reinstalling it and checking the result.
Confirm the part and repair scope
Start by confirming your vehicle configuration. Most TJ models use the NP231 Command-Trac transfer case. Rubicon models, introduced for 2003, use the NV241OR Rock-Trac case with a lower 4L ratio. Linkage components, bushings and shifter parts may not interchange between versions or model years. Read the identification tag on the transfer case and match any replacement part to that case and your model year.
Linkage problems usually show up in a few ways. The lever may stop short of a position. It may feel loose or sloppy. It may need extra force at one end of its travel. Or the case may not fully engage the range you selected. A worn grommet or bushing, a bent rod from trail contact, or a seized adjusting trunnion are common causes. Internal problems can feel similar, including a worn shift fork, a damaged detent mechanism, or low or incorrect fluid. Replacing the linkage will not fix those. Lifts, transfer case drops and skid plate changes can also alter linkage geometry. On a modified TJ, binding may come from the changed angle rather than a worn part. Check the rod, its connections and the service history before ordering parts.
Prepare tools and safe access
Get the factory service manual for your model year and transfer case. It gives the correct adjustment procedure, the lever position used during adjustment and the fastener torque values. Typical tools include: • Wrenches or sockets for the trunnion lock bolt; • Pliers or a pick for the retaining clip; • Penetrating oil; • A paint marker; • Wheel chocks and properly rated jack stands; • A torque wrench; If you also plan to replace the shift lever or boot, you will need access to the shifter from inside the cabin, as described in the manual.
Park on level ground, set the parking brake and chock the wheels on both axles. This is critical. Once the linkage is disconnected, the transfer case range lever can move into Neutral. In Neutral, the transfer case no longer connects the transmission to either axle. The vehicle can roll even with an automatic in Park or a manual in gear. Support the vehicle on jack stands, never on a jack alone, and let the exhaust cool before working nearby. If the lever still won't reach its positions after adjustment, or the job turns out to involve internal transfer case work, an experienced shop is the better choice.
Remove without avoidable damage
Before disconnecting anything, record where the floor lever sits and photograph the rod from underneath. Note which end attaches to the shifter assembly and which attaches to the range lever on the transfer case. Note how each connection is oriented. Mark the rod's position in the adjusting trunnion with a paint marker so you have a reference point. Apply penetrating oil to the trunnion lock bolt and the grommet or bushing connections, and give it time to work on a rusty vehicle.
Removal follows this order: 1) Loosen the trunnion lock bolt so the rod can slide. 2) Release the retaining clip at the other end. 3) Work the rod out of its grommet or bushing. Typically the trunnion sits at one end and the clip and grommet at the other, but confirm the arrangement on your vehicle against the service manual. Do not pry against the transfer case housing, and do not lever hard on the range lever. That lever rides on an external shaft with a seal, and bending it or loading the seal can cause a fluid leak. Avoid rotating the range lever more than necessary. With the rod out, inspect the grommets, the bushing, the trunnion threads and the shifter pivot for wear, and check the rod for bends.
Install and restore the system
Clean the rod and the trunnion bore, and fit new grommets or bushings rather than reusing hardened ones. Install the rod in the same orientation shown in your photos. Seat the end connection fully and confirm the retaining clip is locked in place. Before tightening anything, the rod should slide freely through the trunnion. If it drags, find the cause first, because a binding rod will prevent accurate adjustment.
Adjustment is what makes this repair work. The factory procedure puts the floor lever and the transfer case range lever in a specified position, then tightens the trunnion lock bolt. Follow the procedure and torque value for your transfer case rather than a generic method or your paint mark alone. Treat the mark as a starting reference only, since worn parts may have shifted the original setting. Once adjusted, move the lever through its full travel and confirm it does not contact the boot, console or floor opening in any position.
Check the completed work
With the vehicle still secured, have a helper move the floor lever while you watch the range lever from below. Each position should produce a distinct detent, and the range lever should reach each detent fully rather than stopping short. Next, lower the vehicle and follow the owner's manual shifting procedure. For these part-time cases, that generally means shifting into or out of 4L with the transmission in neutral and the vehicle stopped or barely rolling. Confirm four-wheel drive engagement only on a loose surface such as gravel or dirt. Driving in 4H or 4L on dry pavement causes driveline bind.
Some symptoms call for further diagnosis rather than more adjustment: • The case pops out of 4L or 4H. • You hear grinding during the shift. • The lever cannot reach a position after a correct adjustment. • Fluid appears around the range lever seal. • New noises come from the transfer case. These point toward internal wear, fluid condition or a seal problem. Record the repair in your service history. Include the linkage in routine under-vehicle inspections, especially after off-road driving, where rocks and debris can bend the rod or dislodge the clip.