Jeep Gladiator Rear Axle Shafts: How to Confirm Replacement Fitment
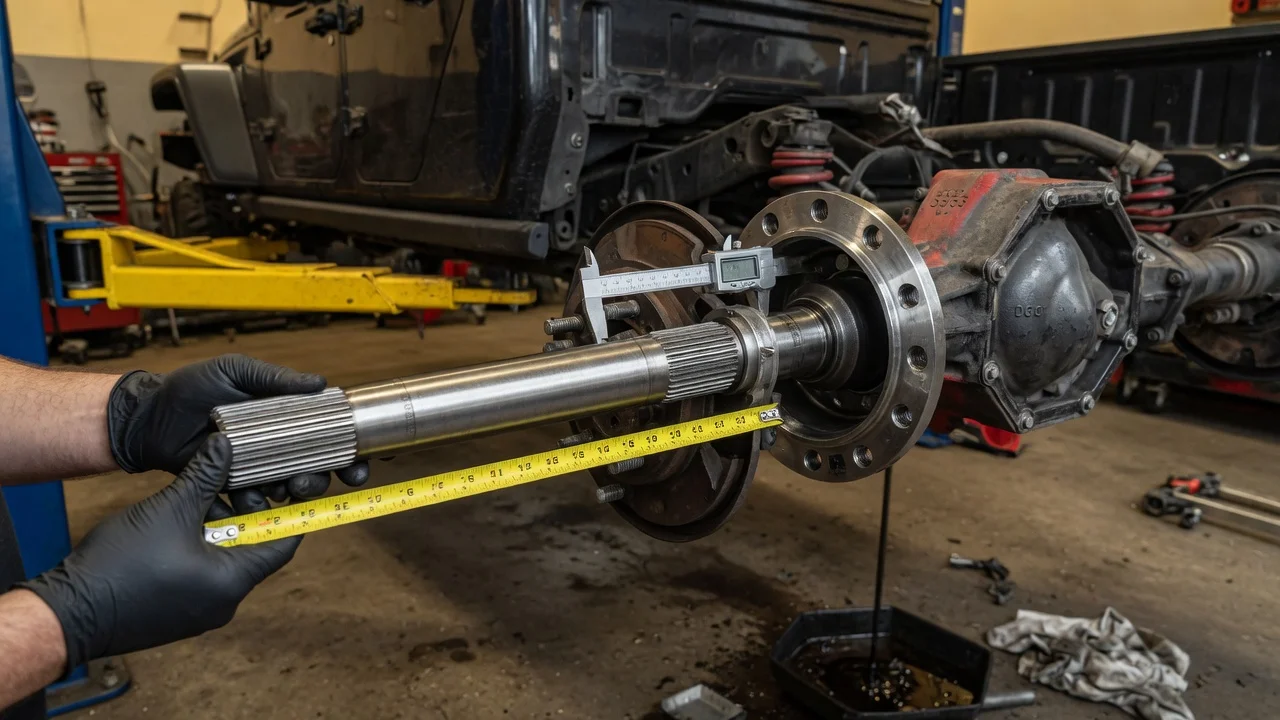
A worn bearing, leaking seal or bent shaft can make a rear axle repair look simple. But ordering the wrong Jeep Gladiator rear axle shaft turns a weekend job into a second teardown. Fitment depends on the exact vehicle configuration, not just the model year. The replacement also only helps if the shaft is truly the failed part. This guide explains how to confirm compatibility, prepare safely, remove and install the shaft, and verify the finished repair.
Confirm the part and repair scope
Start with the identification data that actually determines fitment. A parts catalog lookup by VIN, or the original build sheet, shows which rear axle assembly the truck left the factory with. That includes the trim-related differences that matter here: whether the axle has an open differential, a limited-slip unit or an electronic locker, and which gear ratio is installed. The axle tag on the housing or differential cover confirms the same information on the vehicle itself. This matters on a used Gladiator whose service history is unknown or whose axle may have been swapped. Compare the left and right part numbers as well, because the two sides are commonly different lengths and should never be assumed interchangeable.
Before buying anything, confirm the shaft is the problem. Several symptoms can point to the shaft, its bearing or its seal: a growl or hum that changes with road speed, gear oil on the inside of the wheel or brake parts, play at the wheel end, or a wobble after an off-road impact. Similar symptoms can also come from tires, brake drag, pinion bearings and differential wear. To narrow it down, raise the wheel off the ground, check for play, rotate it by hand and look for leaks at the axle tube end. Damaged splines, a bent flange or a scored bearing surface make a clear case for replacement. A weeping seal alone may only need seal and bearing service if the shaft itself is straight and undamaged.
If the truck has aftermarket parts such as regeared gears, a replacement locker, wheel spacers or a lift kit, match the new shaft to those components rather than to the original catalog entry. Spline count and length must suit the differential side gears. The flange and stud pattern must suit the wheels and brake rotor actually in use.
Prepare tools and safe access
Rear axle shaft replacement is within reach of an experienced home mechanic. It does involve supporting a heavy truck and handling the brake system. Depending on the axle design and the part supplied, it can also involve pressing a bearing and retaining ring onto the shaft. If the replacement shaft arrives without a bearing installed, that step requires a hydraulic press and correct adapters, and it is usually better left to a shop. Owners without proper jack stands, a torque wrench and factory-level service information for their exact build should consider professional service.
Gather the vehicle-specific service information before you start. You need the shaft retention method, fastener torque values, and lubricant type and capacity. You also need any steps for the wheel speed sensor, parking brake and locker wiring. Typical tools include: • Sockets and a breaker bar for lug nuts and caliper hardware; • A slide hammer or axle puller if the shaft is tight in the tube; • A seal driver and a drain pan; • The specified gasket or sealant; • New seals and any fasteners the manual lists as single-use; Park on level ground and chock the front wheels. Raise the rear at approved points and support the truck on stands rated for its weight before removing a wheel.
Remove without avoidable damage
Remove the wheel, then the brake caliper and its bracket. Hang the caliper with wire instead of letting it dangle from the brake hose. Remove the rotor and, where applicable, release or disconnect parking brake components as the service manual directs. Disconnect or carefully move the wheel speed sensor and its harness before any pulling begins. Sensors are easy to damage, and an overlooked connector can be torn out during removal.
How the shaft comes out depends on how it is retained. Some axle designs hold the shaft with a bolted retainer at the end of the axle tube. Others use C-clips inside the differential, which means draining the gear oil, removing the cover and taking out the cross shaft first. Identify the method from the service information for your exact axle rather than guessing. Prying against the wrong part can damage the retainer, the backing plate or the differential. Once the shaft is released, pull it straight out and support its weight so the splines do not drag through the inner seal. On trucks with an electronic locker, take care not to disturb the locker wiring routed along the housing.
Inspect the old shaft and housing once they are apart. Look for scoring at the seal surface, bearing debris in the tube, metal particles in the gear oil and wear on the side gear splines. These clues show whether the problem extends into the differential, which a new shaft alone would not fix. Clean the axle tube end and seal bore before installation.
Install and restore the system
Compare the new shaft directly with the old one before installing it. Length, spline count, flange diameter, stud pattern, and bearing and retaining ring position should all match, along with any sensor surface. Install new seals as the service manual specifies, and lubricate the seal lips so they are not damaged on first rotation. Guide the shaft in level and rotate it slowly until the splines engage the side gear. Never hammer the shaft to force engagement.
Secure the retainer or C-clips exactly as designed. Tighten fasteners to the manufacturer specifications in the correct sequence and replace any single-use hardware. Reinstall the wheel speed sensor and confirm its harness is routed clear of moving parts. Then refit the parking brake components, rotor, caliper bracket and caliper. If the differential cover was removed, reinstall it with the specified sealant or gasket. Refill with the lubricant type and quantity listed for your axle. Axles with a limited-slip differential may require a friction modifier, so follow the service information rather than assuming any gear oil will do.
Before lowering the truck, pump the brake pedal until it is firm. Pushing the caliper piston back during removal leaves the first application soft. Rotate the wheel by hand to confirm it turns smoothly without binding or scraping.
Check the completed work
Start with a static check. Confirm the lug nuts are torqued to specification and the fill plug is tight. Make sure there are no leaks at the axle tube end or cover, and no warning lights on the instrument cluster. An ABS, traction control or locker warning after the repair usually points to a sensor connector, harness routing or sensor seating problem, and it needs attention before you drive any distance. On trucks with an electronic locker, engage and disengage it while stationary, following the owner's manual procedure, to confirm it responds.
Next, road test at low speed. Listen for clicking, grinding or humming, and feel for vibration or brake pull. Recheck the wheel end and differential for leaks after the drive and again after the first few trips. Retorque lug nuts as your service information recommends. Add the repair to the service history so future maintenance schedule decisions reflect the new parts. Some signs call for further diagnosis of the bearing, differential or sensor system: persistent noise, a hot wheel end, fresh leaks or warning lights that return. Do not keep using the truck under heavy loads or demanding operating conditions until the cause is found.