Installing a Home EV Charging Station: What It Involves and What It Costs
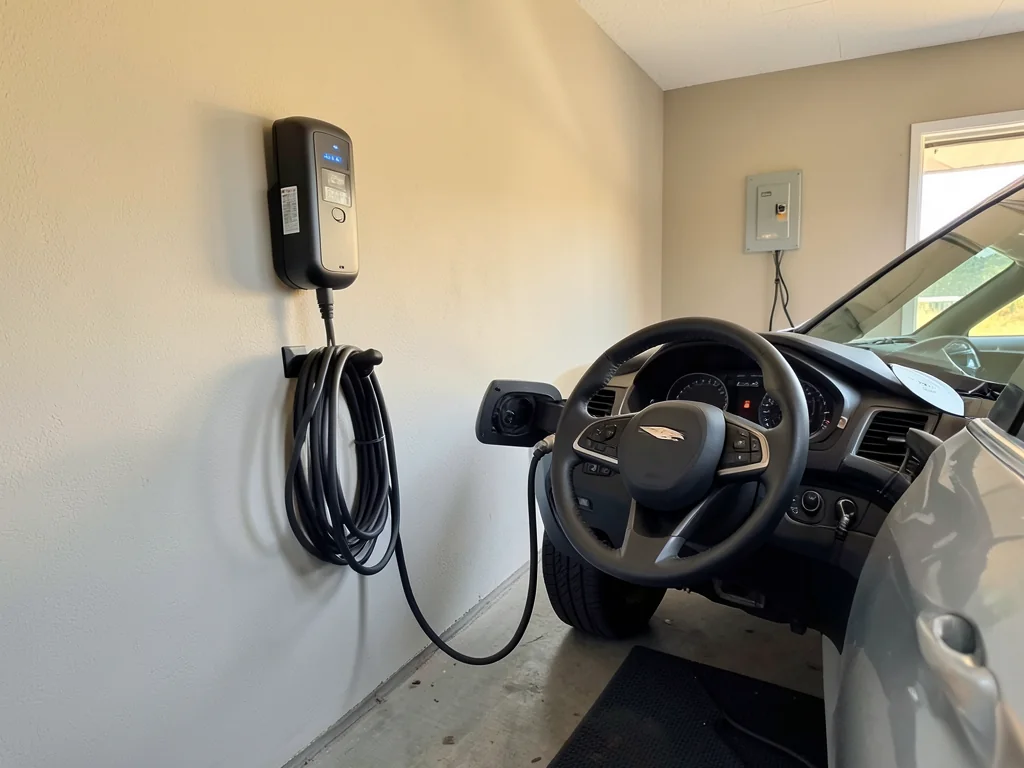
Adding a charger at home is often the most useful upgrade an electric vehicle owner can make, but it takes more than buying a box and plugging it in. The right setup depends on how far you drive, what your electrical panel can handle, local permit rules and how far the wire has to run. This guide explains how those pieces fit together and what drives the final bill.
Home Charging Options: Standard Outlet, Level 2 Outlet or Hardwired Wallbox
Most owners end up with one of three setups. The simplest is the portable cord that comes with many vehicles, plugged into an ordinary 120-volt outlet. The next step up is a 240-volt outlet, such as a NEMA 14-50, paired with a plug-in Level 2 charger. The third is a hardwired wallbox. A 120-volt outlet adds range slowly. That can be enough to cover a short commute overnight, but it falls behind for high-mileage drivers.
A wallbox, or EVSE, is not really the charger. It is a safety and communication device. It confirms a solid connection, tells the car how much current the circuit can supply and cuts power when there is a fault. The car's onboard charger sets the real limit. Plug-in hybrids and full EVs use the same equipment, but a small onboard charger gains nothing from a powerful unit. When you compare units, look at cable length, connector type, weather rating, load management and scheduling.
Electrical Requirements: Dedicated Circuit, Amperage and Panel Capacity
A Level 2 charger needs a dedicated 240-volt circuit that serves nothing else. Charging draws steady current for hours, so electrical codes treat it as a continuous load. That means the breaker must be rated above the charger's actual draw to prevent overheating. Before choosing a size, an electrician does a load calculation. It adds up the big existing loads, such as HVAC, electric water heating, ranges and dryers, to show how much spare capacity the service really has.
Warning signs include a panel with no open breaker slots, an older low-amperage service or a home that already runs close to its limit. A full service upgrade is not always required. An electrician may suggest a load-sharing device that pauses charging while other heavy appliances run, or a lower-amperage circuit that still refills the battery overnight. Distance matters too. A long run through finished walls or outdoors to a driveway adds significant labor and heavier wire.
Permits, Inspections and Why This Is Not a DIY Job
Most jurisdictions require an electrical permit and an inspection for a new 240-volt circuit, and the installer normally files the paperwork. Running a high-amperage circuit and working inside a live panel is a job for a licensed electrician. Mistakes can cause shock, fire or a connection that slowly overheats. Unpermitted work can also complicate an insurance claim after a fire and raise questions at resale when a buyer's inspector finds a circuit with no permit on record.
There is still useful prep a homeowner can do. Decide where the car will park, measure the distance from the panel to the charge port, read the panel label for the service size and have your utility account details ready. Renters, condo owners and HOA members usually need written approval, and shared parking often needs a different solution than a private garage. Before ordering equipment, check whether your utility's time-of-use rates or charging programs require a specific charger or separate meter.
What the Installation Process Looks Like From Assessment to First Charge
The usual sequence is an assessment, either on site or from photos, then a written quote, the permit application, equipment delivery, installation day, inspection and commissioning. Expect questions about where the car parks, which side the charge port is on, where the panel sits, what the wall is made of and whether the run stays indoors. On installation day the electrician shuts off power, adds a breaker, routes the wire, mounts the outlet or wallbox and tests the circuit before turning power back on.
Your part comes at the end. With a smart unit, you connect it to home Wi-Fi, link the app and set a charging schedule. Then you plug in the car to confirm it starts charging at the expected rate. A simple garage installation near the panel can often be finished in a few hours. Panel upgrades, trenching to a detached garage or utility coordination can add days and sometimes a second inspection, so leave time for that before the car arrives.
Charger Hardware Cost: What Separates Basic and Premium Units
Hardware falls into rough tiers. Basic plug-in Level 2 units do the core job without extras. Mid-range smart chargers add app control, scheduling and energy tracking. Premium units add load management, higher amperage or integration with home energy systems. Price rises with output current, longer cables, outdoor-rated enclosures, connectivity and brand ecosystem ties. Some automakers bundle or discount a home charger with a new car, and the onboard charger may make a high-output unit unnecessary anyway.
For many owners, a 240-volt outlet paired with a portable charger is a sound lower-cost option. The outlet is usually simpler to install, and the cord can travel with the car. The trade-offs are daily convenience, since you have to coil and store the cord, and weather exposure, because an outlet outside needs proper protection. Treat any prices you see as approximate and confirm them directly, since models and promotions change frequently.
Installation Labor and Panel Upgrade Costs: The Main Variables
An installation bill has several parts: electrician labor, wire and conduit, the breaker, mounting the outlet or wallbox, permit fees and any panel or service upgrade. The cheapest case is a panel inside the garage a few feet from the parking spot. Costs rise with long runs, finished walls that have to be opened and patched, exterior conduit and detached garages that need trenching. A panel upgrade is the biggest possible add-on. It can bring in the utility and a new meter base, and it lengthens permitting.
Regional differences are wide. Labor rates, permit fees and inspection requirements vary between cities and states, so a price that looks high in one area may be normal in another. Your best protection is to get more than one written quote that itemizes materials, labor, permits and any upgrade. That lets you compare what each installer will actually do instead of a single headline number. It also shows whether one installer left out conduit, wall repair or the permit.
Ways to Keep the Project Affordable and Red Flags in a Quote
Most of the savings come from planning. Mounting the charger close to the panel shortens the wire run. A modestly rated circuit that still covers your daily driving overnight can avoid a service upgrade entirely. Help may be available through utility rebates, tax credits or automaker offers, but eligibility rules and deadlines change, so check the current terms yourself. If a second EV is likely, ask about conduit sized for another circuit now. That costs far less than reopening walls later.
Be wary of quotes that leave out the permit, never mention a load calculation or give a flat price without seeing the site or photos. Another red flag is pressure to buy a high-output unit that your car's onboard charger cannot take advantage of. A good installer asks about your vehicle, your driving habits and your panel before recommending hardware, and explains why a particular circuit size fits. That conversation says more about the quality of the work than the lowest price does.