How to Install Safety Chains on a Trailer
What Safety Chains Do and Where They Must Attach
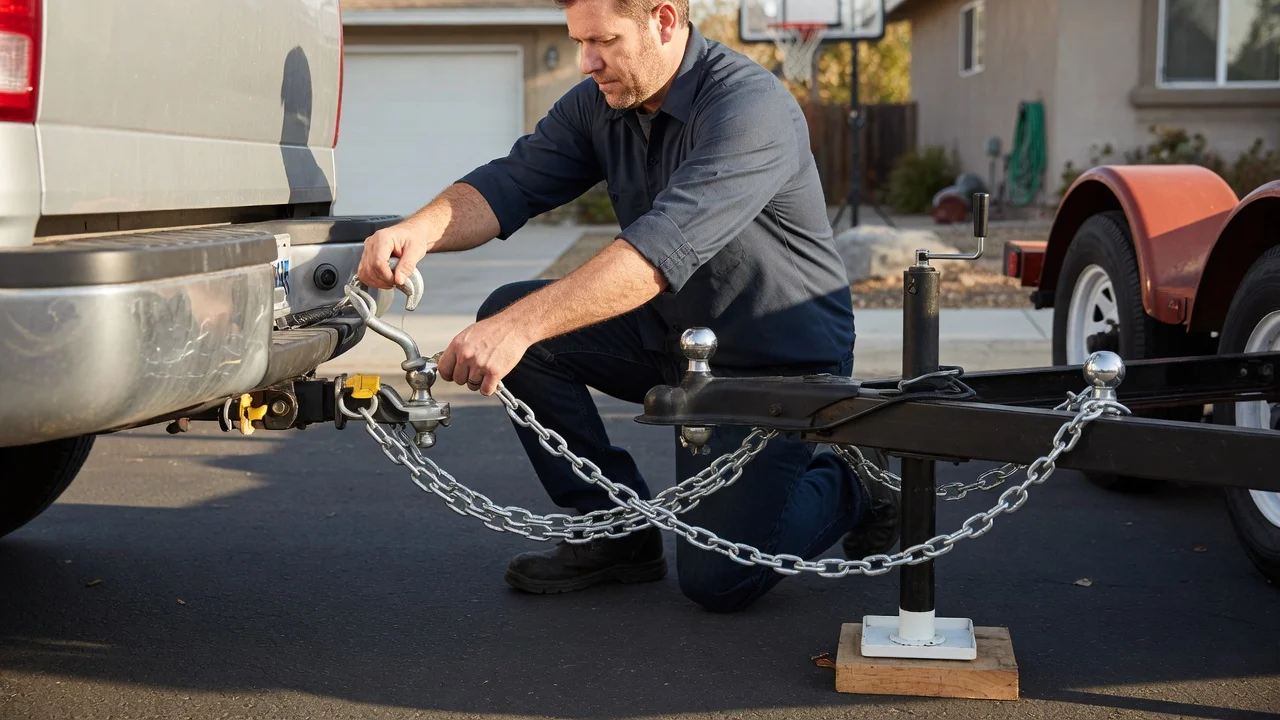
Safety chains are the secondary connection between a tow vehicle and a trailer. If the primary coupler separates from the hitch ball, properly installed chains keep the trailer attached long enough for you to stop. For this to work, the chains must be crossed beneath the tongue and connected to secure mounting points on both the trailer and the tow vehicle.
The trailer ends of the chains must attach to the trailer tongue or A-frame, never to the removable coupler itself. The vehicle ends must attach to the hitch receiver or a dedicated chain connection point on the hitch bar. Do not loop the chains over the ball or connect them to a bumper not rated for towing.
Before You Begin
Use chain that meets or exceeds the trailer's gross vehicle weight rating. For many utility trailers, two Grade 43 or Grade 70 chains with a working load limit above the trailer weight are common, but always confirm with the trailer manufacturer's specification. Chain length should allow full turning without dragging, yet be short enough to support the coupler if it disconnects.
Collect the chains, rated quick links or clevis hooks, washers, bolts or weld-on mounting tabs, and hand tools. Welding is required for some permanent installations. If you are not experienced with welding on a trailer frame, have the mounting tabs installed by a qualified service.
Ordered Installation Steps
Chock the trailer wheels and set the parking brake on the tow vehicle. Position the trailer coupler on the hitch ball and latch it as normal. Measure chain length by running each chain from the trailer tongue mount point to the vehicle hitch connection point. Cross the chains under the tongue and leave a little slack so turns are not restricted. Mark the chain lengths. Cut with a bolt cutter or angle grinder if needed. Attach the trailer end of each chain to a fixed point on the trailer tongue, such as a welded tab, an existing hole in the A-frame, or a through-bolted bracket. Use a rated quick link or clevis with a load rating at least equal to the chain. Attach the vehicle end of each chain to the hitch receiver chain loops or a rated shackle through the safety chain holes on the hitch bar. If no loops exist, install a rated chain anchor plate designed for your hitch. Cross the left chain to the right connection point and the right chain to the left connection point beneath the trailer tongue. Close every hook, quick link or shackle completely. If using hooks with spring clips or latches, confirm each latch seats firmly.
Completion Check
With the coupler still latched, lift the trailer tongue slightly. Both chains should go taut without the tongue dropping far enough to strike the ground. Turn the tow vehicle through a full lock in both directions while stationary or moving very slowly. The chains must not bind, drag, or limit steering.
After installation, recheck fastener torque and chain condition every time you tow. Replace any chain showing wear, deformation, or damaged links. Because attachment hardware is safety-critical, follow the load ratings stamped on each component and do not substitute general-purpose hardware.
When to Seek Professional Help
If your trailer tongue has no suitable fixed mounting point, or if welding is required to add chain attachment tabs, consult a qualified trailer service. Also confirm any local legal requirements for chain grade and connection style, since safety chain rules can vary by jurisdiction and trailer type.