How to Use Chassis Ears to Isolate Wheel Bearing Noise
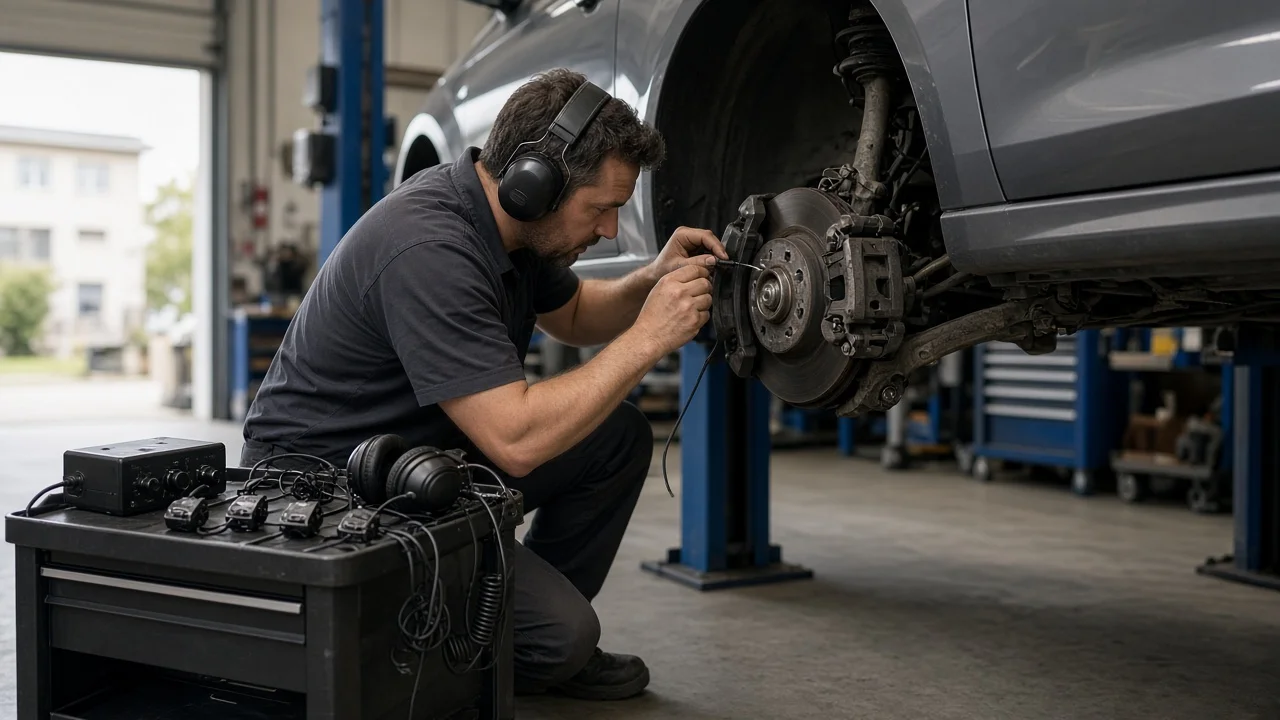
A steady hum or growl that rises with road speed is often blamed on a wheel bearing, but tires, CV joints, brakes and driveline parts can produce very similar sounds. Chassis ears let you listen to several suspension points during a road test, so you can compare corners instead of guessing from the driver's seat. This guide explains how to set them up, run the test safely and read the results before you buy parts.
What chassis ears are and how they work
Automotive chassis ears are a diagnostic listening kit. Several small vibration sensors or microphones sit in clamps, and each one connects by a lead or wireless transmitter to a control box with a channel selector and headphones. Electronic chassis ears amplify the vibration carried through the metal they are clamped to, so a listener can switch between channels while the vehicle moves and hear which location is loudest. Wired kits need careful lead routing. Wireless kits simplify routing, but the clamps still have to be secure.
The tool does not measure anything against a specification. It compares relative sound at the mounting points you choose. Because noise travels through the body and suspension, every channel usually picks up something, so the diagnosis depends on comparing matching positions rather than on whether a channel hears noise at all.
Establish the symptoms
Before clamping anything, record when the noise appears. Note the speed at which it starts and whether it follows road speed or engine speed. Note whether it changes in gentle left and right sweeping curves, when accelerating, cruising or coasting, under light braking and on different road surfaces. Bearing noise usually tracks road speed rather than engine speed, and it often changes when a turn shifts weight onto or off the affected corner.
Also list recent changes and associated signs. A tire rotation or replacement, a pothole or curb strike, brake work, hub or axle repair, an alignment or new wheels can all point toward a cause. Vibration in the steering wheel or floor, a pull, uneven tire wear, clicking in turns or an ABS or traction warning light are useful clues. This record tells you which corners to compare and which driving conditions you must reproduce during the test.
Distinguish plausible causes
A worn wheel bearing typically produces a hum, growl or rumble that rises with speed and often grows louder when that bearing is loaded in a turn. It may be accompanied by roughness or play. Cupped, feathered or irregularly worn tires can make a nearly identical hum, but tire noise often changes sharply with road surface and tends to move when tires are rotated. An outer CV joint usually clicks in tight turns under power, while a worn inner joint tends to cause vibration on acceleration. A dragging caliper or a dust shield touching the rotor gives a scraping or rhythmic sound that may change when the brakes are lightly applied. Differentials, transfer cases and driveshaft support bearings produce whine or hum tied to acceleration and deceleration, and that sound can seem to come from one corner.
Evidence that weakens the bearing theory includes noise that changes mainly with throttle, noise that varies strongly with pavement type, or noise that moved after a tire rotation. Evidence that supports it includes a clearly louder channel near one hub, a change with turning load and play or roughness found during inspection.
Checks in a useful order
Start with checks that need no tools. With the vehicle parked on level ground, engine off and parking brake set, inspect tread by eye and hand for cupping or feathering, set tire pressures to the door placard, and look for bent dust shields, grease leaking from a hub and torn CV boots. These findings can explain the noise before anything is lifted.
If you need to raise the vehicle to reach the mounting points, use proper vehicle support: rated jack stands at the manufacturer's lift points or a lift, never a jack alone. Clamp sensors to solid metal near each suspect bearing, such as the steering knuckle, strut body or control arm near the ball joint. Keep clamps off brake lines and hoses, ABS sensor wiring, CV boots, rotating parts and the exhaust. Use matching positions on the left and right so the comparison is fair, label every channel and consider one reference channel, such as the differential housing. Route and tie leads away from wheels, steering linkage, brakes and hot parts, then turn the steering from lock to lock to confirm clearance before lowering the vehicle.
For the road test, one person drives while a passenger listens, using safe, legal roads to reproduce the conditions in your notes. Switch channels at the same steady speed and during gentle curves, then confirm all clamps stayed in place. Some follow-up checks require service specifications or a qualified technician: measuring hub end play with a dial indicator against the manufacturer's limit, rocking a supported wheel to separate bearing play from ball joint or tie rod play, and any procedure that runs driven wheels with the engine on a lift.
Interpret the findings
A channel that is consistently louder than its matching opposite and changes with turning load is a strong pointer to that bearing. Similar loudness on both sides suggests tires, the driveline or another shared source, so compare against the reference channel. Noise loudest at the axle center points toward the differential, and a change on a channel near the brake during light braking points toward brake components.
Chassis ears localize noise; they do not condemn a part. Before replacing anything, confirm the finding with a joint play inspection, a check for roughness when the wheel is turned by hand and, where tire type allows, swapping tires to see whether the sound moves. If play is present, note where the movement actually occurs, since a worn ball joint or tie rod end can feel similar to bearing play.
When a bearing or hub is replaced, the axle nut and hub bolts must follow the manufacturer's fastener specification, and some nuts are single-use. If bushings are disturbed, some procedures call for final tightening at ride height. Whether a wheel alignment check is needed depends on what was disassembled, so follow the service information. Repeat the chassis ears test afterward to confirm the noise is gone.
Urgency and next action
Stop driving and arrange a tow if you notice grinding or metallic scraping, wheel wobble or obvious play, a new pull or vague steering, a burning smell or unusual heat at a hub, smoke, or an ABS or traction light appearing together with the noise. A failing bearing can affect wheel retention and braking, and no one can predict a safe remaining distance from the sound alone.
For the repair, bring the vehicle's year, make, model and drivetrain, your notes on when the noise occurs, which channel was loudest and where each clamp was mounted, any play or roughness you found, recent work and tire condition. Ask the shop to confirm the diagnosis with its own inspection before parts are ordered.