How to Use a Clay Bar to Decontaminate Car Paint
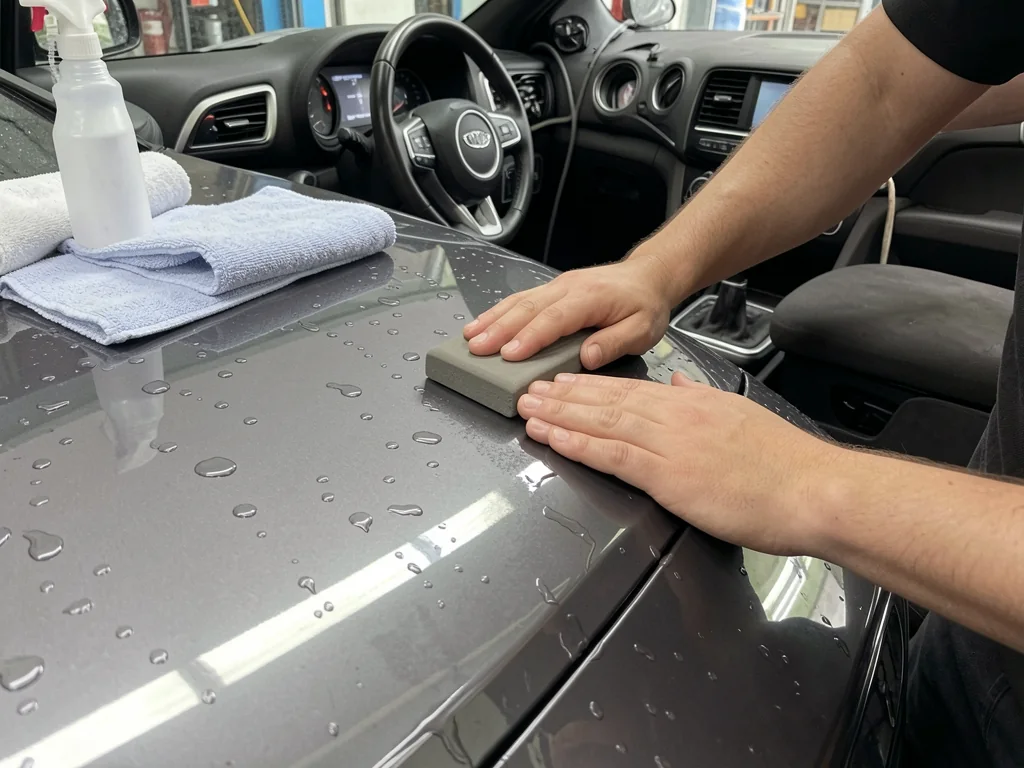
Washing removes loose dirt, but some grime clings to paint so firmly that a wash mitt glides right over it. A detailing clay bar is made to lift that bonded layer and leave a smoother surface that is ready for protection. Used carefully, and only when the paint needs it, clay is one of the simplest ways to improve how a finish looks and feels.
What a Clay Bar Removes From Car Paint
Detailing clay is a soft, slightly tacky compound. When it glides over a lubricated surface, it catches contaminants that stick up above the clear coat. A wash mitt mostly moves loose dirt around. Clay shears off particles that have bonded to the finish, such as airborne paint overspray, sap residue, road film and tiny embedded specks of industrial fallout. Those deposits get trapped in the clay instead of being pushed across the panel. Results depend on the contaminant, though, and some stains or etched spots may still be there after careful claying.
It helps to know what clay can't do. It doesn't remove scratches, swirl marks or water-spot etching, because those are damage in the paint, not material sitting on top of it. It won't restore oxidized, chalky paint, and it leaves no protective layer behind. Treat claying as an occasional prep step for when the surface still feels rough after washing, not as part of every wash. Each session adds some friction to the finish.
Check Whether Clean Paint Needs Claying
After a thorough wash and dry, lightly run clean fingertips over a small area, such as the hood or a lower door where road grime builds up. Paint that needs claying often feels gritty instead of slick. Some detailers slip their fingers into a thin plastic bag, which can make small bumps easier to feel. Keep the pressure very light, because you're feeling the surface, not rubbing on it. Roughness only tells you that something is bonded there. It can't tell you what the contaminant is or how deeply it's embedded.
Some surfaces call for a pause before any clay touches them. Rubbing can make peeling or flaking clear coat, chipped or freshly repainted areas, and thin or faded paint worse, so have those assessed first. If you're not sure a panel is standard gloss paint, find out before you start. Matte paint, vinyl wraps, paint protection film and ceramic-coated surfaces each have their own care guidance. Check it before claying, because clay can dull, mark or wear down these finishes.
Prepare the Surface and Choose Compatible Lubrication
Clay should only touch paint that is already clean. Wash the vehicle thoroughly and rinse it well to get rid of loose grit, because any sand left behind can be dragged across the surface and leave marring. Work on a cool panel in the shade. Heat and direct sun make lubricant evaporate fast, and then the clay grabs instead of gliding. Keep the clay, the lubricant bottle and your towels on a clean surface off the ground, where they would easily pick up abrasive debris.
Lubricant is what lets clay glide instead of drag, so choose one that's approved for your clay and for the surface you're treating. Some clay makers allow a diluted car wash solution. Only use it if your clay's instructions say so, because some soaps can break down the clay or aren't slick enough. Cut off a small piece, knead it until it's warm and soft, and flatten it into a patty that fits your palm. Keep the rest of the clay in its sealed container so it stays clean for later.
Work in Small Areas With Light Pressure
Work on a small section of one panel at a time. Spray the area generously and mist the face of the clay too, so there is a clear film of lubricant between them. Move the clay in short, straight passes with light pressure and let it do the work instead of scrubbing. At first you may feel slight resistance or hear a faint grinding as the clay picks up contamination. That usually fades as the surface gets cleaner. Add more lubricant as soon as the area starts to look dry or the clay slows down.
Check your progress often by wiping a spot dry and feeling it again. Stop once the area feels smooth instead of aiming for a set number of passes. Look at the clay regularly, and when its face is dirty with trapped grime, fold and knead it to expose a clean surface. Throw away clay that has been dropped or can't show a clean face anymore, because embedded grit will scratch the paint. If the clay drags or leaves marks, stop, clean the area and check your lubrication before you continue.
Inspect the Paint and Finish Pre-Wax Preparation
When a panel is done, remove the leftover lubricant the way the product instructions say, which may mean a wipe or a rinse. Then dry it with a clean, soft microfiber towel. Inspect the paint in good light, ideally diffused daylight or a bright lamp held at an angle. This is when you can spot any remaining specks and look for the light haze or fine marring that claying sometimes leaves. If deposits survive careful work, they may need a treatment that's safe for the surface or a professional's opinion. Pressing harder isn't the answer.
A pre-wax cleaner does a different job from clay. Instead of lifting bonded particles, it usually removes old wax, oils and light residue so a new protection product can bond properly, and some versions contain mild abrasives. Whether you need one depends on the paint's condition and on the instructions for the wax or sealant you plan to use. Polishing is optional too. If the inspection shows swirls or marring that bother you, correcting them may be worth it, but claying on its own doesn't mean you have to polish.
Protect the Paint After Claying
A sensible order is to wash, clay only where the paint needs it, inspect, and then apply protection. Product names and kits that pair clay with wax can blur this order, but a clay bar doesn't wax the paint. Some kits include a lubricant that leaves a little wax behind, but the clay's only job is still removing contamination. Claying can also thin or disturb an existing wax, sealant or coating. Check what's left and renew it the way that product's instructions recommend.
Apply a compatible wax or sealant to the clean, prepared surface following its label, and pay attention to temperature, how thick to apply it, and curing or buffing times. Protection often spreads more evenly on freshly decontaminated paint, and the finish can feel noticeably slicker. After that, wash gently and regularly with clean mitts to slow down new buildup. Instead of claying on a fixed schedule, repeat the fingertip check now and then, and clay again only when the paint starts to feel rough.