How to Test a Transmission Valve Body
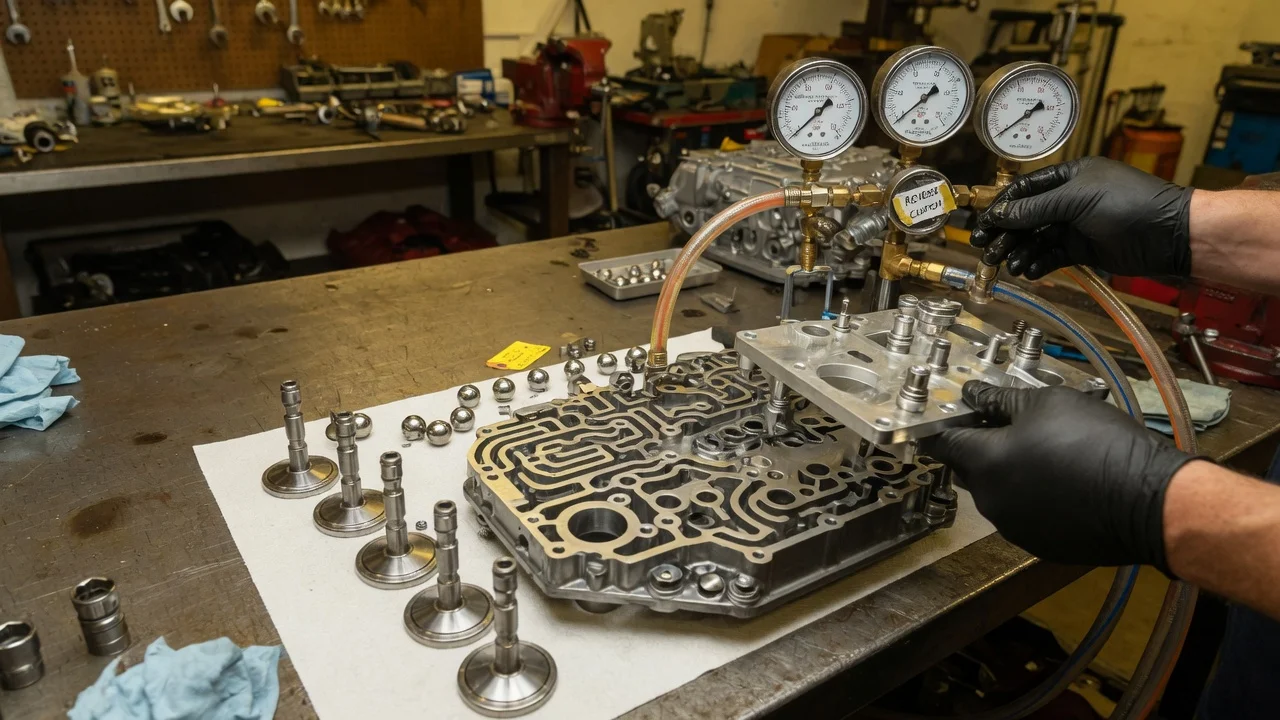
The valve body routes pressurized fluid to the clutches and bands of an automatic transmission, so a problem there can look like many other faults. Testing it is mostly elimination: confirm fluid condition, read the transmission control data, measure pressure, and only then judge the hydraulic circuit itself. Designs vary widely between manufacturers and even model years, so identify the exact transmission type and configuration before following any procedure or buying parts.
Establish the symptoms
Start with a precise record of when the problem appears. Note whether it happens cold or only after the transmission is fully warm, during a specific gear change, on upshifts or downshifts, under light or heavy throttle, or when engaging Drive or Reverse from a stop. Describe what you feel: a flare where engine speed rises between gears, a harsh bang, delayed engagement, shudder, a missing gear, or the vehicle holding one gear in a limp mode. Write down any warning lights and whether the fault is constant or intermittent.
Then list recent changes. A fluid service, a top-up with an unverified fluid, a battery disconnection that cleared learned shift adaptations, a software update, heavy towing, an overheating event or a leak repair can all change shift behavior. Collect the mileage, the service history and any stored diagnostic codes before clearing anything, because freeze-frame data is lost once codes are erased.
Distinguish plausible causes
Faults that genuinely originate in the valve body include valves sticking from varnish or debris, worn valve bores that leak pressure, damaged separator plate gaskets, misplaced or missing check balls after a previous repair, and failing solenoids mounted on the body. Evidence that supports a hydraulic valve body problem includes a symptom tied to one particular shift, behavior that worsens as fluid gets hot and thins, and pressure that drops only in certain circuits while the rest of the unit performs normally.
Several competing causes produce similar complaints. Low, overfilled or degraded fluid, a clogged filter, a weak pump, harness or connector faults, a faulty speed or temperature sensor, control module software, worn clutch packs or bands and torque converter clutch problems all overlap with valve body symptoms. Electrical circuit codes point toward wiring or a solenoid circuit rather than a stuck valve. Slipping in every gear suggests a supply problem such as fluid level, filter or pump. Correct pressure combined with slipping suggests worn friction material rather than a control fault. Engine misfires can also be mistaken for rough shifting.
Checks in a useful order
Begin with observations any owner can safely make. Check the fluid level using the manufacturer's method; many modern units have no dipstick and require a specific fluid temperature, engine running and a fill or check plug, so guessing can lead to overfilling or underfilling. Look at the fluid color and smell, and note any visible debris. Inspect for leaks around the pan, cooler lines and seals, and look at the transmission connector for damage, oil intrusion or corrosion. Confirm that any fluid previously added matched the required fluid specification.
The next stage requires a scan tool that reads transmission data, not just generic engine codes. Record diagnostic codes with freeze-frame information, then review live data during a road test: commanded versus actual gear, input and output shaft speeds, calculated slip, fluid temperature and commanded solenoid pressures where available. Measuring solenoid resistance at the connector and comparing it with the published value helps separate wiring faults from internal ones, but only if you have the correct specification for that unit.
Deeper tests are usually best left to a qualified transmission technician. A line pressure test uses a gauge on the case test ports and compares readings by range and condition against factory specifications. Removing the pan allows inspection of filter and sediment. Removing the valve body permits vacuum or air testing of individual bores, inspection of the separator plate and bench testing of solenoids. These steps need correct torque values, a clean work area and the right replacement gaskets.
Interpret the findings
Pressure readings narrow the location. Low pressure in every range points to the supply side, such as fluid level, filter, pump or the main pressure regulator, rather than one shift valve. Normal pressure in most ranges but low pressure in one suggests a leak in that circuit, which could be the valve body or a clutch piston seal downstream. Pressure that is too high or does not respond to commands suggests a regulator valve or pressure control solenoid issue. Vacuum testing that shows leakage in specific bores is strong evidence of valve body wear.
Codes describe a condition, not a part. A circuit code shows an electrical fault somewhere in that circuit, including wiring and the control module. A ratio or performance code shows a shift did not happen as commanded, which may be hydraulic or mechanical. A solenoid with correct resistance can still stick mechanically. Metal fragments in the pan indicate hard-part damage that a valve body alone will not fix. Before replacing parts, confirm the fault with pressure or bore testing, rule out electrical causes, and check whether an adaptation relearn is required afterward.
Urgency and next action
Stop driving and arrange towing if the vehicle will not engage a gear, slips severely, flares with the engine racing, shows a transmission overheat warning, smells burnt, leaks fluid heavily, or makes grinding or clunking noises. Continuing to drive with incorrect pressure can turn a control problem into burned clutches and a far more expensive repair. No remaining safe distance can be predicted from symptoms alone.
For an accurate quote, give the shop the VIN, transmission model, fluid specification used, stored codes with freeze-frame data, a description of when the problem occurs, service history and any test results you already have. Repair options range from correcting fluid level or wiring, to solenoid replacement, valve body reconditioning, a replacement valve body, or a full rebuild if internal wear is confirmed. Verify fitment by VIN and transmission code, and ask whether the replacement unit or integrated control module needs programming and a relearn procedure.