How to Replace Spark Plugs Step by Step: A Complete DIY Guide
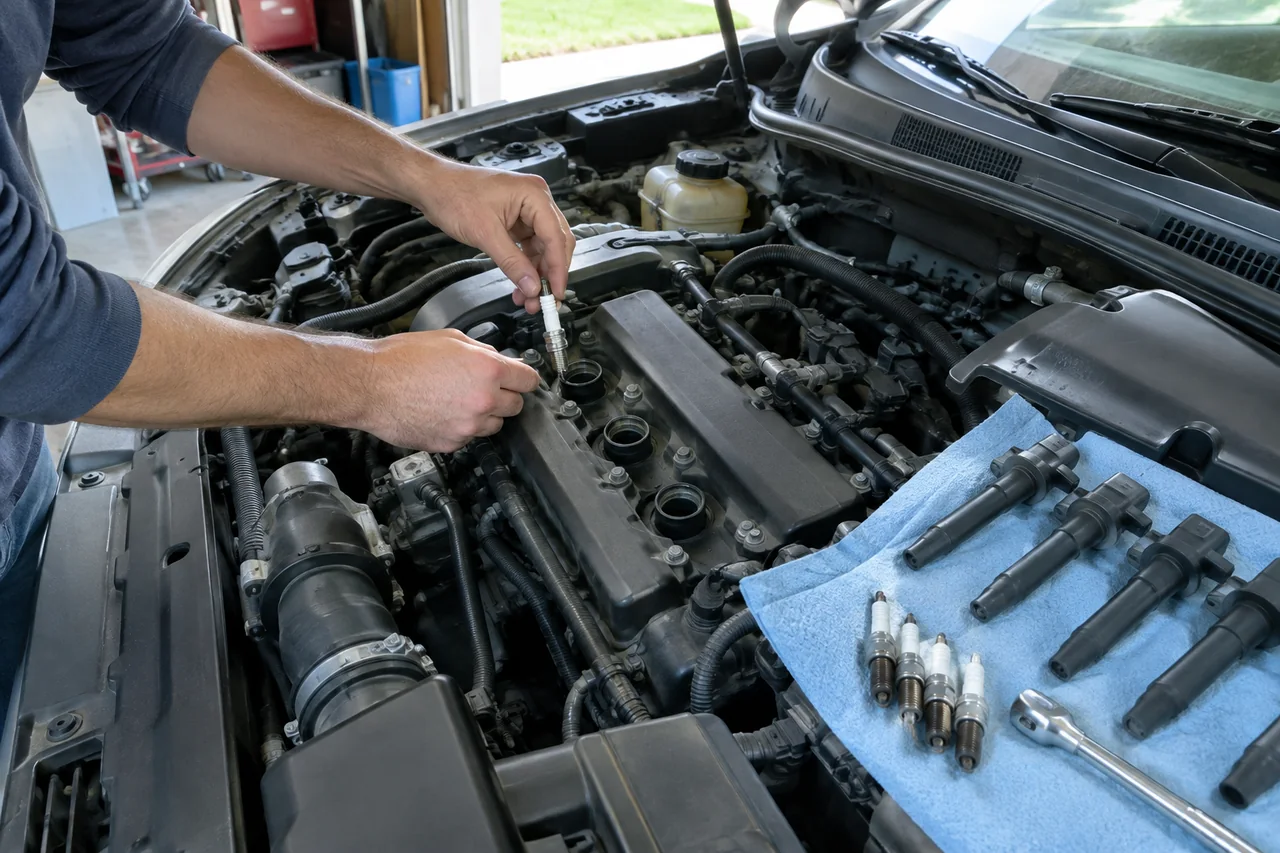
Fresh replacement spark plugs can restore crisp starts, a smooth idle and steady power, and on many engines the swap is well within reach of a careful home mechanic. This guide covers how to judge whether your engine suits a DIY attempt, how to find and reach the plugs, safe removal, preparing the new set, correct installation, and confirming everything runs properly afterward.
Is changing spark plugs a realistic DIY job, and how long does it take?
How approachable the job is depends mostly on engine layout. When the plugs sit in a row on top of the cylinder head under individual coil-on-plug units, access may be just a cover, a few connectors and one hold-down bolt per coil. Difficulty climbs sharply when plugs hide beneath an intake manifold, behind accessories or along the rear bank of a sideways-mounted V engine, where reaching them can mean removing the upper intake and several sensors first.
On an accessible four-cylinder, a first attempt often takes an unhurried hour or two, and repeat jobs go faster once the routine is familiar. Buried rear-bank plugs can multiply that time several times over. The skills involved are patience and discipline rather than strength: work one cylinder at a time, keep fasteners grouped, and notice when something feels wrong. Hand the job to a shop if a plug will not budge, the threads look damaged, or you find oil or coolant in a plug well.
Where the spark plugs are located and how to get to them
On an inline engine the plugs usually line up along the top center of the cylinder head. V-type engines split them between two banks, one of which may face the firewall, while horizontally opposed engines place them on the sides, often low and close to the frame. On any layout, the easiest way to find them is to trace the ignition system: follow each plug wire from the coil pack, or look for individual coils atop the valve cover, and the plug sits directly beneath.
Start only once the engine has cooled completely, since hot parts burn and aluminum cylinder head threads are more vulnerable when warm. Turn the ignition off and keep the key away from the car. Engine cover removal usually comes first, followed by any intake ducting in the way, then the coils or wire boots. Photograph each stage to guide reassembly. Check your own manual for model-specific access steps, and confirm the plug type and cylinder count rather than assuming a universal design.
Removing the old spark plugs without damaging the engine
Unplug the first coil's electrical connector, remove its hold-down bolt, and lift the coil straight out with a gentle twist. With plug wires, grip the plug wire boot itself and pull, never the cable, which can separate the internal conductor from its terminal. Tape a cylinder label on each coil or wire so it returns to the same spot. Then clear the plug well with compressed air or a brush, wearing eye protection, so grit cannot fall into the cylinder once the plug is out.
Seat the spark plug socket fully and turn counterclockwise with steady pressure. A normal plug breaks loose with firm initial effort, then spins out smoothly with little resistance. If it grows tighter as it turns, squeaks or binds partway, stop instead of forcing it, because pushing through can strip or pull threads from the head; this is the moment to reassess or seek professional help. Keep to one cylinder at a time, and loosely cover the open hole with a clean rag while the new plug is prepared.
Reading the old plugs and preparing the replacement set
The old plug's firing end offers useful clues. A light tan or grayish insulator with modest electrode wear generally reflects healthy combustion. Heavy dry black soot can suggest a rich mixture or weak spark, white blistered deposits may indicate overheating, and wet oily fouling can point toward oil entering the cylinder. Treat these as observations worth mentioning to a professional, not a diagnosis. Keep the plugs in cylinder order while inspecting, since one that looks different from the rest narrows where to look.
Next, check the spark plug gap on each new plug with a feeler gauge or wire gauge, comparing it to the figure in your owner's manual or on the underhood label rather than a generic number. Fine-wire iridium and platinum tips are fragile, and prying on them can crack or bend the electrode, so leave them as delivered if the manual says so. Finally, hold new and old plugs side by side to compare thread length, seat type and reach, and stop if anything differs.
Installing the new spark plugs step by step
Start every new plug by hand. Slip a short length of rubber hose over the insulator, or use the spark plug socket alone without a ratchet, and turn gently clockwise. The hose or bare socket slips before it can force misaligned threads, which helps prevent cross-threading. If the plug stops after only a thread or two, back it out and try again. Continue by hand until it seats, then add the small additional turn or tightening value your manual specifies, since gasket and tapered seats differ.
Be cautious with anti-seize. Many plugs arrive with a plating meant to resist seizing, and extra compound can reduce friction enough to cause overtightening, so let the manual or packaging decide whether anything goes on the threads. Once the plug is seated, press the coil or boot down until it clicks or seats firmly, reinstall the hold-down bolt and reconnect the connector before moving to the next cylinder. When finished, sweep the area for tools, rags or loose hardware near the intake and belts before covers go back on.
Reassembly, the first start-up and mistakes that cause trouble later
Reinstall ducting, covers and connectors in reverse order, using your photos to confirm routing and clip positions, then give every coil and wire a final look and a light tug to confirm connectors are latched. On first start, a healthy engine may idle slightly high briefly but should settle into a steady, even rhythm. Shaking, a rough idle, a noticeable misfire or a lit check engine light means shutting down and rechecking your work, because driving with a persistent misfire can overheat the catalytic converter.
The mistakes that cause trouble later are predictable: wires swapped between cylinders, a boot not fully seated, plugs overtightened or left loose, the wrong heat range or gap, and debris dropped into a cylinder. If a misfire persists after ruling those out, a coil, wiring or another fault is more likely, and any stored code is a starting point for professional diagnosis rather than proof of a failed part. Log the date and mileage, and keep the old plugs briefly in case a technician wants to see them.