How to Replace a Driveshaft U-Joint
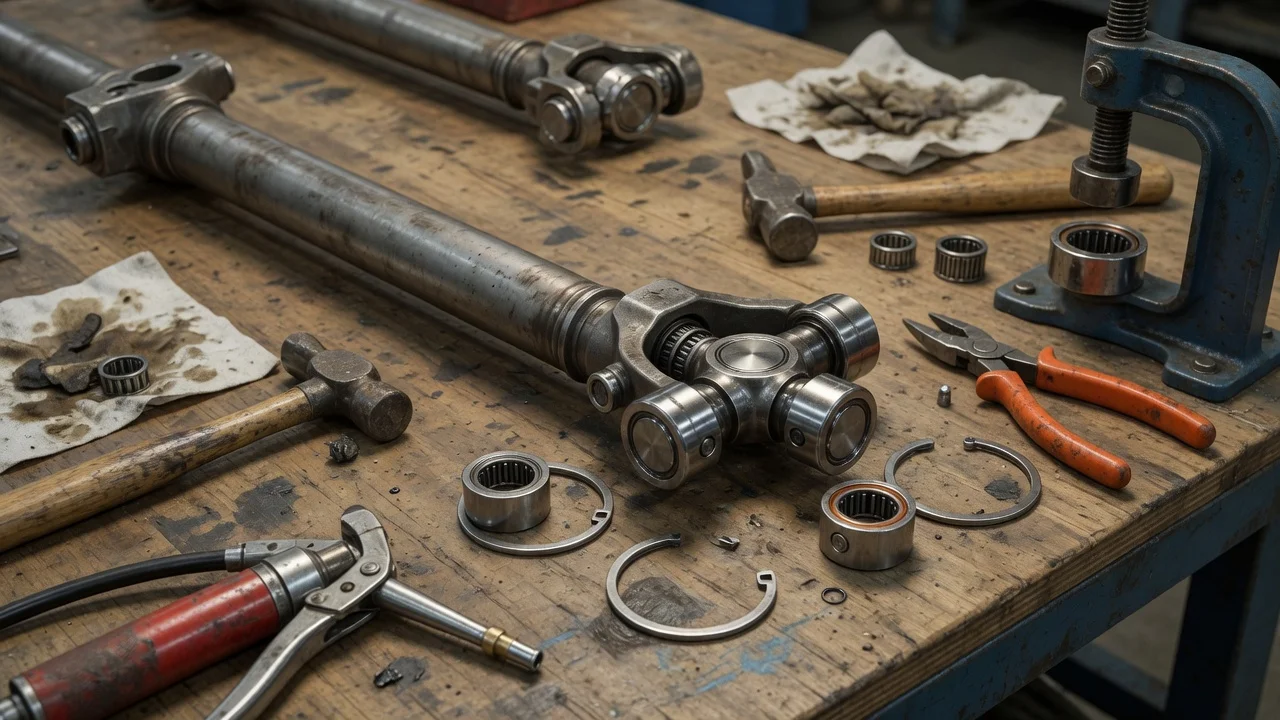
A worn universal joint usually shows up as a clunk when shifting into gear, a squeak at low speed, or a vibration that grows with road speed. Changing a U-joint on a rear-wheel-drive or four-wheel-drive driveshaft is a common home repair. It does take patience and the correct information for your exact vehicle configuration. This guide covers confirming the problem, removing the shaft, pressing in the new joint and checking the result.
Confirm the part and repair scope
Before ordering parts, make sure the joint is actually at fault. Support the vehicle safely and put the transmission in neutral. Then grip the driveshaft near each joint and try to twist and lift it. A worn joint shows itself through perceptible play, clicking, a notchy feel when you rotate the yoke by hand, or rust-colored dust around the bearing caps. Vibration and clunks can also come from other driveline parts: a worn slip yoke, a failing center support bearing on two-piece shafts, loose differential mounts, worn engine or transmission mounts, or excessive driveline backlash. Inspecting the whole driveline keeps you from replacing a good part.
Universal joints are not one-size-fits-all. Cap diameter, width across the caps, retention style and the presence of a grease fitting all vary by vehicle. They can even differ between driveshafts on the same model, because front and rear shafts, transfer case options and axle choices may use different joint series. Identify the joint from your vehicle configuration and the parts catalog. You can also measure the old joint once it is out and match those dimensions. Some driveshafts have a double cardan or constant-velocity joint at one end. Some factory joints are held in by injected plastic rather than snap rings. Those designs may need a different procedure, special tools, or a complete shaft replacement instead of a simple joint swap.
Prepare tools and safe access
You will need a floor jack, jack stands rated for the vehicle and wheel chocks. Add wrenches or sockets for the driveshaft fasteners, snap ring pliers or a small screwdriver, and a paint pen or marker. You also need a way to press the bearing caps. A U-joint press or ball joint press works well. A common alternative is a heavy bench vise with two sockets: one slightly smaller than the cap to push it, and one larger to receive it. Keep grease, a wire brush, penetrating oil, and a plug or plastic bag for the transmission tailshaft nearby. Take fastener torque values and model-specific notes from the factory service information for your vehicle, not from generic figures.
Park on level ground and chock the wheels that stay on the ground. Support the vehicle on jack stands, never on the jack alone. On many automatic-transmission vehicles, park holds the wheels only through the driveshaft. Once the shaft is disconnected, park no longer stops the vehicle from rolling, so the chocks and parking brake must do that job. Some jobs are better left to a driveline shop: two-piece shafts, staked or plastic-injected original joints, and shafts that need balancing afterward. Pressing joints takes real force, and a bent yoke or a cap driven in crooked can ruin an otherwise good driveshaft.
Remove the driveshaft and old joint
Before loosening anything, mark the driveshaft and its mating yokes or flanges with paint. The marks let everything go back in the same orientation, which preserves the original balance and the phasing between the yokes at each end. At the axle, remove the straps, U-bolts or flange bolts. Tape the loose bearing caps or hold them in place so they cannot fall off and spill needle rollers. If the shaft uses a slip yoke, slide it rearward out of the transmission or transfer case and plug the opening immediately to limit fluid loss. On some vehicles you must also unbolt a front flange or center bearing.
With the shaft on the bench, clean the yoke ears and remove the retaining clips. Outside snap rings sit in grooves on the yoke, while inside clips sit on the bearing caps. Penetrating oil and a light tap on the yoke can help seized clips release. Use the press or vise to push one cap inward, which drives the opposite cap partly out of its bore. Grip the exposed cap and twist it free, then press the cross the other way to remove the second cap. Repeat for the remaining pair. Support the tube so the vise does not crush or bend it, and never hammer directly on the tube, which can dent it and upset its balance. If the original joint was retained by injected plastic, the press must first shear that material. Clean the grooves afterward so a replacement joint with clips can seat.
Install the new U-joint and refit the shaft
Clean the yoke bores until the new caps slide in smoothly. Compare the new joint with the old one to confirm they match. Remove the caps from the new cross carefully so every needle roller stays seated in its grease. If the joint has a grease fitting, decide its position before pressing. It must face where a grease gun can reach it, and it should follow any direction given in the joint or vehicle instructions. Fit the cross into the yoke and start one cap squarely into its bore. Guide the trunnion into the cap, then press until the clip groove is exposed. Press the opposite cap in the same way and install both clips.
If a joint binds after the clips go in, a cap is usually sitting slightly too far in or a needle has fallen over. A light strike on the yoke ear with a brass or dead-blow hammer often relieves binding caused by preload. If the joint stays stiff, take it apart and inspect it rather than forcing it, because a dropped needle destroys a joint quickly. If you are replacing both joints, repeat the process at the other end. Reinstall the driveshaft following your paint marks, and use new straps or bolts where the service information requires them. Tighten all fasteners to the manufacturer specifications, and top up the transmission or transfer case fluid if any was lost.
Check the completed work
Rotate the shaft by hand before lowering the vehicle. Each joint should move smoothly through its full range, with no tight spots and no play. On greaseable joints, pump grease until fresh grease appears at all four cap seals, then wipe off the excess. Confirm that every clip is fully seated and every fastener is torqued. Make sure nothing contacts the exhaust, fuel lines or brake lines. Check the transmission fluid level using the method your vehicle requires.
Road test the vehicle at gradually increasing speeds. If the joint was the cause, the earlier vibration should be reduced or gone and the clunk on engagement should disappear. A new vibration usually means one of three things: the shaft went back in out of phase, a joint is binding, or the driveshaft needs balancing. If noise or a clunk persists, other driveline parts need diagnosis. Recheck fastener tightness after the first short drive. Add U-joint inspection and lubrication to your maintenance schedule at the interval your manufacturer lists for your operating conditions. Towing, off-road use and water crossings wear joints faster.
What affects U-joint replacement cost
The cost to replace a U-joint depends mostly on the vehicle and on who does the labor. Part prices vary with joint size, greaseable or sealed design, and brand. Many driveshafts have two or more joints, and owners often replace them together while the shaft is out. Shop labor rises for two-piece shafts, staked or plastic-injected original joints, rusted parts, and shafts that need balancing afterward. Doing the job yourself mainly costs time and access to a press. A quote from a local shop will reflect your exact vehicle and its service history, which makes it more reliable than any general estimate.