How to Replace a Timing Belt: Step-by-Step Overview, Tools and Time Required
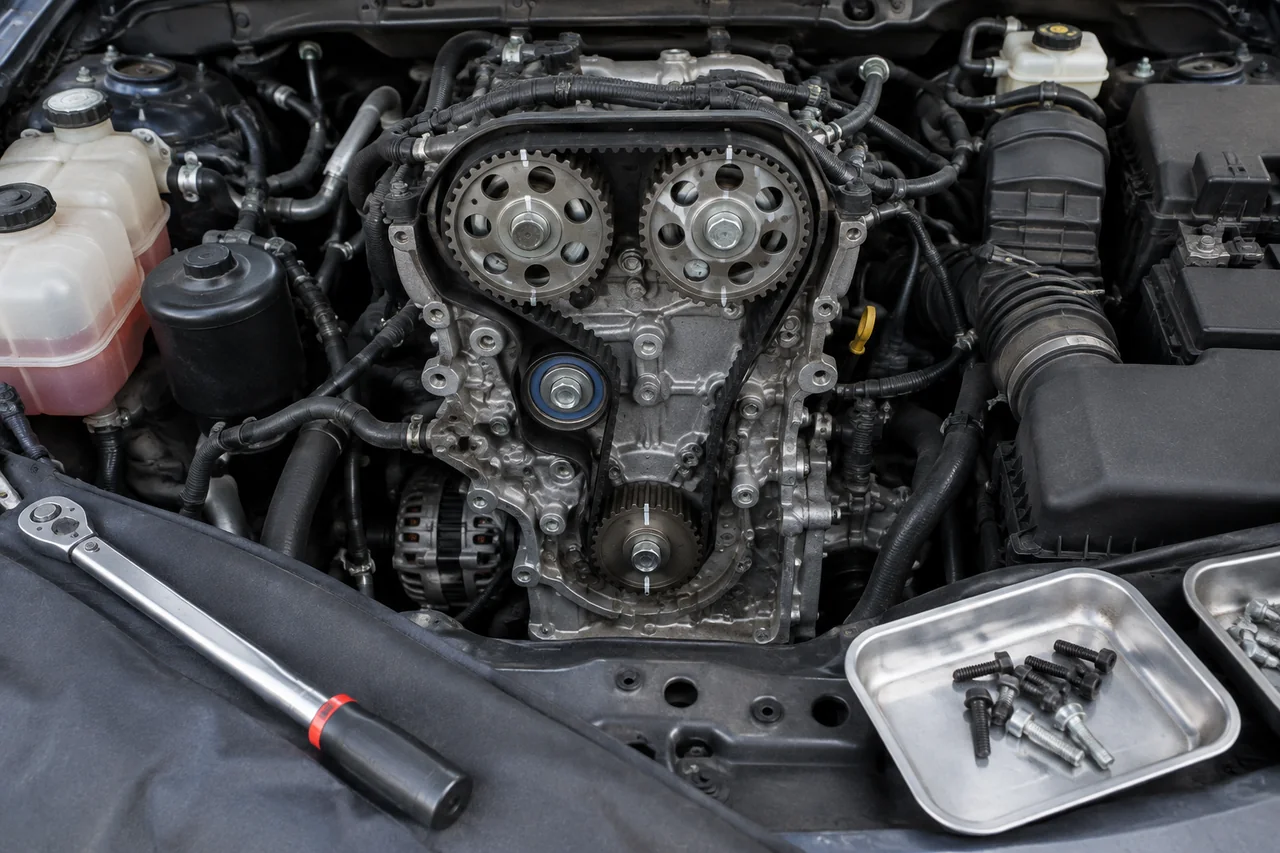
Replacing a timing belt is one of the more demanding maintenance jobs on an engine, because the new belt must restore exact synchronization between the crankshaft and camshafts. This overview explains what the work involves, which tools and parts to gather, how the old belt comes off and the new one goes on, how long it realistically takes, and how to decide whether to tackle it yourself.
What a timing belt change involves and why precision matters
A timing belt links the crankshaft to one or more camshafts so the valves open and close in step with piston movement. On an interference engine, valves and pistons occupy the same space at different moments in the cycle, so if the belt slips, jumps teeth or is installed a tooth off, a piston can strike an open valve. The result may be bent valves or damaged pistons. Even on engines with more clearance, a misaligned belt causes rough running and lost power, which is why accuracy matters more than speed.
The job is a replacement procedure rather than an adjustment. The old belt is removed, the tensioner, pulleys and nearby seals are assessed, and a new belt is fitted while the engine is held at a defined reference position, usually top dead center on a specified cylinder. Because belt routing, locking tools and torque values vary from engine to engine, the service information for your exact engine is essential before starting. Also confirm that your engine actually uses a belt, since many engines use a timing chain, which follows a different procedure.
Preparation: tools, parts and reference information to gather first
Beyond a good socket and wrench set, the job usually calls for a torque wrench, a breaker bar for the crankshaft pulley bolt, and a quality floor jack with stands. Many engines also require specific tools named in the service manual, such as cam locking tools, crankshaft locking pins or a holding fixture that keeps the crankshaft pulley from turning while its bolt is loosened. Improvised substitutes are a common source of trouble, so check which tools your engine needs and have them on hand before anything is removed.
The main parts decision is whether to buy the belt alone or a kit that adds the tensioner, idler pulley and often the camshaft and crankshaft seals. Since reaching the belt is the hardest part of the job, many owners renew those wear items together rather than risk opening everything again later. Order by engine code rather than model year alone, and compare the new parts against the old ones early. Work on level ground with strong lighting, label fasteners as they come out, and photograph belt routing and component positions.
Removing the old belt: gaining access and setting the engine to its reference position
Access work varies widely but commonly begins with disconnecting the battery, removing the accessory drive belts and taking off the timing cover. Many transverse engines also require removal of an engine mount, with the engine supported exactly as the manual specifies, and the crankshaft pulley often has to come off. Before releasing the old belt, turn the engine by hand to the reference position and confirm that every timing mark aligns and every locking tool engages. With the belt removed, never rotate the crankshaft or camshafts unless the manual says it is permitted.
If the belt you are removing is already broken, stripped or has jumped teeth, the situation changes. On an interference engine, valve damage may already have occurred, and fitting a new belt without first checking compression or inspecting the valvetrain can waste time and parts. When the old belt comes off normally, use the opportunity to inspect the area. Look for oil around the camshaft and crankshaft seals, spin each pulley to feel for roughness or play, and check the water pump for coolant weeping or bearing noise.
Installing the new belt: routing, tension and the verification turns
Fit the new belt following the routing sequence in the manual, typically working so the slack ends up on the tensioner side while the runs between the crankshaft and camshafts stay taut. Recheck that no timing mark has shifted as the belt goes on, since a cam sprocket can creep under valve spring pressure. Manual tensioners are set to a specified indicator position or deflection, while automatic tensioners are usually released from a retained position and allowed to settle before any pointer or window is checked against the specification.
Before covers go back on, rotate the engine by hand through the number of full revolutions the manual specifies, stopping immediately if you feel sudden resistance, then recheck every mark and the tensioner setting. If the water pump is belt-driven or sits behind the belt, replacing it now avoids repeating the labor, which is why many kits include one. Reassemble using the specified torque values, especially for the crankshaft bolt and engine mount. Keep the first start brief and listen for ticking, whining or knocking.
How long timing belt replacement takes
Access is the biggest factor in how long the job takes. An engine mounted lengthwise with a clear front end is usually quicker to work on than a transverse engine squeezed against the inner fender with a mount in the way. A professional who has done the same engine before typically needs a few hours. A first-time DIY attempt more often takes a full day, and it is common for the work to stretch across a weekend once research, careful checking and cleanup are included.
Certain tasks add time predictably. A crankshaft pulley bolt that will not break loose can stall progress, as can corroded or seized fasteners on covers and mounts. Replacing the water pump and seals adds draining, cleaning sealing surfaces, and refilling and bleeding the cooling system. For a DIY job, assume the vehicle will be off the road longer than planned, arrange other transportation, and know where you can quickly source a missing tool, bolt or gasket if something unexpected turns up mid-job.
Deciding whether to replace it yourself or hire a shop
The honest risk is that alignment or tension mistakes often stay invisible until the engine runs, and on an interference engine the outcome can be a cylinder head repair or a replacement engine. The job is a reasonable DIY candidate when the belt is easy to reach, the procedure is well documented for your engine, no special locking tools are required, and you already have experience with engine-side repairs such as water pumps or accessory drives. If several of those conditions are missing, the savings may not justify the risk.
A shop is the better choice when special tools are required, an engine mount must be removed, workspace is limited, or the belt has already failed and the damage needs assessing. When comparing quotes, ask whether the price includes the tensioner, idlers, water pump and seals, and whether the technician has worked on this engine before. Keep in mind that symptoms blamed on the belt, such as ticking or a misfire, often have other causes, so get a proper diagnosis before replacing a belt ahead of schedule.