How to Replace a 4L60E Transmission Pressure Control Solenoid
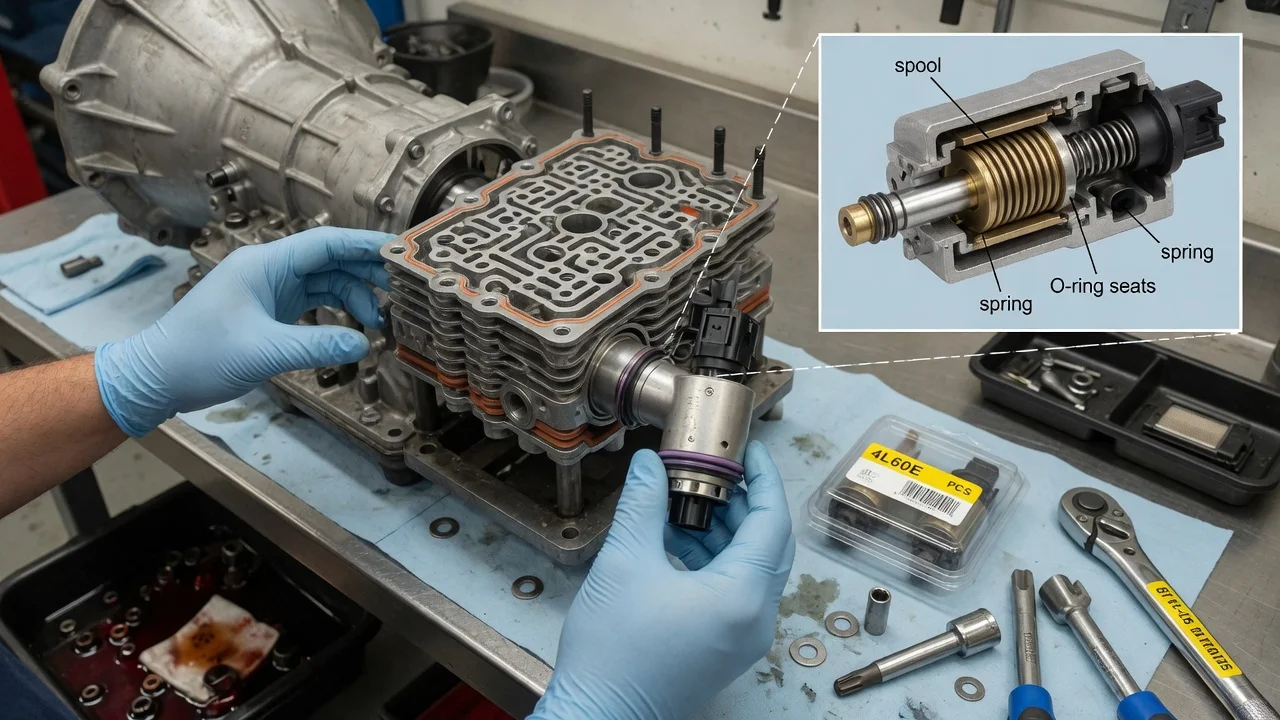
The pressure control solenoid in a 4L60E automatic transmission is an electronically controlled valve. It sets line pressure when the vehicle's control module commands it. When it stops responding correctly, shifts can become harsh, soft or inconsistent, and a diagnostic code may set. Replacing the solenoid means removing the transmission pan, and a careful owner can often do it at home. First, confirm the transmission type and trace the fault to the solenoid rather than to the wiring, the fluid or internal wear.
Confirm the part and repair scope
Start by confirming the transmission type. The 4L60E was fitted to many rear-wheel-drive and four-wheel-drive GM trucks, SUVs and cars. It has the same general layout as the heavier-duty 4L65E and 4L70E. The service parts identification label, usually inside the glove box, lists the vehicle's RPO codes, and M30 indicates a 4L60E. The identification tag on the transmission case gives more build information. Pressure control solenoid designs and connectors changed over the production years. Choose a replacement that fits your model year and transmission rather than a generic listing, and compare it with the old part before you install it.
A stored code such as P0748 means there is a problem in the pressure control solenoid circuit. It does not prove the solenoid itself has failed. The circuit also includes the external connector at the case, the internal wiring harness and the control module. Before buying parts, read all stored diagnostic codes, check the fluid level and condition, and review the service history. Firm or slipping shifts can also come from low fluid, a clogged filter, worn clutches or valve body problems. Measure the solenoid's resistance and compare it with the specification in your vehicle's service information. If the fluid is dark, smells burnt or contains heavy friction debris, a new solenoid alone is unlikely to fix the transmission. In that case, get a professional opinion on repair options such as valve body work or a rebuild.
Prepare tools and safe access
You need a safe way to raise the vehicle, such as a lift, ramps or quality jack stands on firm, level ground. You also need a drain pan big enough for the fluid in the transmission pan, a socket set, a torque wrench, a scan tool and shop rags. Along with the replacement solenoid, buy a new pan gasket, a filter kit and enough fresh fluid. Use the fluid specification listed in the owner's manual or service information. Many 4L60E pans have no drain plug, so expect fluid to spill over the pan edge when it comes off. Get the service information for your vehicle before you start, because torque values, bracket fasteners and fluid check procedures vary by application.
Let the transmission cool first, because hot fluid can cause burns. Disconnect the negative battery cable before unplugging any transmission electrical connectors, and wear eye protection when working under the pan. This job is reasonable for an owner comfortable with basic underbody work. If your service information calls for removing the valve body, consider professional help. The valve body and spacer plate hold small check balls, springs and valves that are easy to lose or put back in the wrong place, and a mistake there can damage the transmission.
Remove without avoidable damage
Remove the pan bolts, but leave a couple loosely threaded at one end so the pan tips and drains in a controlled way. Lower the pan, then inspect the magnet and the bottom of the pan. A fine gray paste is common. Large metal pieces or a lot of friction material suggest internal wear that a solenoid will not cure. Pull the filter straight down and make sure its seal came out of the pump bore with it. A leftover old seal will stop the new filter from sealing.
Find the pressure control solenoid on the valve body. It has its own electrical connector from the internal harness and is held in place by a retaining bracket or clip. Photograph the area, including the wire routing and the solenoid's orientation. Release the connector lock and pull the connector apart by its body, never by the wires. Remove the bracket fastener, then ease the solenoid out of its bore without prying against the valve body. Do not loosen other valve body bolts unless the service information for your unit calls for it. Keep the area clean so debris does not fall into open passages.
Install and restore the system
Compare the new solenoid with the old one: the body shape, connector, filter screen and O-rings should match. Lubricate the O-rings with clean transmission fluid. Insert the solenoid in the same orientation as the original and press it in by hand until it seats fully. Install the retaining bracket or clip and tighten its fastener to the specified torque. Overtightening can crack the bracket or strip the threads in the aluminum. Push the electrical connector on until it locks, and route the wiring as it was so it cannot touch moving parts.
Install the new filter seal and filter, clean the pan and magnet, and fit the new gasket. Tighten the pan bolts gradually in a crisscross pattern to the specified torque. Too much force can distort the pan flange and cause leaks. Refill with the specified fluid and reconnect the battery. Some vehicles need the transmission's adaptive values reset, or a relearn done with a scan tool, after a solenoid replacement. If your service information includes these steps, follow them.
Check the completed work
Start the engine and check under the pan and around the case connector for leaks. With the brake applied, move the shifter through each gear position. Then check the fluid level using the procedure and temperature range in your service information. Too much or too little fluid can change shift behavior by itself, so get the level right before judging the repair. Clear the stored codes and start the road test gently. Pay attention to engagement into drive and reverse, shift firmness and shift timing.
If your scan tool can display live data, compare the commanded pressure control solenoid current with the actual value the module reports during the drive. If a circuit code returns with the new solenoid installed, suspect the connector, internal harness, wiring or module rather than the new part. Harsh, soft or delayed shifts without a code need further diagnosis. That may include a line pressure test with a gauge and an inspection of the valve body and accumulators. Check the pan for seepage after the first drive and again a few days later.